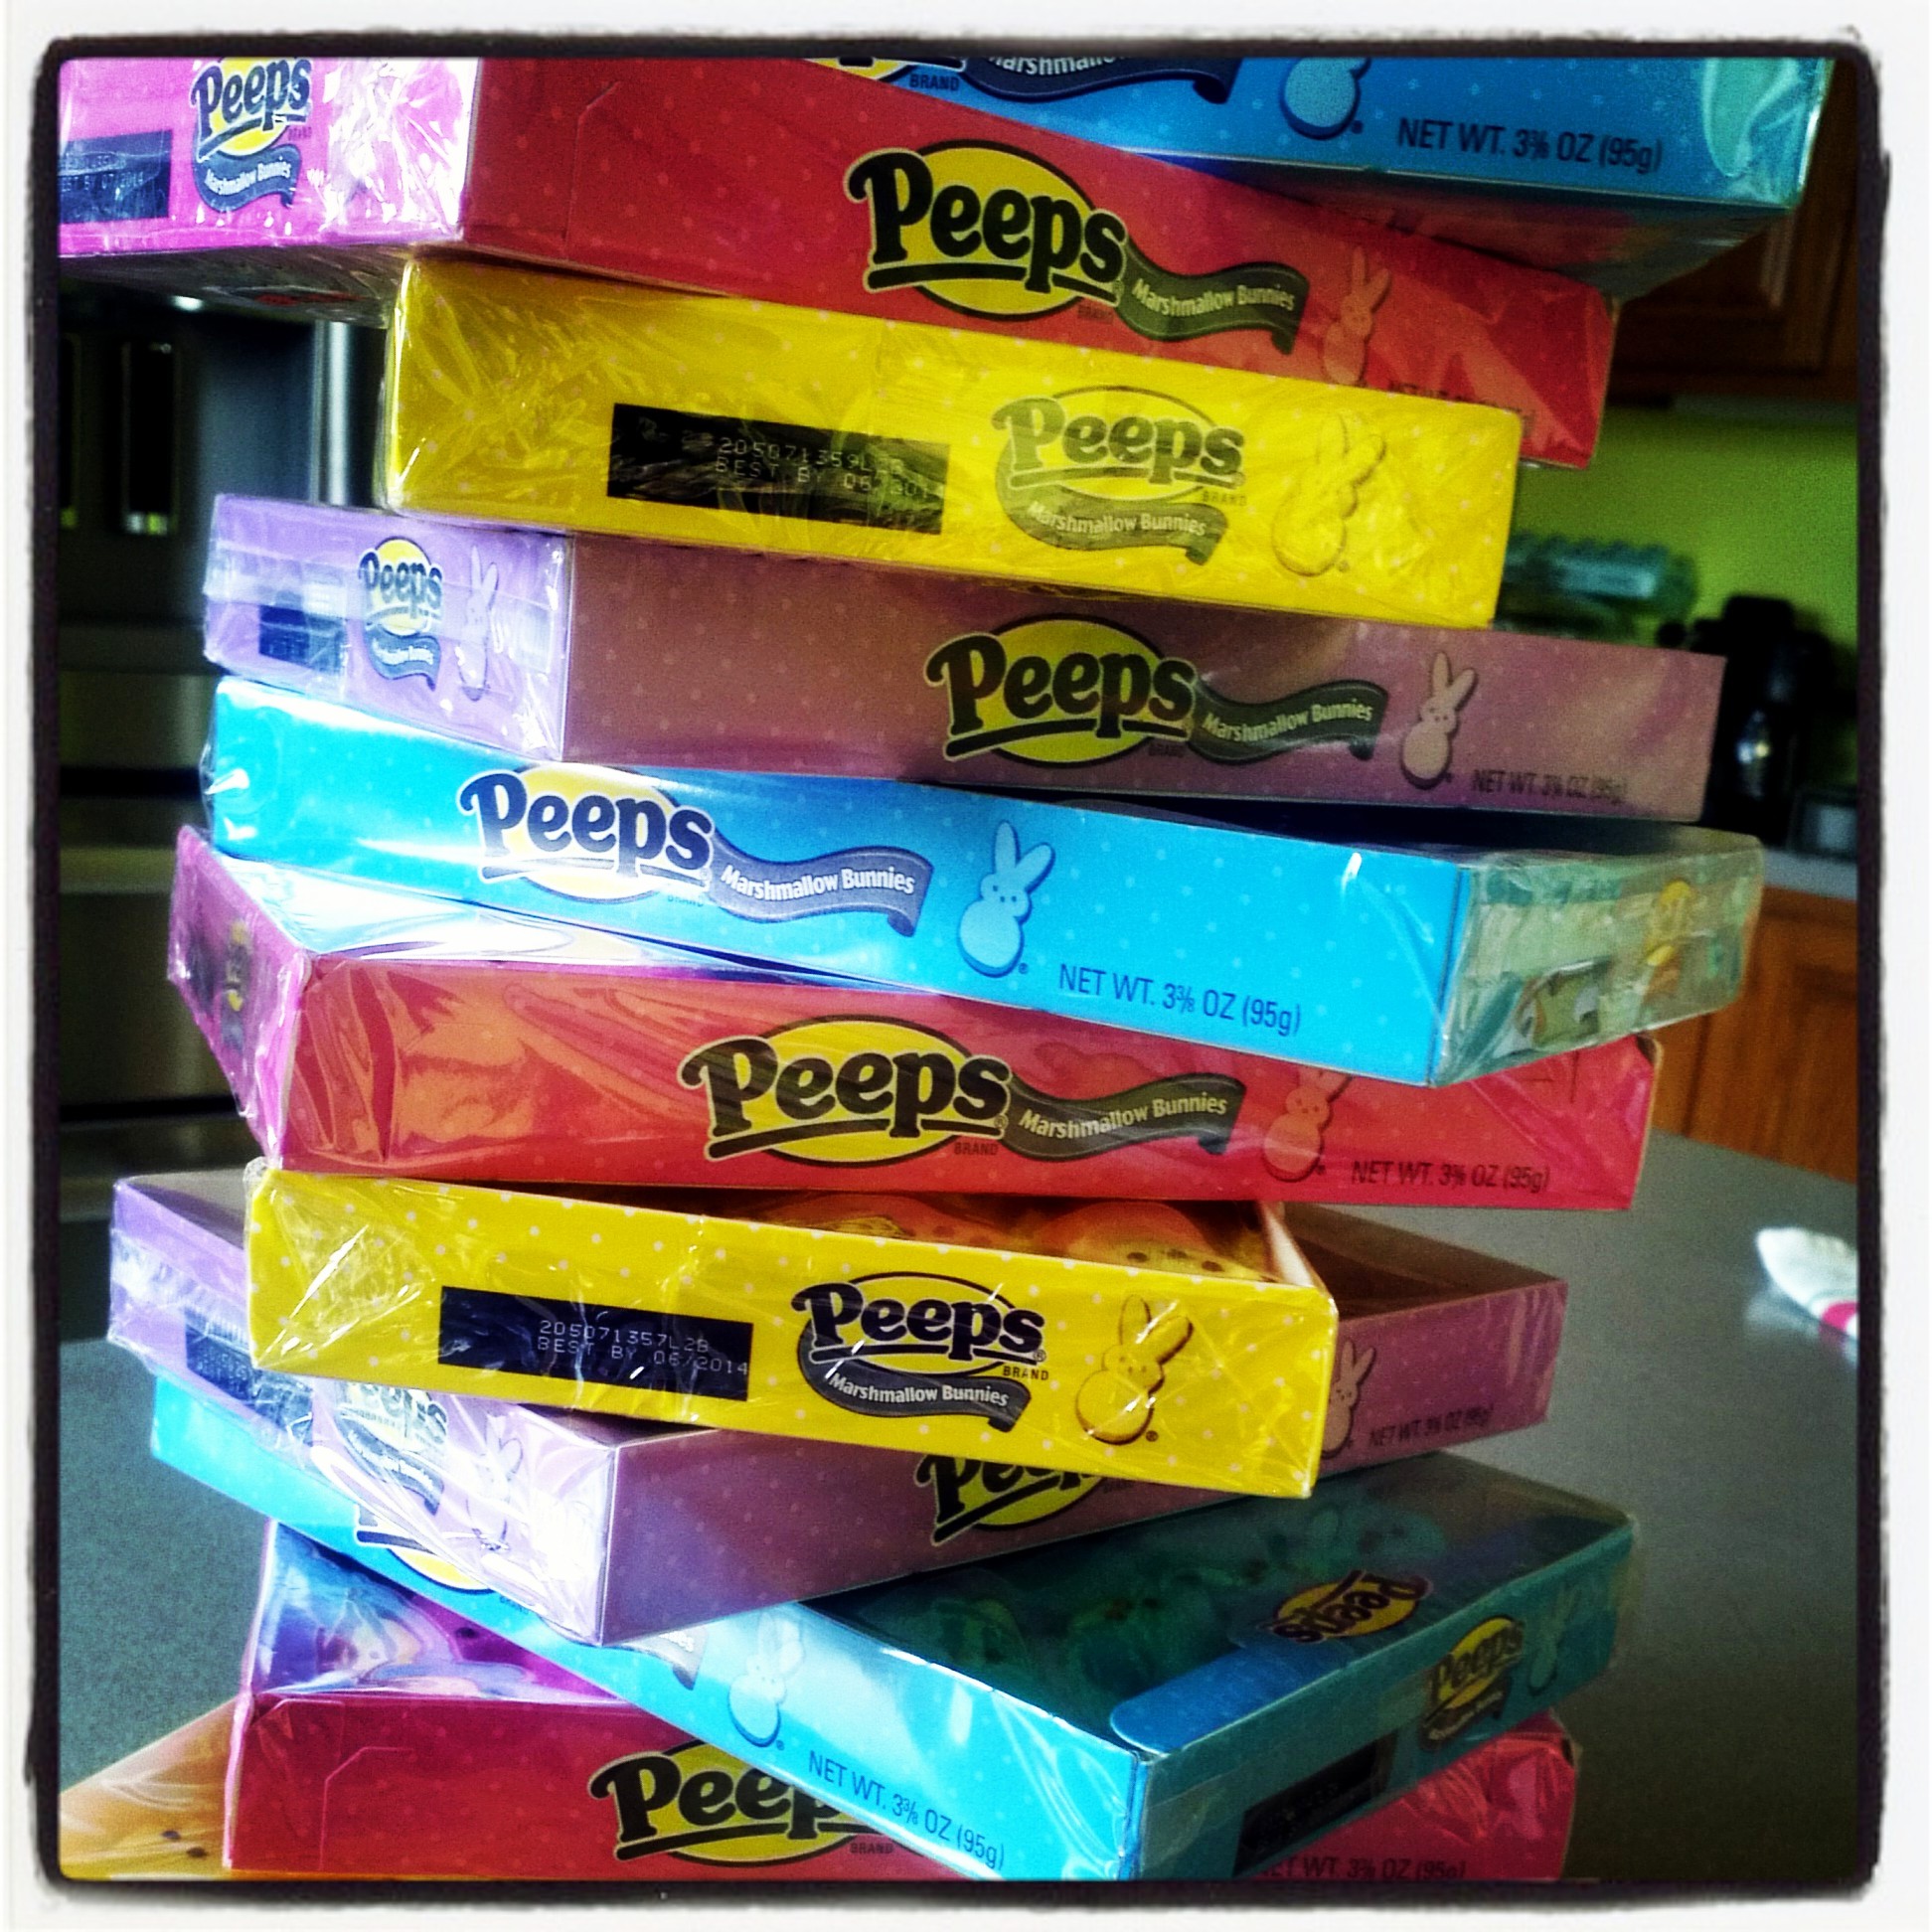
Red Velvet Cheesecake!!! “Fiesta Friday #63”

25 Comments

“Red Velvet, Red Velvet, send “Cheesecake” right over” LOL

Anyone remember playing “Red Rover, Red Rover” as a kid 😉 if not just google it LOL 😛

Anyway I was trying to start my blog out in a silly kind of way, but there is no silliness when “Red Velvet” is involved 😉

Of course Red Velvet everything starts to come out around Valentine’s Day, and this is around that time I made this delicious cheesecake.

Of course I did share with several friends and I must say I had “zero” complaints 🙂 LOL

So I thought this would be perfect for this week’s “Fiesta Friday #63”, of course our host is Angie@The Novice Gardener her new blog for Fiesta Friday’s is here and her co-host this week are Julianna@Food On Board and Hilda@Along The Grapevine.

So I’d like to thank them for letting me share this recipe 🙂

So without further ado here you go!!

FullSizeRender (2)


Ingredients

IMG_1873

Crust –

place biscuits in food processor


IMG_1875


Pulse until it becomes fine crumbs

IMG_1876

this is the 1 1/2 cup of the tea biscuits

IMG_1877


Add melted butter and crumbs together


IMG_1879


butter & crumb mixture


IMG_1881


spray your spring-form pan

IMG_1882

Pour crumb mixture into pan

IMG_1883

with your fingers firmly press crumb mixture into pan
and up the sides about 1 inch

IMG_1884

Filling – cream cheese softened

IMG_1885


blend the cream cheese until smooth

IMG_1886


add eggs one at a time, blending well after each one

IMG_1887

IMG_1889


add the sugar

IMG_1891


add sour cream

IMG_1892


add salt & cornstarch


IMG_1893

add vanilla

IMG_1894

scrap your bowl

IMG_1896

put about 2 1/2 cup of the filling in another bowl

IMG_1897

add red food coloring and cocoa

IMG_1898


whisk together

IMG_1899

Pour red mixture on top of cream mixture
and give it a swirl and bake

IMG_1901


once its done turn oven off, crack the oven door open
and let cake sit inside for 1 hour

IMG_1951


remove from oven and let cool for 3 hours

IMG_1973


Chill overnight or for at least 3 hours before
cutting and serving

IMG_1979

IMG_1980

FullSizeRender


Its came out just delicious!!!

FullSizeRender (8)

Enjoy!!

Red Velvet Cheesecake

  • Servings: 8-10
  • Difficulty: easy
  • Print

Crust:
2 1/2 cups cookie crumbs (graham or flavored)
(I used 1 1/2 cups Cappuccino tea biscuits and 1 cup graham cracker crumbs)
6 Tbsp. butter, melted
1/4 cup sugar

Mix all together in a bowl, in a 9 inch spring-form pan press mixture down on the bottom and up the sides about 1 inch, set aside.

Filling:

2 8oz. bricks cream cheese, softened
1/2 cup sour cream, room temp
3 eggs, room temp
3/4 cup sugar
1/4 tsp. salt
1 Tbsp. corn starch
1 tsp. vanilla
1 tsp. red food coloring
1/4 cup cocoa powder

In a large bowl with a stand mixer or hand mixer, mix the cream cheese until smooth and creamy, add one egg at a time, making sure each is mixed in before adding the next.  Then add the sugar, sour cream, vanilla, salt and then cornstarch, scraping the bowl as needed.

Take 2 1/2 cups of the mixture and add it to a small bowl then mix in food coloring  and cocoa until fully combined.

Pour white mixture into the pan and spread around, then add red mixture and just swirl the 2 mixtures together.

Bake at 350 degrees for 45-60 minutes, edges will be puffed up and slightly brown, turn off oven, leave the door cracked with cheesecake inside for 1 hour.  Then cool at room temp. for about 3 hours, place in refrigerator to chill for at least 2-3 before serving.

FullSizeRender (6)

fiesta-friday-badge-button-i-party

Bread Pudding

8 Comments

IMG_20130828_123818

Bread Pudding…you either love it or hate it 🙂

I don’t think there is any in between 🙂

I myself like Bread Pudding…if it made well…believe me I had some that I’ve wanted to spit out 😛

But I must say I have had great success making Bread Pudding 🙂

As part of what I do in my job, we host wine dinners, beer dinners, customer appreciation dinners.  One of the dinners that happens each month is a Wine dinner with a local radio station and the morning DJ’s and their winners.  They are Bob and Marianne…Check out photo below…doesn’t he look familiar….think “Entertainment Tonight”

bob_marianne_radio-620x394

Yes Bob Goen…well he is just the nicest person ever!! 🙂

Our dinner for them included the following courses, each with a wine pairing

1st. course – Trio of Crostini’s
2nd. course – Mini cheese Ravioli’s with Apples and Walnuts with a Balsamic glaze
3rd. course – Zen Blend Salad with strawberries, blueberries, goat cheese crumbles, candied walnuts with a Balsamic glaze dressing
4th. course – Parmesan Chicken cutlet, with Whole Wheat Pasta served with Sweet Peppers, Kale  tossed in Arrabiata Sauce
5th. course – Lemon Marmalade Bread Pudding – recipe below 🙂

They loved everything 🙂

Side note****
But today is my Birthday 🙂 and when its your birthday you bring treats into the office and well I made the Lemon Marmalade Bread Pudding along with a Wild Blueberry 🙂


Ingredients

IMG_20130828_101519

Bread

IMG_20130828_101728

Cube it up

IMG_20130828_101929

place on baking sheet

IMG_20130828_102030

bake

IMG_20130828_103232

divide marmalade

IMG_20130828_102818

add butter to saucepan with marmalade

IMG_20130828_103955

stir and melt

IMG_20130828_105955

add mixture to cubed bread in a large bowl

IMG_20130828_110136

toss to coat bread, set aside

IMG_20130828_110157

add half and half to marmalade jar

IMG_20130828_103405IMG_20130828_103439

Shake

IMG_20130828_103550

add jar mixture, rest of the half and half, sugar, eggs, egg yolks, vanilla (lemon juice & zest)

IMG_20130828_105552

whisk together

IMG_20130828_105839

pour custard over bread cubes

IMG_20130828_110300

mix together, set aside for 30 minutes

IMG_20130828_110404

Spray ramekins

IMG_20130828_113516

add bread-custard mixture, place on baking sheet, bake

IMG_20130828_114008

IMG_20130828_114030

after baking

IMG_20130828_122544

top each ramekin with the remaining marmalade

IMG_20130828_122731

Recipe – Lemon and Wild Blueberry Bread Pudding

12 oz. package of King’s Hawaiian Rolls, bread, sub rolls, buns…it all works 🙂
1 quart Half and Half
1 cup granulated sugar
2 whole eggs
2 egg yolks
1 tsp. vanilla
2 tbsp. butter

For Lemon – zest and juice of 1 large lemon
                         1 jar Lemon Marmalade 12.35 oz – 14 oz. 

For Wild Blueberry – 1 cup frozen or fresh blueberries 12.35 oz. – 14 oz.
                                        1 jar Wild Berry or Blueberry preserves

Cut bread into 1 inch cubes, toast on baking sheet in oven at 350 degrees, until golden brown about 10 minutes or so, let cool, once cooled add cubes to large mixing bowl, set aside.

Remove a 1/4 cup of the marmalade and set aside, take the rest of the marmalade and add to a small sauce pan with the butter, on medium heat, warm marmalade and melt butter, stirring to combine.

Once butter has melted, pour mixture over top the toasted bread cubes and toss to coat, set aside.

Take empty marmalade jar and add 1/2 cup of the half and half, shake vigorously to loosen any thing left to the sides of the jar.   In a medium bowl add that mixture, the rest of the half and half, sugar, vanilla, eggs and egg yolks, whisk to fully combine.  

(If making Lemon at this point add zest and juice to the wet mixture whisking to combine)

Pour custard mixture over the coated bread cubes, mixing together, let stand for 30 minutes, pushing bread cubes down into the custard occasionally. 

After 30 minutes, pre-heat oven to 325 degrees

Distribute the bread-custard mixture into buttered or sprayed ramekins, I used 10 8 oz. ramekins filling them about 2/3 the way full.  

(If making Wild Blueberry, top each ramekin with a little of the blueberries)

Place on a baking sheet and bake for about 40 minutes, remove from oven and and using the set aside marmalade spoon over top each ramekin.  Bake for an additional 5 minutes.

IMG_20130828_171530

Serve and Enjoy!!!

IMG_20130828_171622IMG_20130828_171722

Sweet Pickles…………Easy and Sweet!!!

4 Comments

Summer is coming to a close and the garden’s are producing some late blooming goodies.

I got my hands on some good seedless cucumbers or some might call them “burpless” even “English”, in any case I like using these cucumbers for making pickles, so I had about 30 minutes on my hands and I made Sweet Pickles 🙂

IMG_20130831_101723

Ingredients

IMG_20130831_092509

Slice the cucumbers, I used my Wolfgang Puck’s Crinkle Cutter 🙂

IMG_20130831_093452


Put into a colander, sprinkle with salt, let set for 30 minutes

IMG_20130831_093810 

IMG_20130831_093921


In a medium saucepan add, sugar, salt, onion powder, mustard & celery seed

IMG_20130831_094452


Add both vinegar’s

IMG_20130831_094603IMG_20130831_094701


Add colman’s mustard and stir to combine

IMG_20130831_095734


Bring to a boil

IMG_20130831_100608


Rinse the salted cucumbers

IMG_20130831_100711


I used a 2 quart jar

IMG_20130831_101235


add the cucumbers

IMG_20130831_101437


then vinegar mixture, fill to the top, put lid on, let cool about an hour on the counter, then keep in refrigerator 

IMG_20130831_101659


Eat them plan or on a burger…how about a grilled cheese 🙂

Recipe

4 Cucumbers (seedless, burpless, English)
2 tbsp. mustard seed
2 1/2 tsp. kosher salt, divided
2 tsp. celery seed
2/3 apple cider vinegar
2 3/4 cup white vinegar
2 1/4 cup white sugar
1/4 tsp. onion powder
1 tsp. colman’s english mustard

Slice cucumbers and place in a colander, sprinkle with 2 tsp. kosher salt and toss, let stand in sink to drain for 30 minutes.

Meanwhile in a medium sauce pan add sugar, 1/2 tsp. kosher salt, onion powder, mustard & celery seed, then add both vinegar’s, stir in colman’s mustard, bring to a boil, let boil for 1 minute.  Remove from heat.
After 30 minutes rinse the cucumbers with cold water, then add cucumbers to the jar.  You can use any size jars, just fill your cucumbers to the top.   Add liquid to jars covering the cucumbers, put the lid on and let stand on the counter for an hour.  Keep in refrigerator, and eat them up 🙂  

I hope everyone had a great summer, I have been extremely busy and will continue to be busy into the fall, so bare with me as I might be even slower getting more recipes out, but more are to come I a sure you.
Thank you for stopping by and taking the time to read and enjoy my recipes!!  🙂

Brown Bread!!

12 Comments

No I don’t mean like Whole Wheat bread…I mean Brown Bread, this is a sweet or quick bread and bake in a CAN!!  

IMG_20130726_142609

Yes I said a can…you know a can that veggies come in or soup 

I grew up having brown bread in our house my Mom would make this as well as my Grandma…I don’t think I ever thought it was odd baking it in a can…I was a kid it was a cool thing 🙂

Wikipedia says – 

New England or Boston brown bread is a type of dark, slightly sweet steamed bread (usually a quick bread) popular in New England. It is cooked by steam in a can, or cylindrical pan.
Brown bread’s color comes from a mixture of flours, usually a mix of several of the following: cornmeal, wheat, whole wheat, graham flour, or rye, and from the addition of sweeteners like molasses and maple syrup. Leavening most often comes from baking soda (sodium bicarbonate) though a few recipes use yeast. Raisins are often added. The batter is poured into a can, and steamed in a kettle. While most variations are quick breads, and can be made in less than an hour, several commercial brands are available. Brown bread is somewhat seasonal, being served mostly in fall and winter, and is frequently served with baked beans.

I really had forgotten about this Brown Bread until I read this blog “A Small Insight” http://asmallinsight.wordpress.com/2013/04/09/mammas-fruit-loaf/
Lucy call it “Mamma’s Fruit Loaf and when I read this post and saw what it was, I immediately thought of Brown Bread 🙂 

So go to her blog and check her out and her recipe for her Mamma’s Fruit Loaf 🙂

All  know is that I really was not a big fan growing up, but now this stuff if great and I like mine with butter, now my Mom likes her’s with cream cheese.  So its up to you on which way you eat it, its also good heated in the microwave 🙂

My recipe here is is made with a couple of can, I also used small paper loaf pan, easy to give as gifts and I made some today for our office and I used a Bundt pan and it just came out so nice…perfect with you were having people over for coffee or tea, it’s perfect.

Now I did compare my brown bread to the ‘Can” kind you find in the store and let me say, I thought the store bought one was very dense, dry, very little raisins compared to mine.  And the flavor well I am sorry to say it was just plan awful…sorry if you like it, I just didn’t care for it 🙂

Store bought

IMG_20130726_114939IMG_20130726_115243IMG_20130726_115347IMG_20130726_115442


Ingredients

IMG_20130726_120106


Raisins and water in a small sauce pan

IMG_20130726_120508

IMG_20130726_120540IMG_20130726_120624


add flour, salt, baking soda and bran/bran buds to bowl 

IMG_20130726_121509


Mix together
IMG_20130726_121614

cream butter and sugar

IMG_20130726_122932


IMG_20130726_123109


stir in egg and vanilla

IMG_20130726_123241


IMG_20130726_123311


add dry mixture and stir a little

IMG_20130726_123357

IMG_20130726_123436


add raisin mixture

IMG_20130726_123543


Fold to combine

IMG_20130726_123613


pour batter into your containers

IMG_20130726_124005


bake

IMG_20130726_132140


this is the can

IMG_20130726_134203


this looks so good

IMG_20130726_142506


this is store on left and mine on right

IMG_20130726_142732


You can see that mine has so many more raisins

IMG_20130726_142852


Both buttered and ready to eat

IMG_20130726_143006


Out come, like I said did not care for the store bought, took one bite 😦

Mine oh it looks so good!!!!

IMG_20130726_143229

Brown Bread Recipe

1 1/2 -2 cups raisins
2 cups water
1 cup Bran or Bran Buds Cereal
1 3/4 cup all-purpose flour
2 tsp. baking soda
1/2 tsp. salt
1 cup granulated sugar
2 tbsp. butter, softened
1 egg
1 tsp. vanilla

4 – 16oz. cans (fill 2/3 full)- bake for 35-55 minutes, small loaf pans (fill half full) – bake 30 minutes, large loaf pan (fill half full to 2/3’s) – bake 40 – 50 minutes, bundt pan (whole recipe) – bake 45 minutes.  With any of these just keep an eye on it, when you stick a toothpick or skewer in bread it should come out clean, it then is done.   Cool upside down on a cooling rack.

Pre-heat oven to 325 degrees

In a small to med sauce pan add water and raisins, bring to a boil over med-high heat, once it boils, remove from heat and set aside for 10 minutes.

In a small bowl add flour, bran/bran buds, salt and baking soda, stir to mix…set aside
In a large bowl cream together butter and sugar for 1 minute, then stir in egg and vanilla, then add dry mixture, stir it a little and raisin mixture, fold to fully combine.

Pour into your WELL greased or spray baking container, and bake.  Let cool enough to handle and then you can dig in 🙂

The Bundt pictures

IMG_20130821_172431


IMG_20130821_172537

Banana Bread!!!!

8 Comments

Okay who doesn’t like Banana Bread 🙂

IMG_20130726_143721

I love Banana anything…cakes, muffins, cookies, bread, ice cream, yogurt, candy!!!  

Oh and have you seen the **NEW** Dole Dippers, slices of bananas dipped in dark chocolate and FROZEN can you say

YUMMMMMMMMYYYY!!!!!!   download

I can, I have had them and they are addicting, they even have them with chopped almonds sprinkled on top too 🙂  They come 6 packages in the box, 100 calories a package, so well worth it 😛

So have a pack of those so when you have a slice of this Banana Bread you will not feel so guilty 🙂

So we’ve all had the few bananas sitting on the counter that are slightly or way past their prime…right 😛

I think what most people think of when that happens to the bananas is….BANANA BREAD TIME!!

So here’s my Banana Bread recipe 🙂  Hope you enjoy it!!

Ingredients

IMG_20130726_122341


whisk together, four, salt and baking soda

IMG_20130726_130728


add bananas to bowl and mash

IMG_20130726_125404

then add sour cream and vanilla to bananas

IMG_20130726_125734

mix together

IMG_20130726_125811

cream butter and sugar

IMG_20130726_125955

for about 3 minutes

IMG_20130726_130206


add egg yolks

IMG_20130726_130404

beat to combine

IMG_20130726_130624

fold in half flour mixture

IMG_20130726_130816


IMG_20130726_130848

then add banana mixture and rest of dry

IMG_20130726_130918


IMG_20130726_131007


IMG_20130726_131058

beat egg whites just until frothy

IMG_20130726_131212


IMG_20130726_131251

fold into batter, but don’t over work it

IMG_20130726_131318

IMG_20130726_131400


I used mini loaf pans, you can also find paper baking loaf size too, for easy gift giving

IMG_20130726_124253


IMG_20130726_131914


Then bake and done

IMG_20130726_140624


This recipe is so moist you will never use another 🙂

IMG_20130726_143858

Recipe

1 stick of butter, softened
1 1/2 cup granulated sugar
2 eggs, yolks and whites separated
1 1/2 cup all-purpose flour
1 tsp. baking soda
1/4 tsp. salt
4 tbsp. sour cream
3 overripe bananas, mashed
1 tsp. vanilla

Preheat oven to 325 degrees

pans – 8 1/2 x 4 1/2 x 2 1/2 loaf pan, or mini loaf pans or small bundt pan.

In a small bowl add mashed banana, sour cream and vanilla, mix to combine.

In another small bowl add flour, salt and baking soda, whisk to combine, set aside.

Cream butter and sugar together in a large bowl for about 3 minutes, then add egg yolks and beat until combined.
Fold in 1/2 of dry mixture, then add banana mixture and the rest of the dry.

In a clean dry bowl add egg whites and beat for about 30 – 45 seconds just until frothy, then fold egg whites into the batter.

Just until combined, try not to over work the batter.

Bake for regular size loaf pan 45 minutes to 1 hour, mini loaf pans about 30 minutes, check by inserting a toothpick in the center and comes out clean.

Enjoy!!!!

IMG_20130726_143758

Zucchini Cake with Cream Cheese Frosting

5 Comments

Well summer is here and the gardens are producing some awesome vegetables!!  Every year we always make zucchini bread with the zucchini.  

This time I decided to make a Cake instead….now I’m sure someone out there has made a zucchini cake…but I have have, this really is no different then the bread just in cake form, so this is what I came up with 🙂

IMG_20130728_200200

along with the things I would change next time 🙂

Did I say change…yes I did 🙂  No one is perfect!!!!!!!!!!  

Ever watch Top Chef or I like Top Chef Masters myself, (in case you don’t, it is a cooking competition show with mostly well know chefs)  I like this show better since I do admire some of the chefs that have been on the show and am amazed at the talent they have  that have made them famous.

download

This new season just started last Wednesday night on Bravo, this season does not have many chefs that are TV known except Chef David Burke he has multiple Awards, Restaurants, and few products.  They have many talented Chefs this season and I am excited to watch.

 It is hosted by Chef Curtis Stone images and recently he posted a picture of dish he was trying make and it just flopped, and he said “see not even Chefs are perfect”  I love him for that 😉

Which brings me back to telling you as I made this cake and it did not turn exactly as I wanted it too, so next time I know the things I’ll change (which I will let you know in the recipe what that is) 🙂

So I’ll tell you a secret, not everything I make turns out just right, including “my new idea for a cookie” that I tried to make this week 🙂
I was trying to make it with no flour, butter, oil…okay health and using things I already had around the house…well I am going to admit, the garbage had its share of treats 🙂  

Oh my goodness I can’t describe the texture…closest word I can think of is “RUBBER”LOL  Hey at least I tried 😛  

UPDATE on this post – I brought this cake into the office today and everyone loved just as I made it, so I’ll leave it up to you on the changes, that are below 🙂

Alright, alright lets move on to the cake 🙂

Ingredients

IMG_20130728_151421

add dry indgredients to a bowl

IMG_20130728_151837

whisk together to combine

IMG_20130728_151935

add eggs, oil and vanilla to large bowl

IMG_20130728_152350

whisk to combine

IMG_20130728_152435

Grate zucchini over the wet mixture bowl
or just add the grated zucchini to the wet mixture

IMG_20130728_152600

IMG_20130728_152940

fold in to combine

IMG_20130728_153026

then add dry to wet

IMG_20130728_153056

just mix until everything is moist

IMG_20130728_153211

Pour into a 9×13 pan
(this is what I would change, if I use a 9×13 again I will double the recipe or I’d use a 9×9 baking dish)

IMG_20130728_153357

Bake and let cool completely

IMG_20130728_160642

Cream Cheese Frosting ingredients

IMG_20130728_153458

add softened cream cheese and butter to bowl

IMG_20130728_195007

with hand mixer or stand mixer, just mix to combine

IMG_20130728_195046

then add confectioners sugar a little at a time

IMG_20130728_195127

add as much sugar as you like for taste of sweetness and consistency

IMG_20130728_195343

I use only 3/4 of a 1 pound bag

IMG_20130728_195409

frost your cake

IMG_20130728_195541

done, you can dig in right now, but keep in the refrigerator

IMG_20130728_195724

IMG_20130728_200333

Zucchini Cake Recipe

 (exactly as I made, with what I would change)

1 large zucchini, grated (about 3 cups or so)
3 eggs
1 cup oil
3 tbsp. vanilla
2 1/3 cup all-purpose flour
1 cup granulated sugar
 1 tsp. salt
1/2 tsp. baking powder
1 tsp. baking soda
2 tbsp. cinnamon (I would have put in a least 1 more tablespoon, I also would have added 1/2 tsp. nutmeg)

Nuts are optional I did not use any

In a medium bowl add all the dry ingredients and whisk to fully combine.

In a large bowl add oil, eggs and vanilla, whisk to fully combine, add grated zucchini and stir to combine.
Then add dry to zucchini mixture, fold just until everything is moist.

Preheat oven to 350 degrees

Pour mixture into a greased or non-stick sprayed baking dish*** see Note below

(In the pictures I used a 9×13, for this recipe  would change that to a 9×9 baking dish.  I felt that the cake was too thin, I would have liked it to be thicker.  Therefore if using the recipe above and  you want a thicker cake use a 9×9 baking dish, if you like it thin (about 1 1/2 inch) then use a 9×13 baking dish.  Now you can also double this recipe and use a 9×13, resulting in a thicker cake)

Bake time using above recipe in a 9×13 done in 30-35 minutes,  using a 9×9 pan check at 35 to 40, until a toothpick inserted in the middle comes out clean.   Cool completely 

Cream Cheese Frosting

8oz. cream cheese, very softened
4 tbsp. butter, very softened
1 box confectioners sugar (1 pound box)

in a medium mixing bowl add cream cheese and butter, beat on med-high speed just until combined, then on low speed add sugar a little at time until you have the sweetness and desired consistency.

Frost cake, slice and serve, or this can kept in the refrigerator until you serve. 

This cake is Super Moist!!

IMG_20130728_200420

and Cream Cheese Frosting is so creamy 🙂

IMG_20130728_200521

I hope you try it!!! Enjoy!! 

IMG_20130728_200547

Sweet Tooth Candies…Newport, Ky

3 Comments

IMG_20130607_153149

Opera Creams, Turtles, Peanut Butter Meltaways, Caramels, Fudge, Bark, Ice Cream and Ice Balls!!!!!!!!!!!!!!!!

I could go on and on, this place will satisfy your Sweet Tooth…ha ha ha 😛 hence the name…Sweet Tooth…ha ha ha

Really I’m not kidding you, this place is an old fashion candy shop they have been making fine chocolates for over 100 years.  And at the Holiday’s they specialize in making delicious beautiful candies for Christmas, Easter, Sweetest Day and Valentine’s day.  Oh and they make Caramel Apples to die for!!!!

Cute tables to sit down if you want, they also have several benches outside to sit and enjoy your favorite treat too.

IMG_20130607_153233

IMG_20130607_153301

IMG_20130607_153336

We also sell some of their delicious confections in our stores, and let me say their chocolate melts in your mouth!!

When I was a kid we would stop in here every once in awhile during the summer on our way to my Grandma’s house and get the famous Snow Ball!!  With Vanilla Ice Cream in the middle 🙂

IMG_20130607_153104

I don’t really remember the flavor I would get, but I have a feeling it was something like grape or cherry!  But I’ll tell you those were great Friday nights when we would make that extra stop 🙂

Now a day’s I’m a sugar free Nectar with no Ice cream…but they do have terrific “Homemade” Ice Cream, I have tried the Peanut Butter Chocolate Chunk…delicious…Banana Chocolate Chip…very delicious…Key Lime Ice….even more delicious!!

This is the Key Lime Ice…with homemade waffle cone 🙂

IMG_20130607_153923

The cone was so good and fresh…the way it should taste

IMG_20130607_153949

But this past month its been the sugar free nectar, and what I like about this place is that its not in those silly paper cones.  Its in a heavy duty foam cup and a small is in a medium cup, a medium is in a large cup, a large is in a extra large cup.  Reasoning so you have room to get your spoon in there without ice spilling up all over, I love it and they putting plenty of juice on it too.  I have been down there so much this past month since its been so so dang gone HOT!! 

This is my Sugar Free Nectar…YUM!!  “their nectar is like “tiger’s blood” in other places, fruit berries with a hint of coconut”

IMG_20130607_153604

But they have so much to choose from just take a look

IMG_20130607_153417

Like I said they have CHOCOLATES!!  

IMG_20130607_153535

FUDGE!!

IMG_20130607_153459

I bought a couple of pieces for my Dad for Father’s Day

IMG_20130616_105713

I bought one for myself so I could do taste test, I have to research for you all, because I know you want to know just how good it is, I am really taking this one for the team 🙂 LOL

Okay so the Boot was dark chocolate ganache covered in dark chocolate, the others are these peanut butter and ganache meltaways…on my goodness…UNBELIEVABLE!!!!!!!!!!!!!!

IMG_20130616_105825

IMG_20130616_105918

Look how thick it is…sweet!!!

IMG_20130616_110054

Layers of chocolate ganache and peanut butter… oh so good 😛

IMG_20130616_110217

Oh and so creamy this just melts in your mouth…ha ha ha 

IMG_20130616_110256

Oh my goodness I think tonight is going to be a Ice Ball night….you know because I have to do research 🙂 for all you readers out there…I’m doing this for the good of all of you Foodies that love to read about good food and fun places.  

So the next time you want some good home made chocolates or Ice Cream or even an Ice Ball…you know that Sweet Tooth Candies has been Chef Amy approved…Enjoy!!!! 

If you want to check them out online…here you go http://sweettoothchocolates.com/

S’Meaches!!!!

7 Comments

S’Meaches…………………WHAT THE HECK ARE S’Meaches??????????????????????????

That is what everyone has been asking me since I’ve told them I’m going to make S’Meaches!!!

It’s like S’Mores but with peaches and a little kick 😉

IMG_20130623_161826

Funny I first heard about S’Meaches in a meeting at work, the video (below) is going to be featured in a few of our stores on huge TV Screens to promote the great tasting peaches we have for sale.

Click this link below for the video

https://vimeo.com/28647609

They are some good peaches too…I’ve been adding them to salads, oatmeal, making my spicy peach chicken, I could go on and on 🙂

But I want to talk about S’Meaches….this is not my recipe, this recipe is all over the internet but of course I have to change it 🙂

Only thing I did was use 2 peach slices and 2 marshmallows…next time I would add some cinnamon to the brown sugar, but using cinnamon graham crackers would do the trick too 🙂
I just thought 2 peaches would make it better and of course adding a second marshmallow made it even gooier 😛 

So if you don’t have a huge fire to cook these at then just use your grill just like I did…let’s take a look 🙂

Ingredients

IMG_20130623_153207

Slice peaches, mix cayenne and brown sugar together
(next time I will add the cinnamon)

IMG_20130623_154113

dredge slices in brown sugar mixture

IMG_20130623_154524

add peach slices to a skewer

IMG_20130623_155127


 I grill peaches first, until tender and caramelized

IMG_20130623_155912

add marshmallows, hold over grill until lightly brown

IMG_20130623_160044


IMG_20130623_160412

ready for graham crackers

IMG_20130623_160855

marshmallow down with peach on top then top with another marshmallow

IMG_20130623_160954


Eat and enjoy!!!

IMG_20130623_161151

Recipe

1 peach, sliced into 8 slices and halved horizontally

8 marshmallows

1/4 cup brown sugar

1/4 tsp. cayenne pepper

1/4 tsp. cinnamon (i will add this next time)

Graham Crackers

skewers

Mix the cayenne, cinnamon and brown sugar, and dredge the peaches in it.
Put 2 slices on skewer, grill over a medium-low flame until caramelized and brown, add 2 marshmallows and toast over flame until light brown.

Break graham crackers into 2 pieces, add marshmallows to top and to bottom piece, then add peaches, put them both together and Enjoy!!!

IMG_20130623_161724


So quick and easy!!!!!  Try it at your next grill out!!!


IMG_20130623_162014

What to do with leftover…Easter Peeps!!!

13 Comments

EASTER!!!IMG_20130331_104825

PEEPS!!!!!!IMG_20130326_151040

Okay this post today is just a fun and silly…so please bare with me 🙂

They have peeps now for every holiday, hearts, pumpkins, snowmen, Christmas trees, reindeer’s, I’m sure I’m missing others…LOL

But I only remember peeps in my Easter Basket, that was my most favorite item in my basket when I was little, I still like peeps now…I just like them on the stale side…ha ha ha…I know I’m going to have haters and lovers of this, but I like the chewiness of that sugary covered bunny!!  Yes I said Bunny I do prefer the Bunny over the Chick, I like that the Bunny is thinner, this way I get more chewiness…okay this is way too much information, I’m sorry LOL!! 🙂

Anyway the the idea for this post came from my friend Joe, I had asked my friends to give me some ideas for my blog, recipes they would like to see.  And Joe said ‘Cooking with Peeps”  I thought awesome idea!!

So I’ve come up with 4 recipes ideas buy adding peeps to it or in place of where you may have used marshmallows, and of course there are many more, but these are fun and easy!!
*** Note – you can click on the pictures to make the image bigger

1. Easter Fudge, 2. Sweet Potatoes, 3. Fudge Brownies, 4. Heavenly Hash/Ambrosia Salad
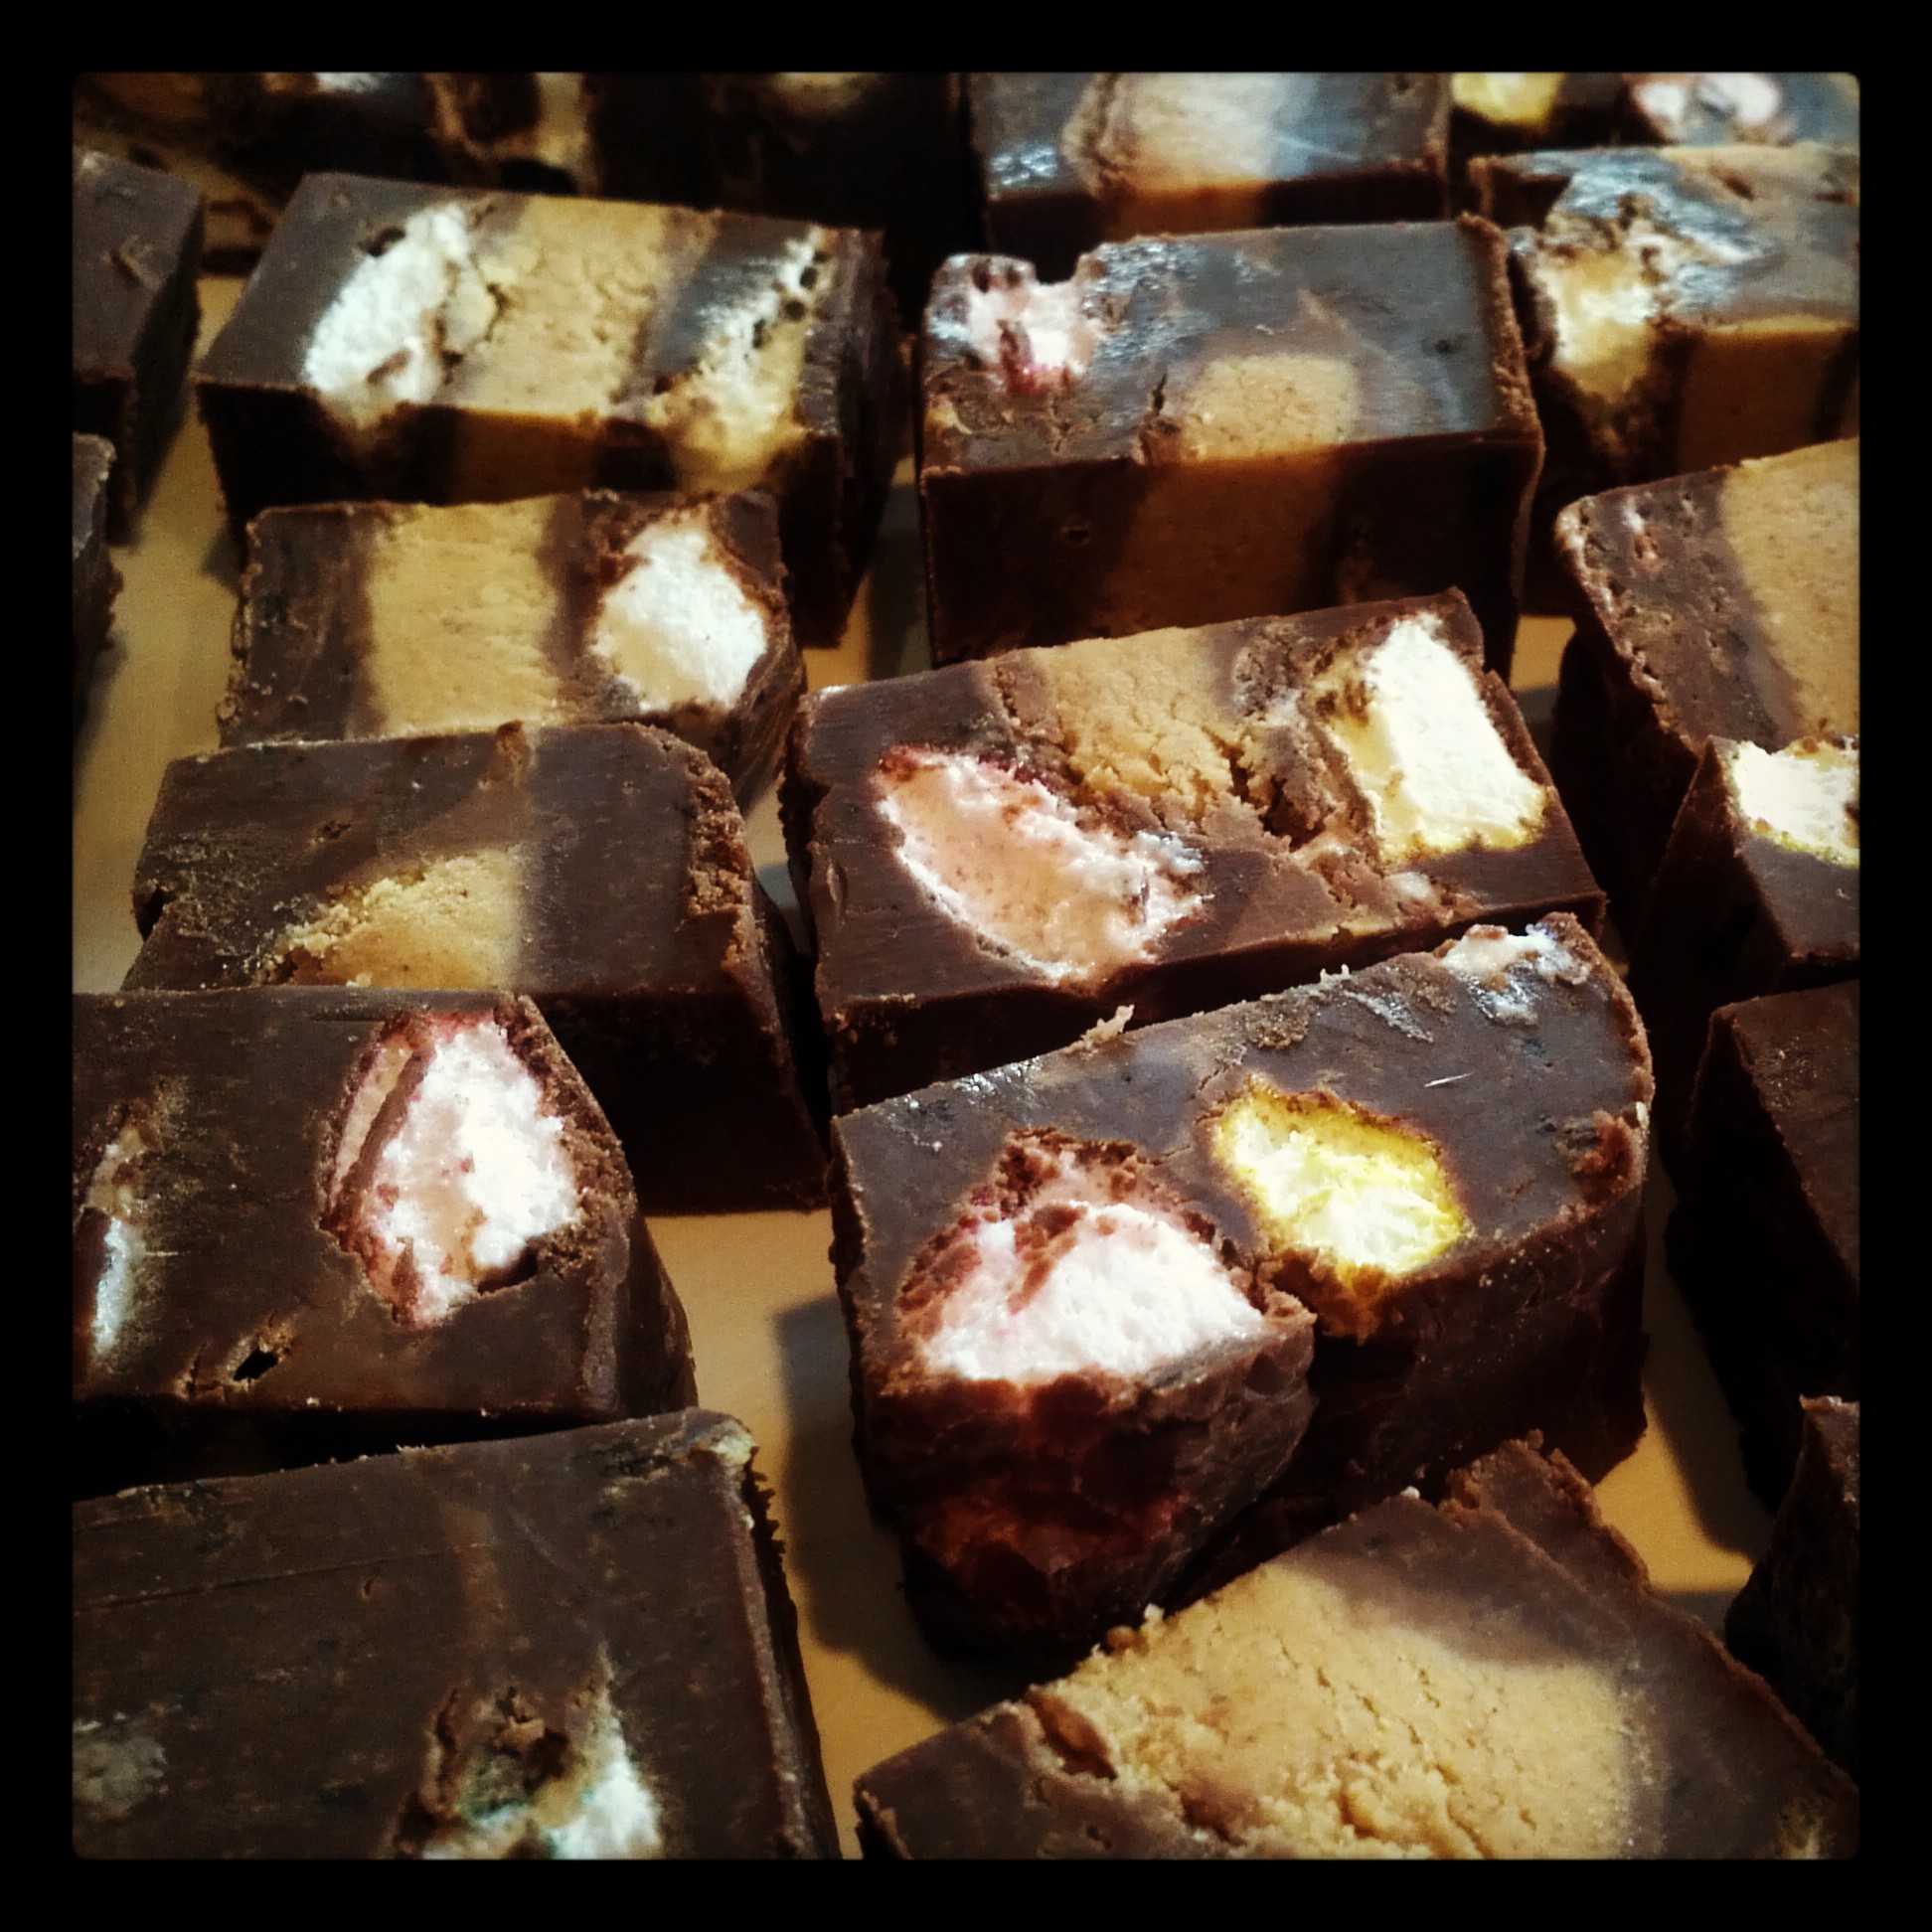
 

1.  Easter Fudge    

IMG_20130331_110544


So this recipe is one that use at Christmas time to make for family and friends, its very close to the foolproof Eagle Brand fudge recipe.  For Christmas I added marshmallows and walnuts, and call it my Rocky Road Fudge.  

For Easter Fudge, I will add Bunny peeps and Reese’s Mini peanut butter eggs too….this one will be good!!!
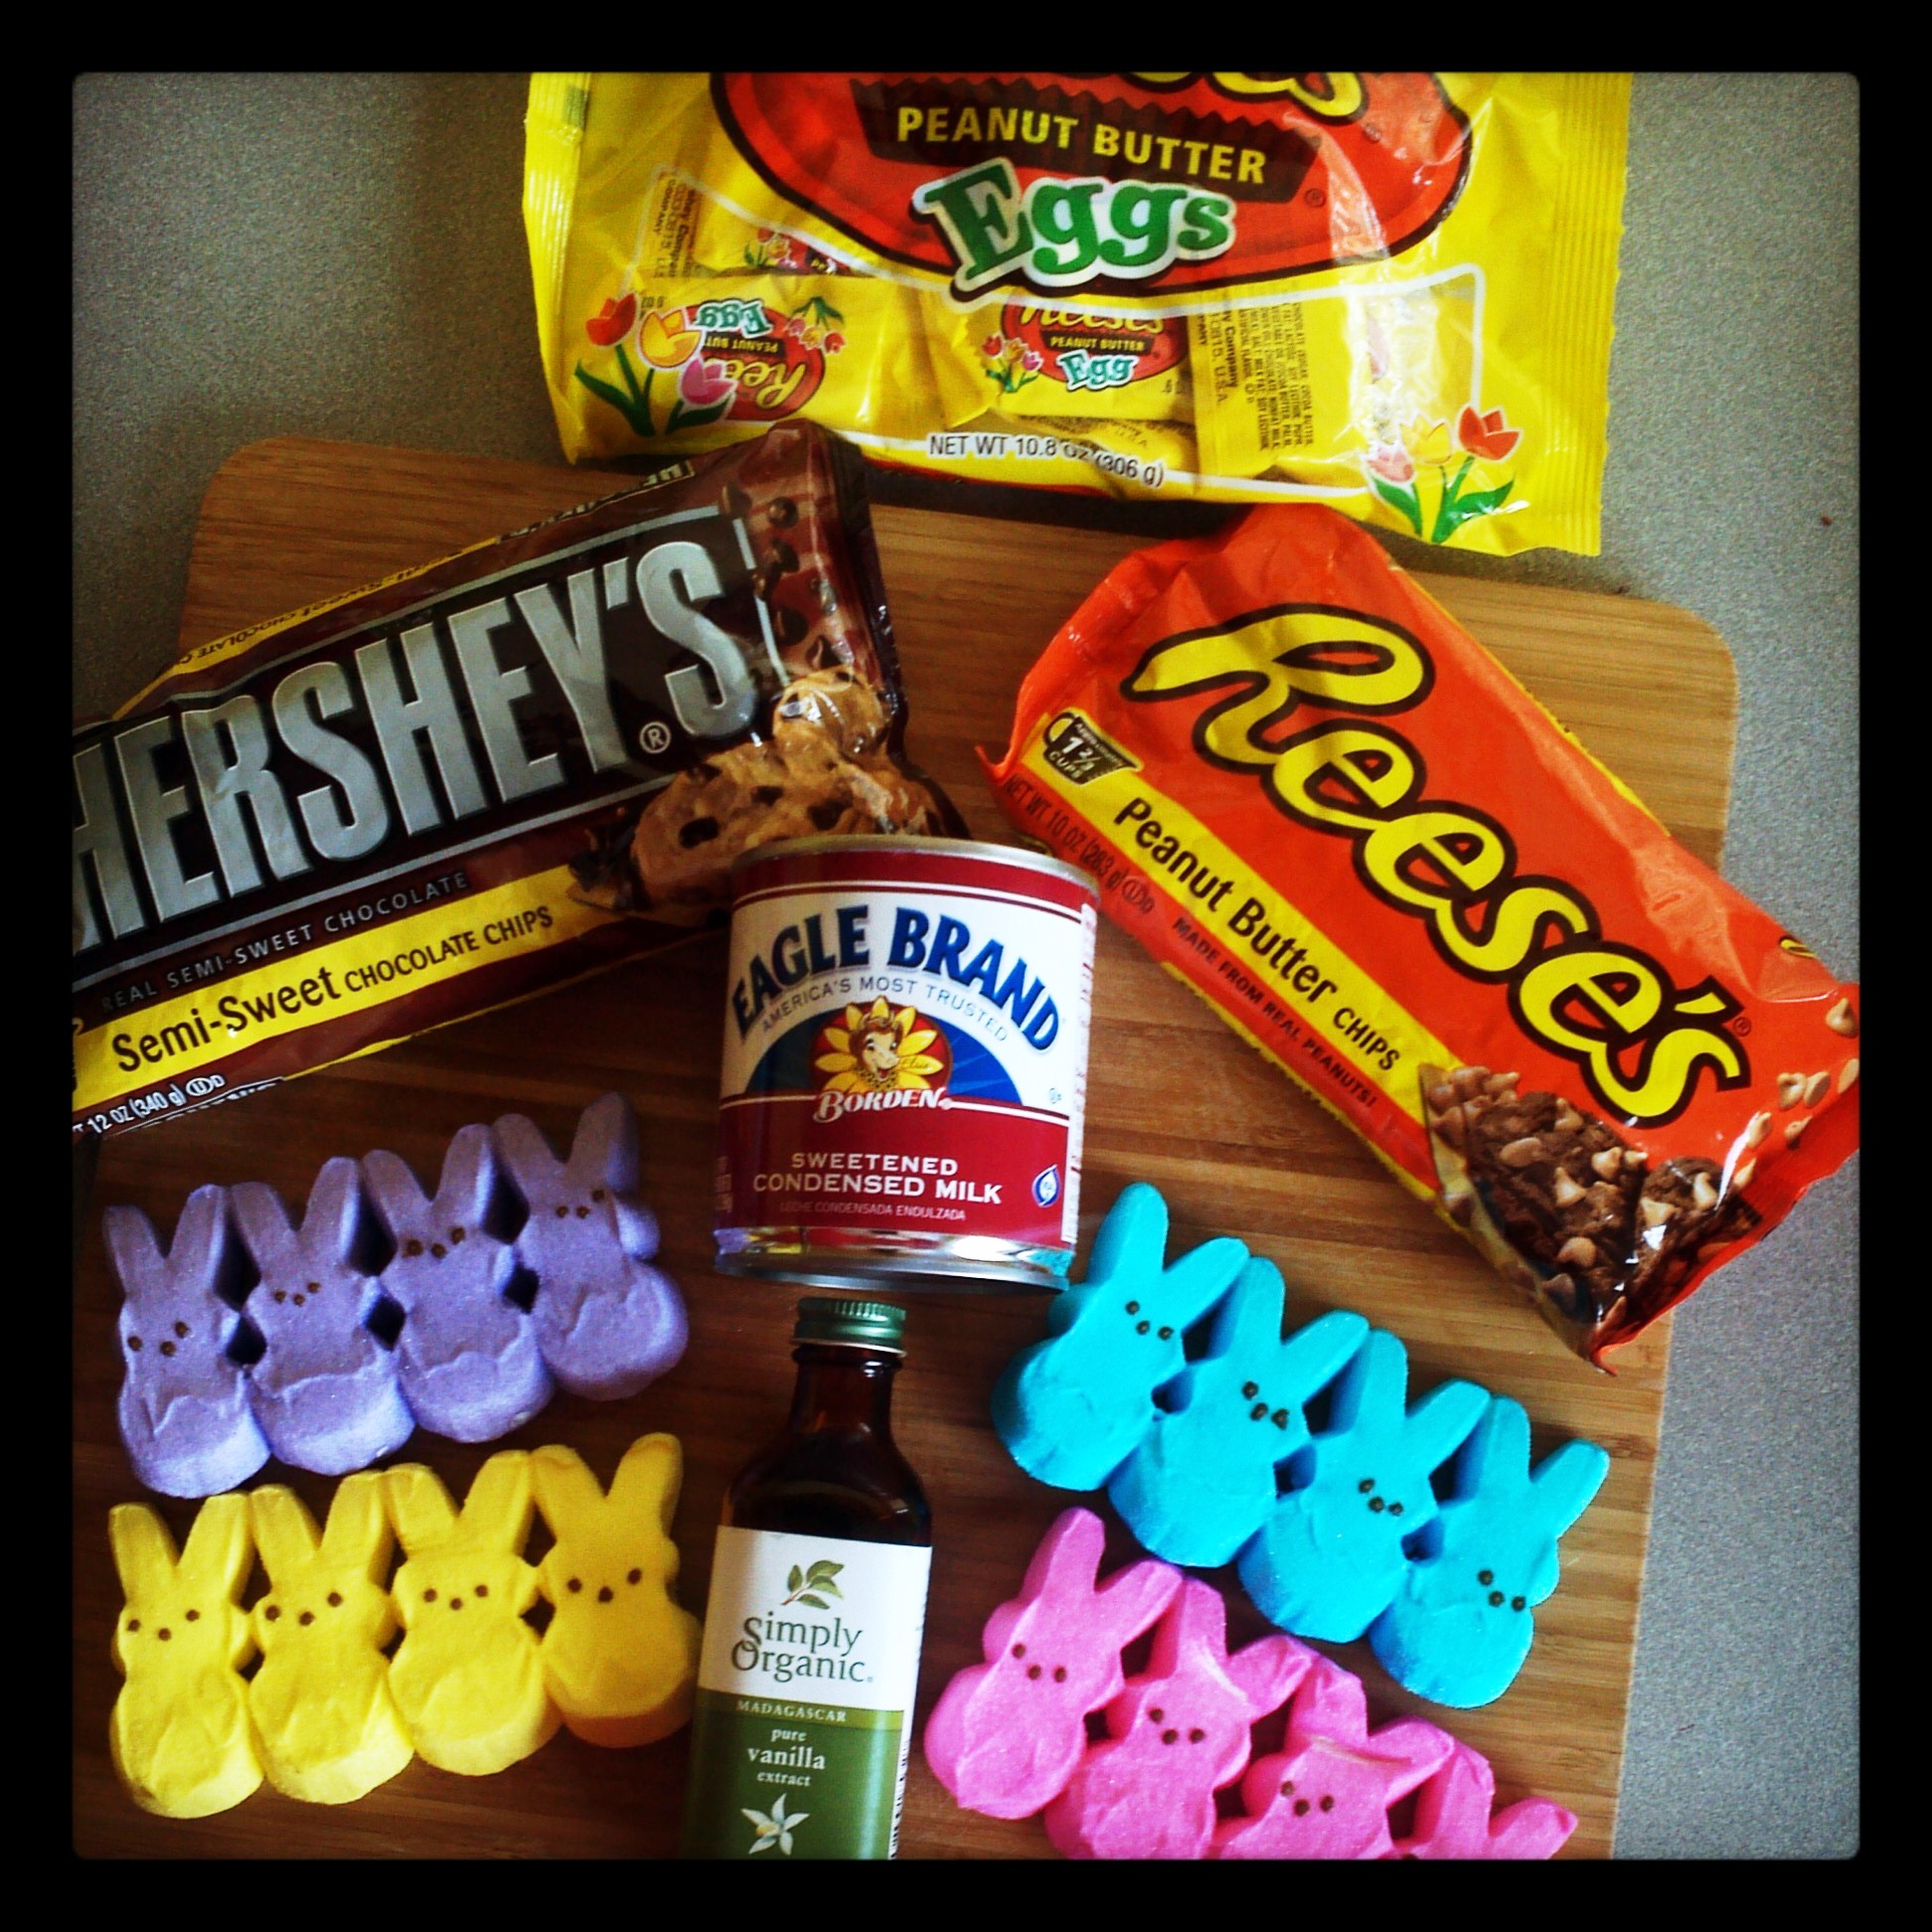
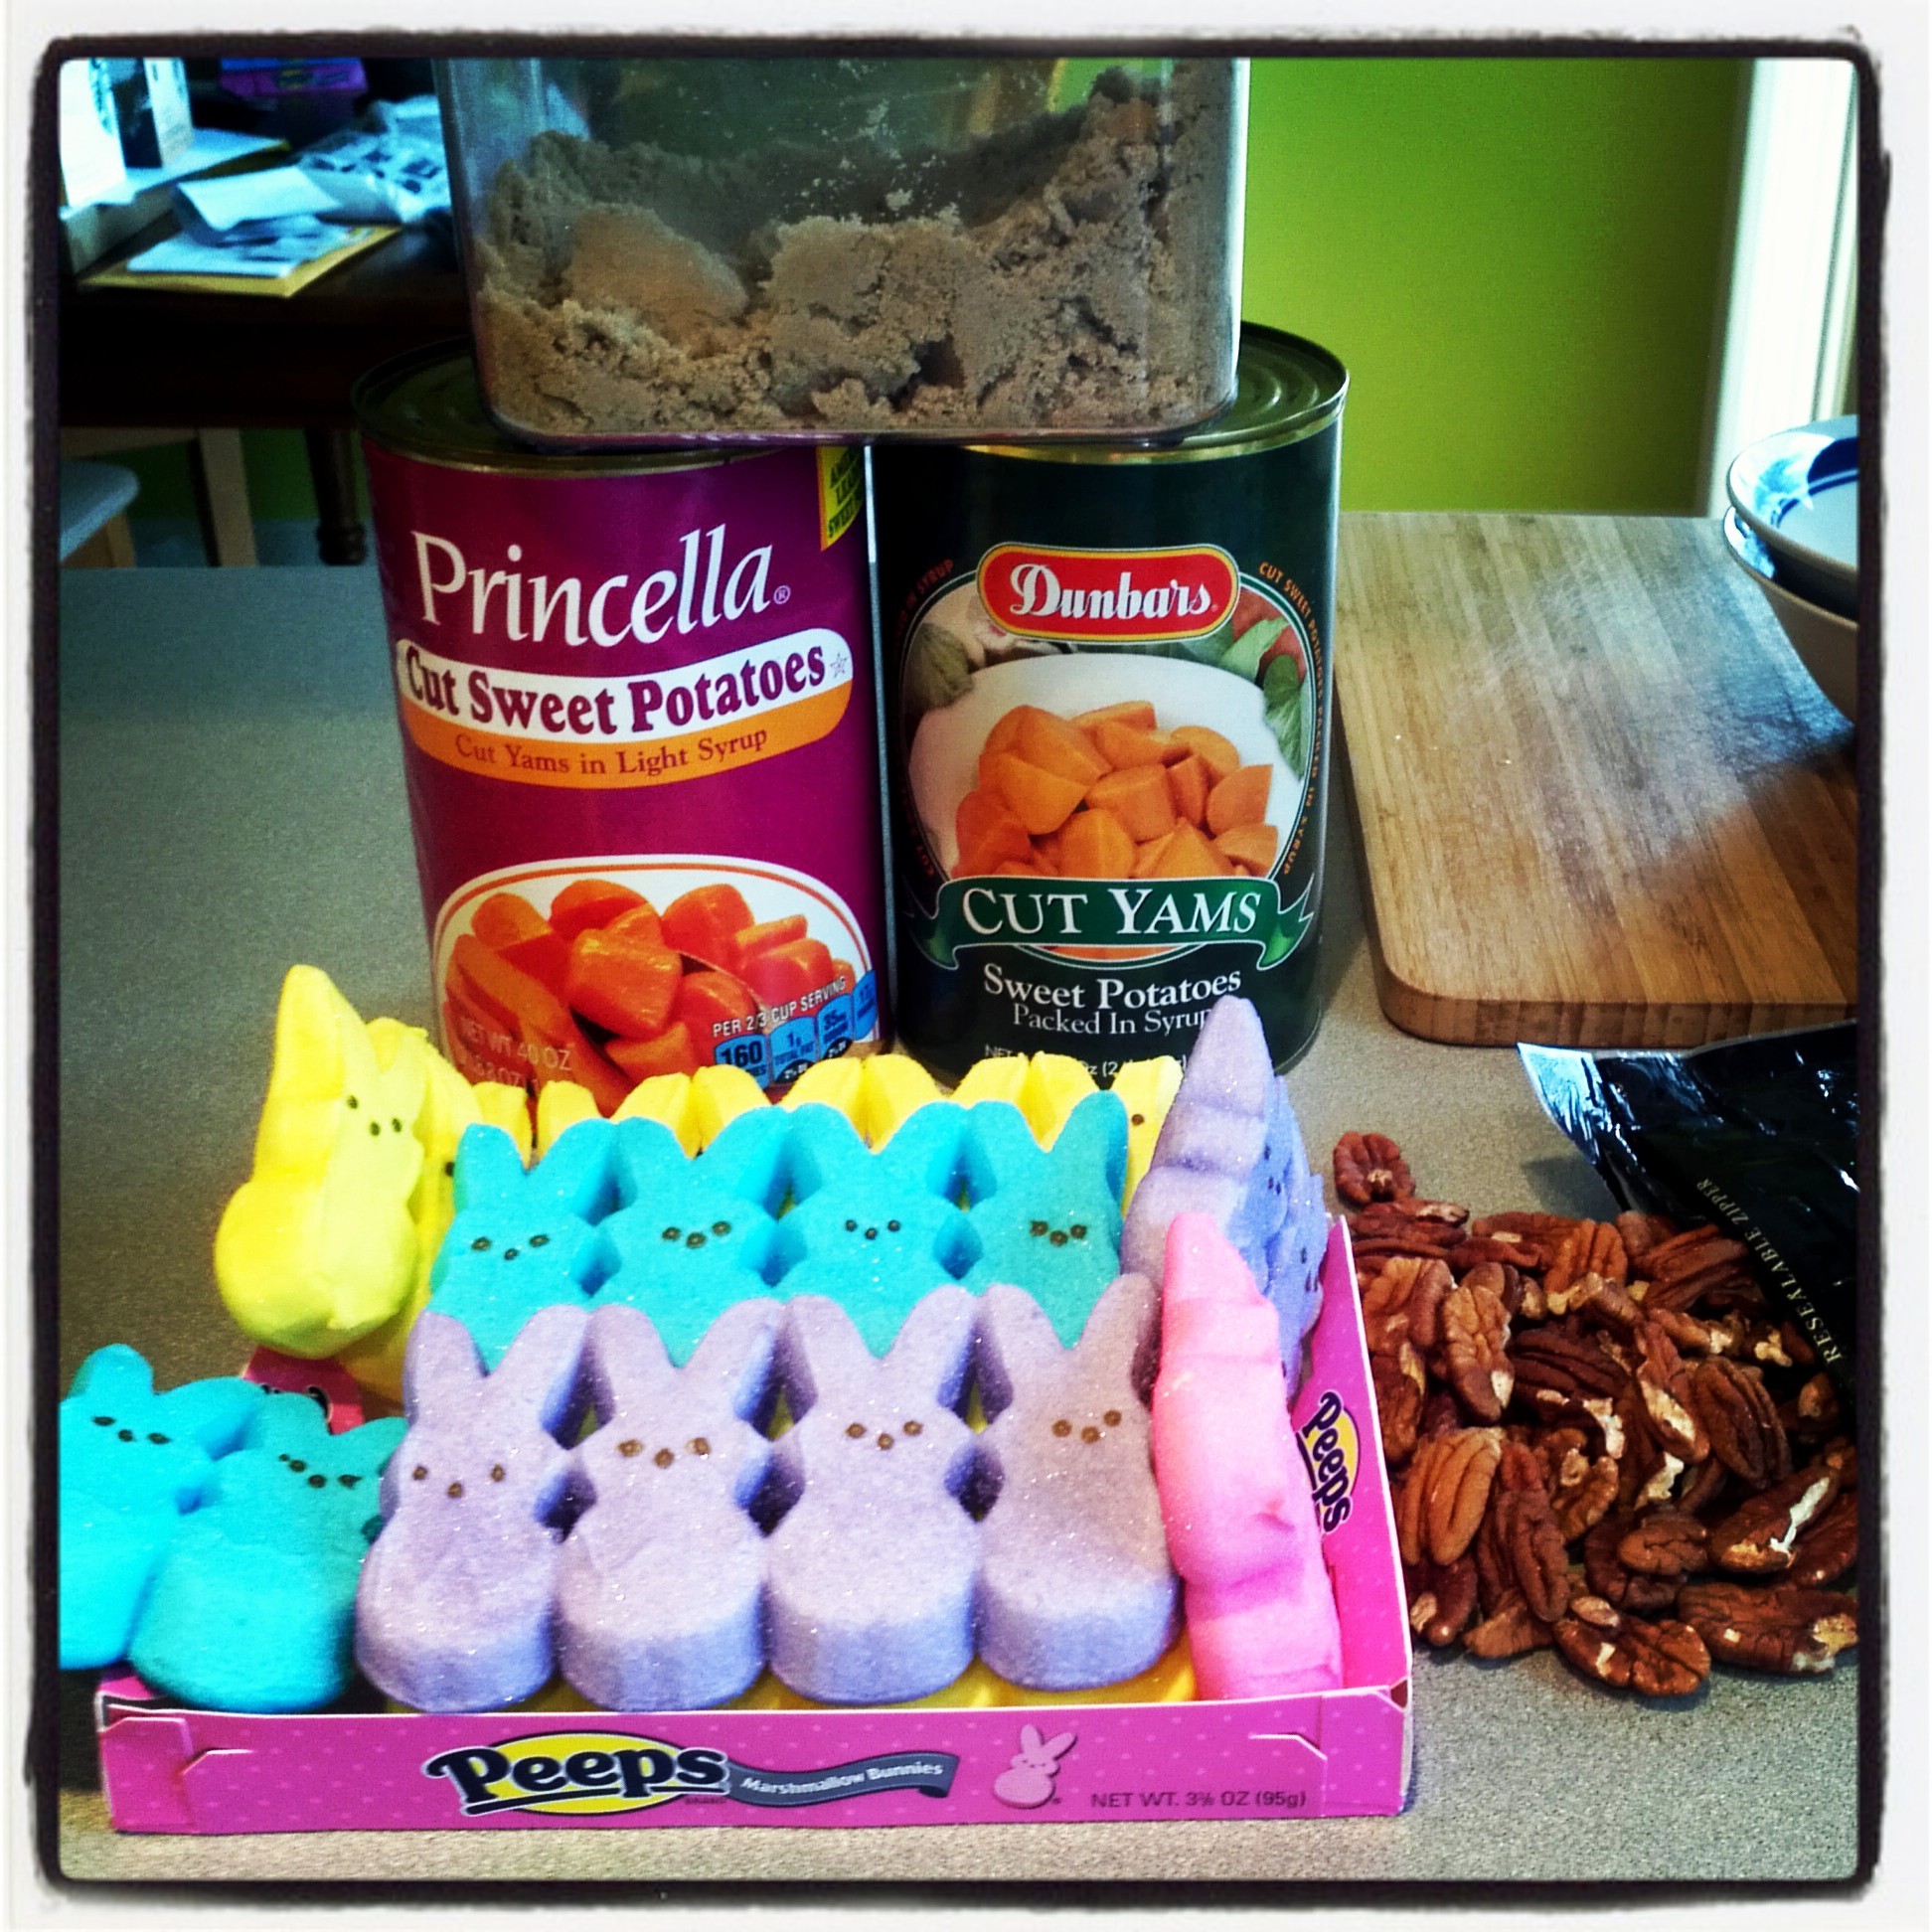
Ingredients

IMG_20130330_165058

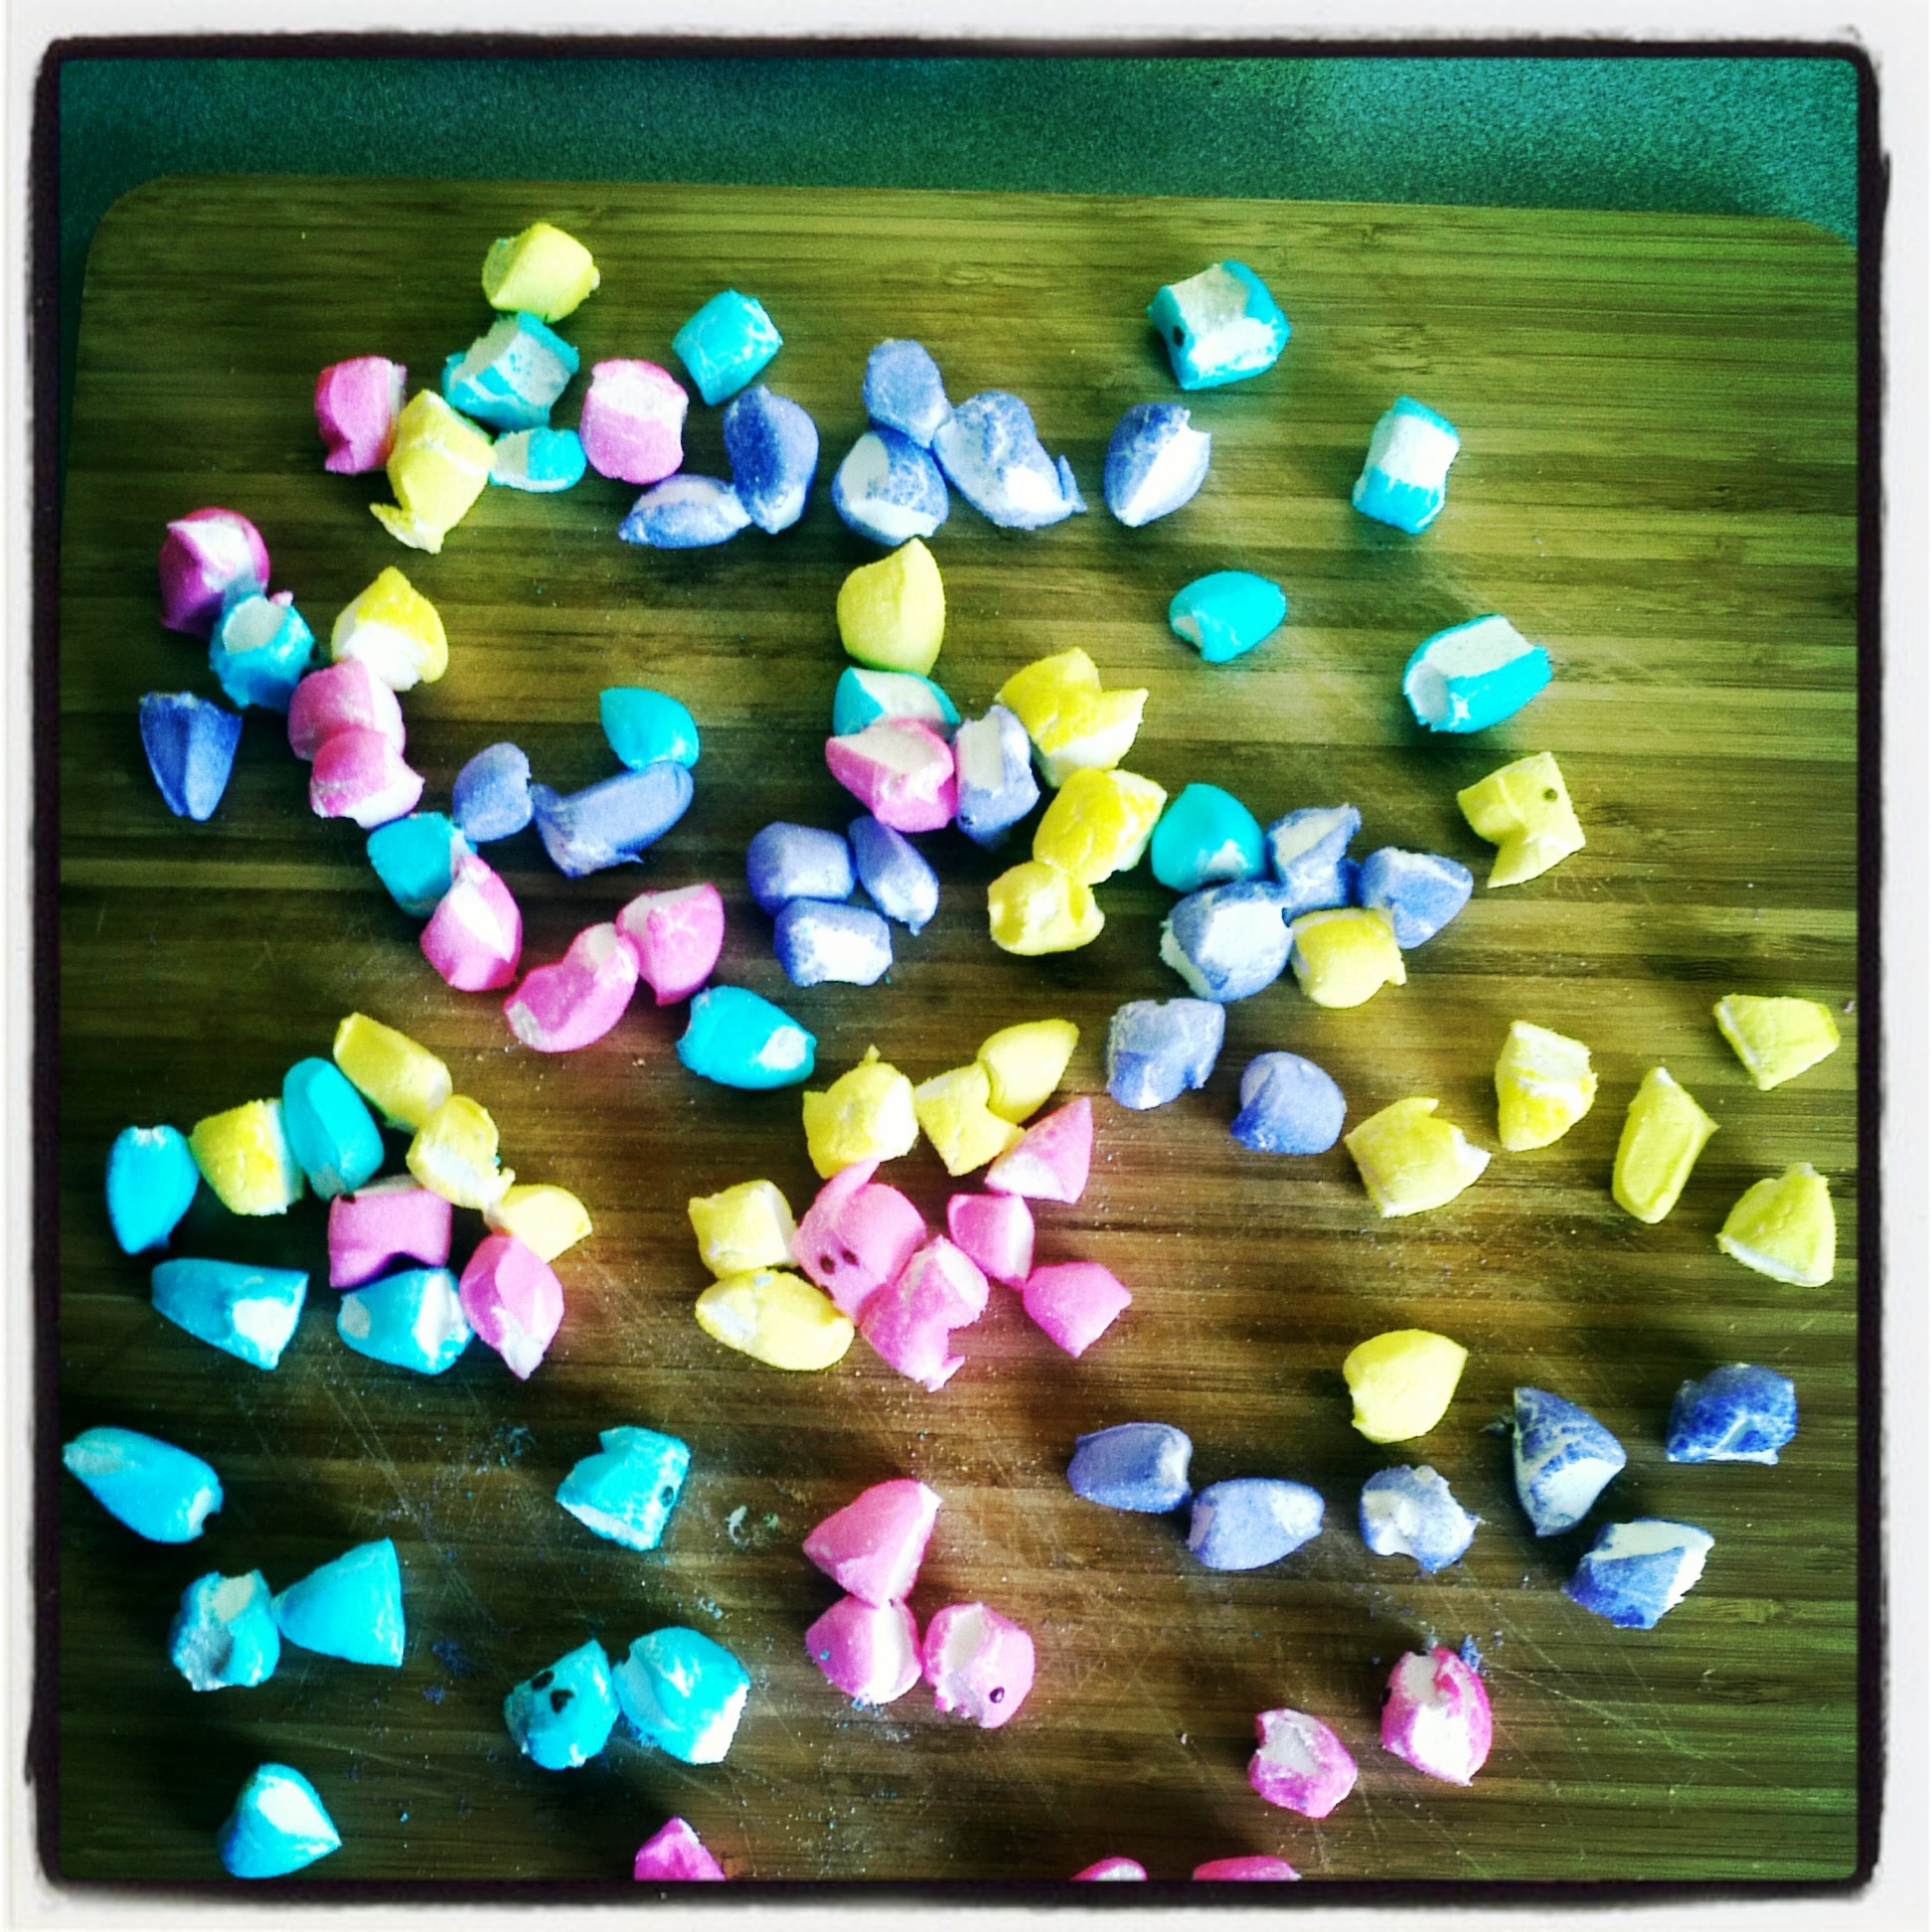
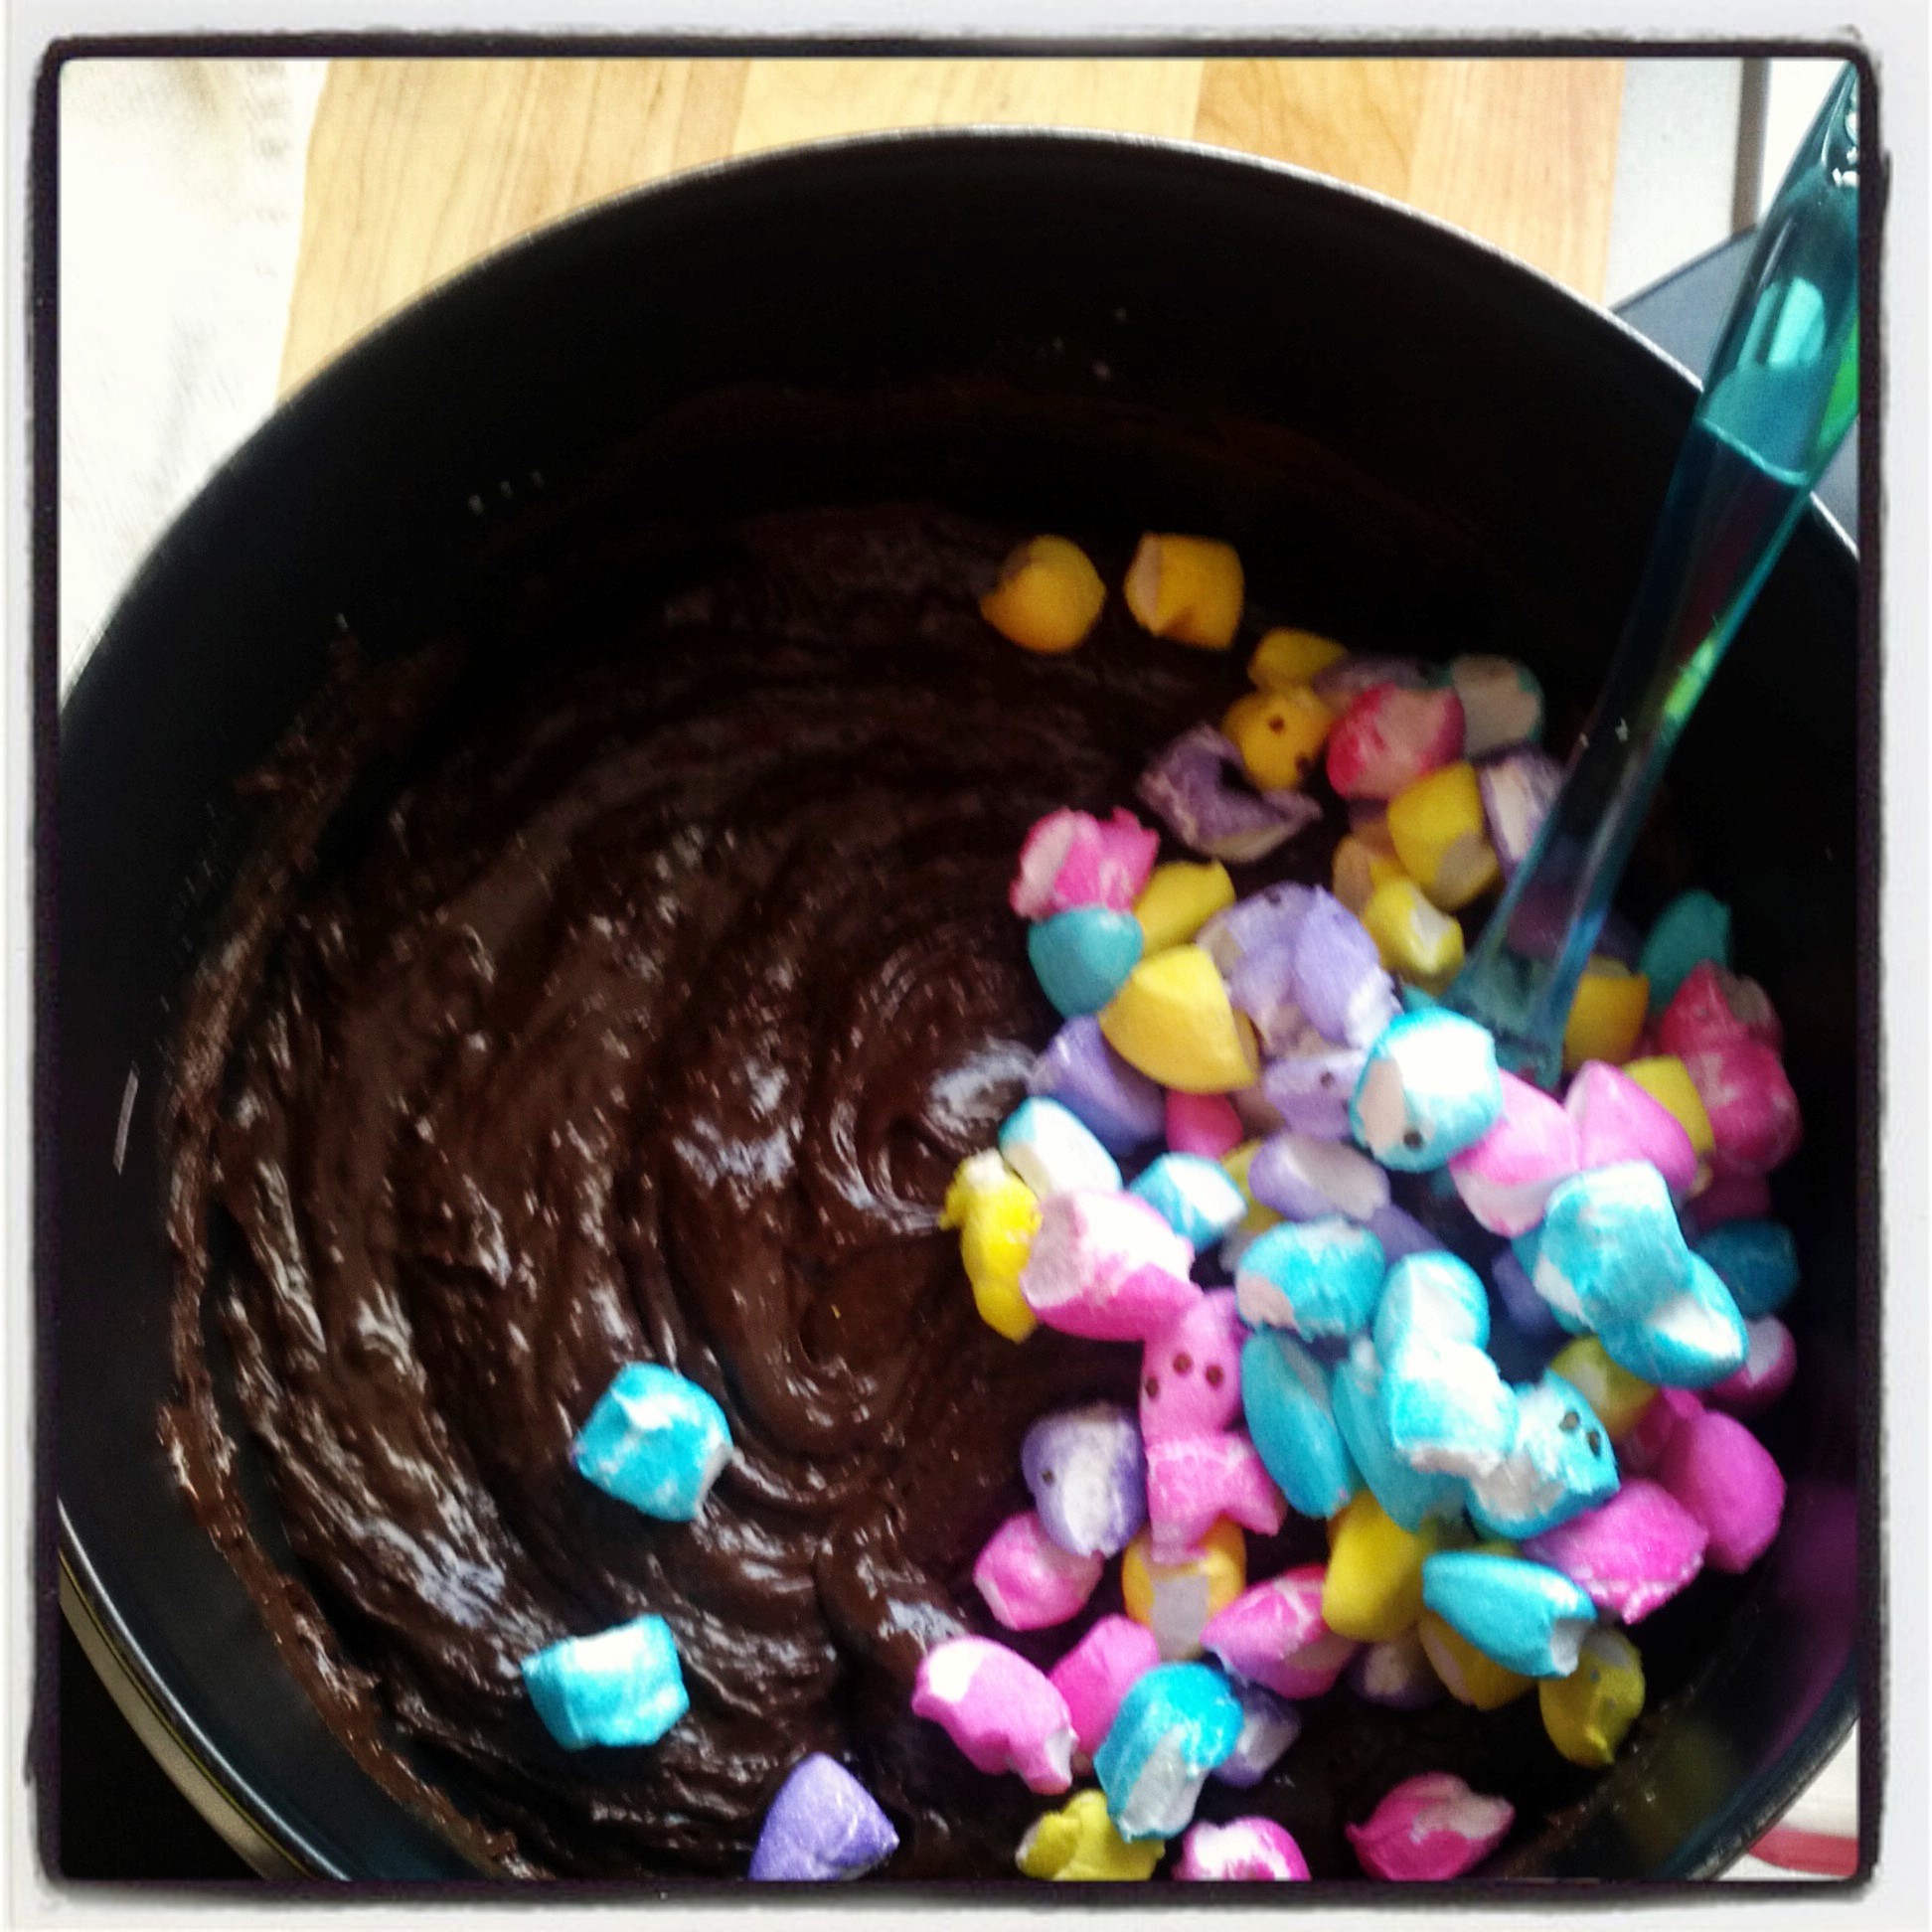
Chop peeps in half then in to 4’s

IMG_20130330_165330     IMG_20130330_165723

in a large pot add chips, vanilla and sweet condensed milk – once melted, off the heat fold in peeps

IMG_20130330_172445                                                    IMG_20130330_173343

line dish with plastic wrap                   add half of mixture, spread out

IMG_20130330_172100                               IMG_20130330_173445

add peanut butter eggs

IMG_20130330_173256   IMG_20130330_173534

then add rest of fudge mixture,         spread over eggs, chill over night

IMG_20130330_173638

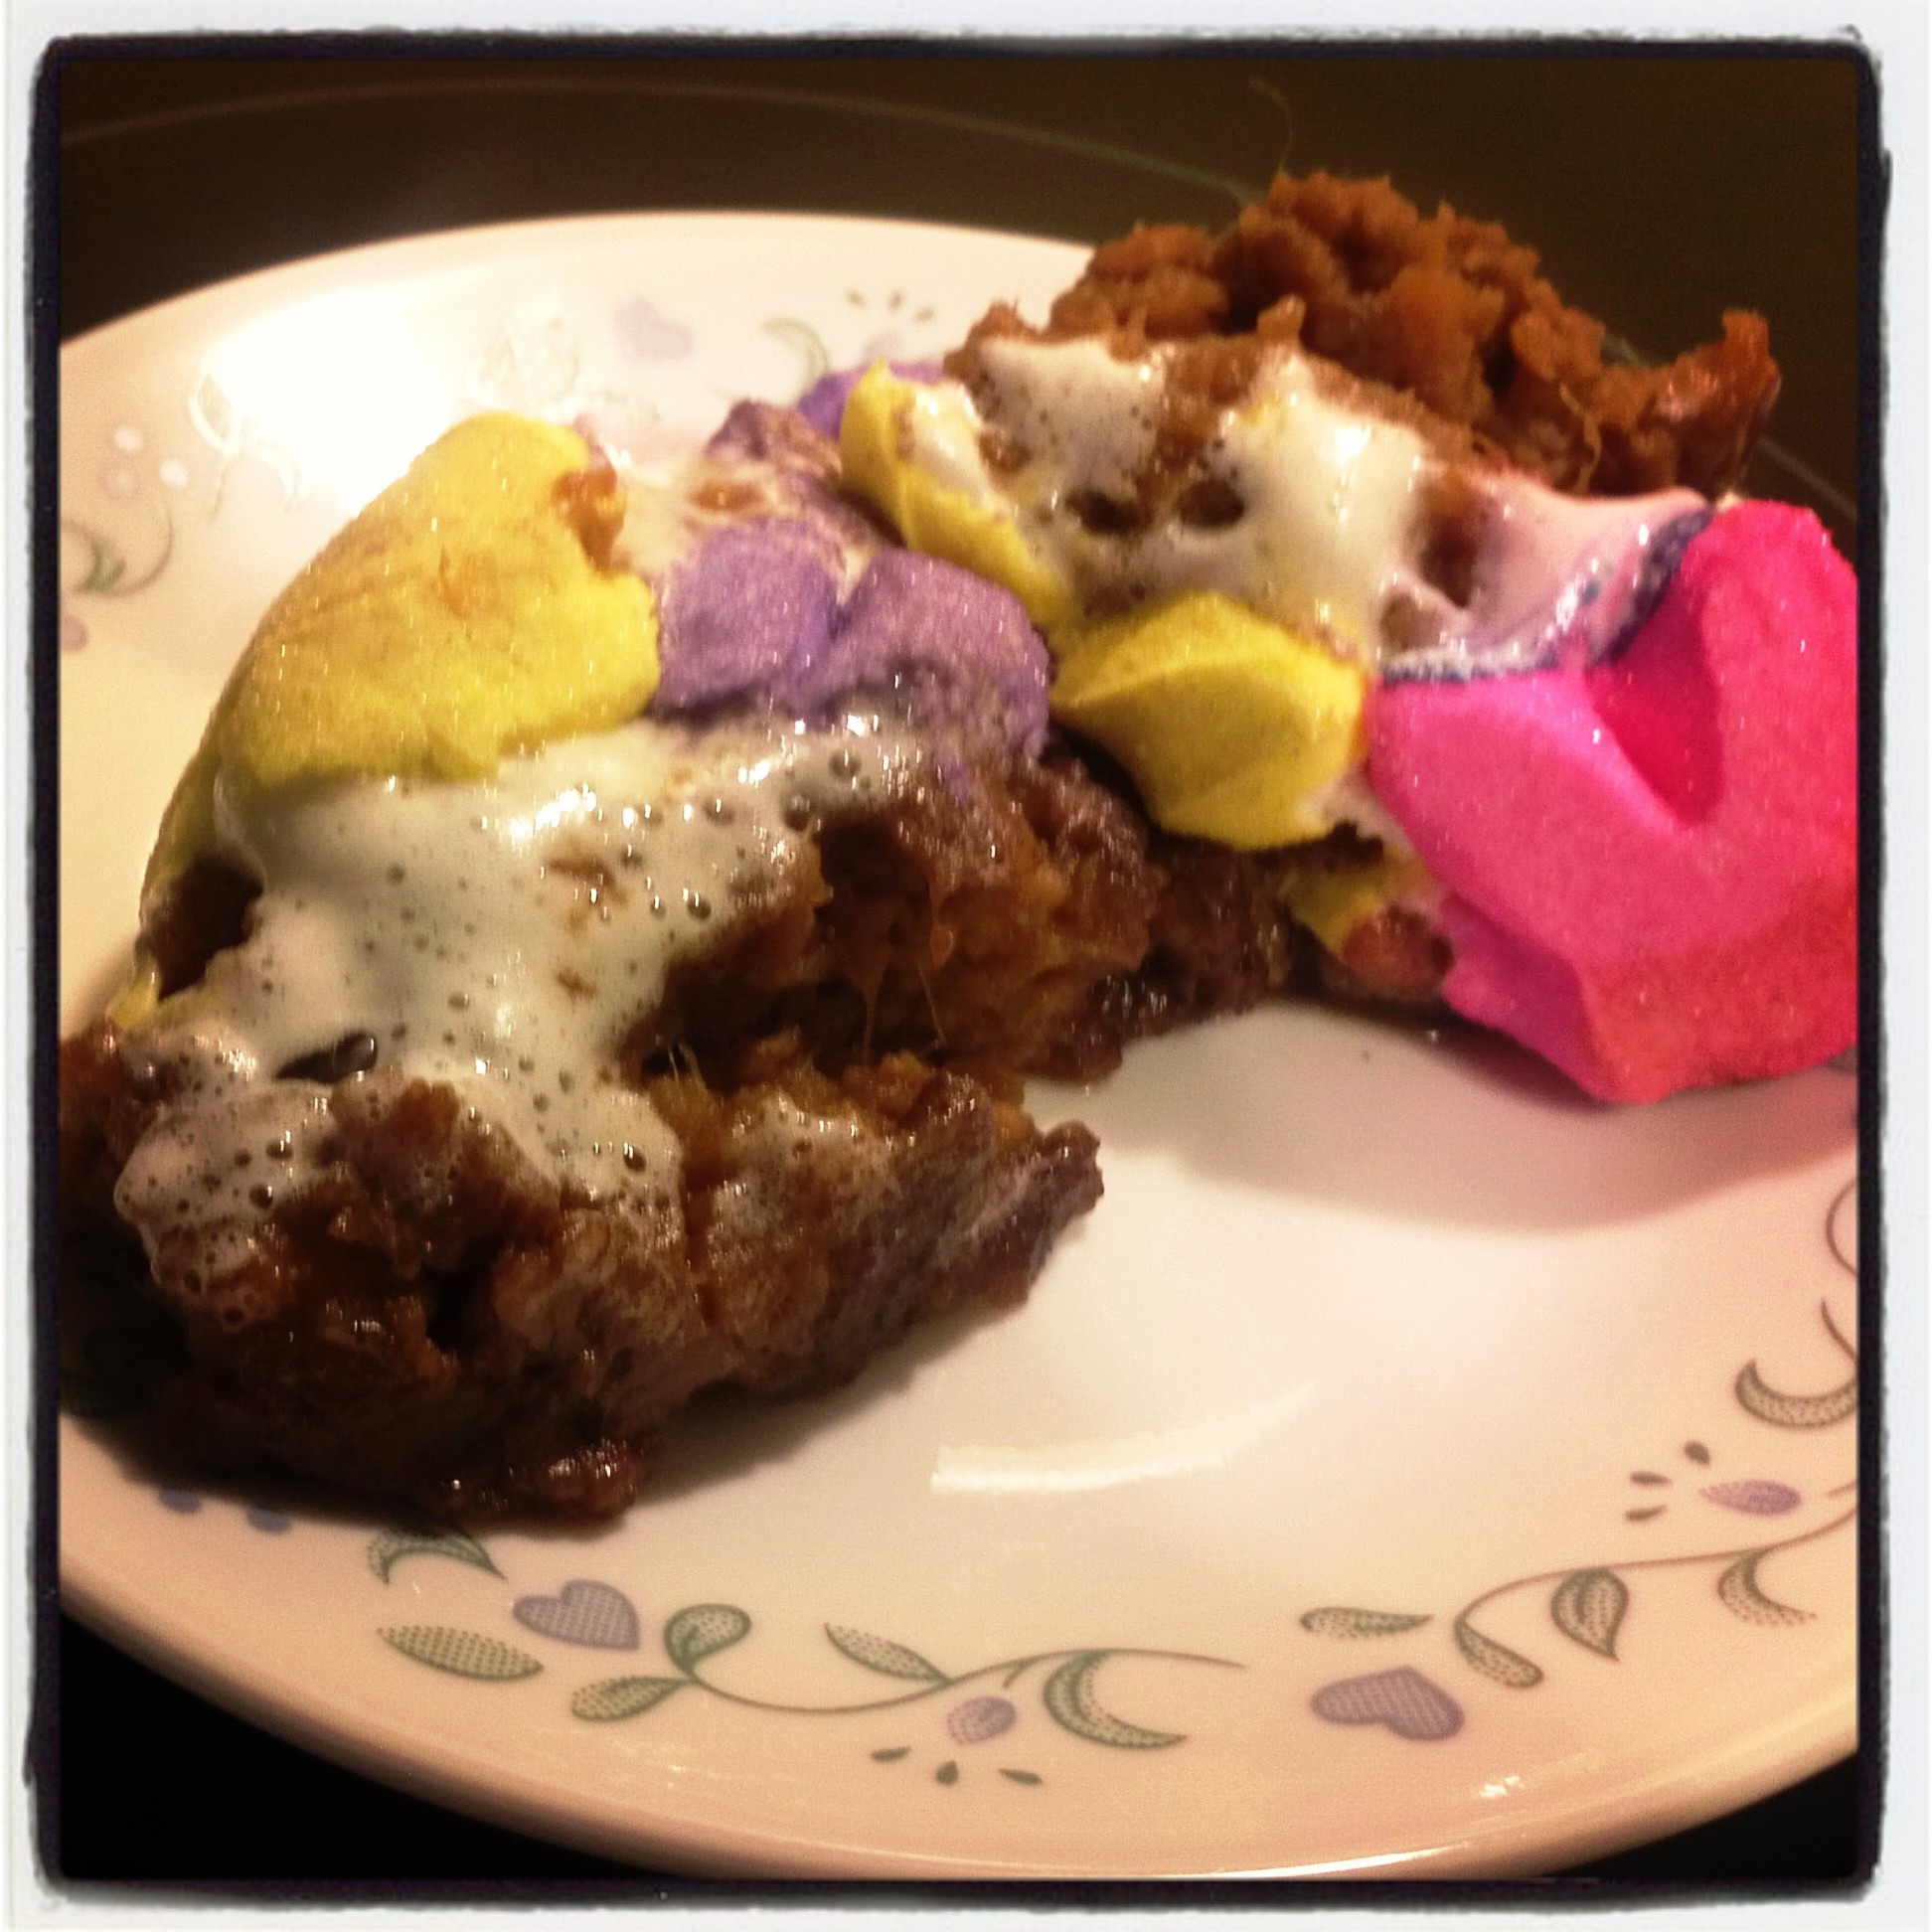
then slice fudge into slices   –  then pieces

IMG_20130331_105819      IMG_20130331_110507


Recipe

1 can sweetened condensed milk
1 bag 18 oz. semi-sweet chocolate chips
1 cup peanut butter chips
2 tsp. vanilla
peeps 3 bunnies of each color 12 total
1 bag Reese’s mini peanut butter eggs (used 15)

Cut peeps in half then into 4’s, set aside.
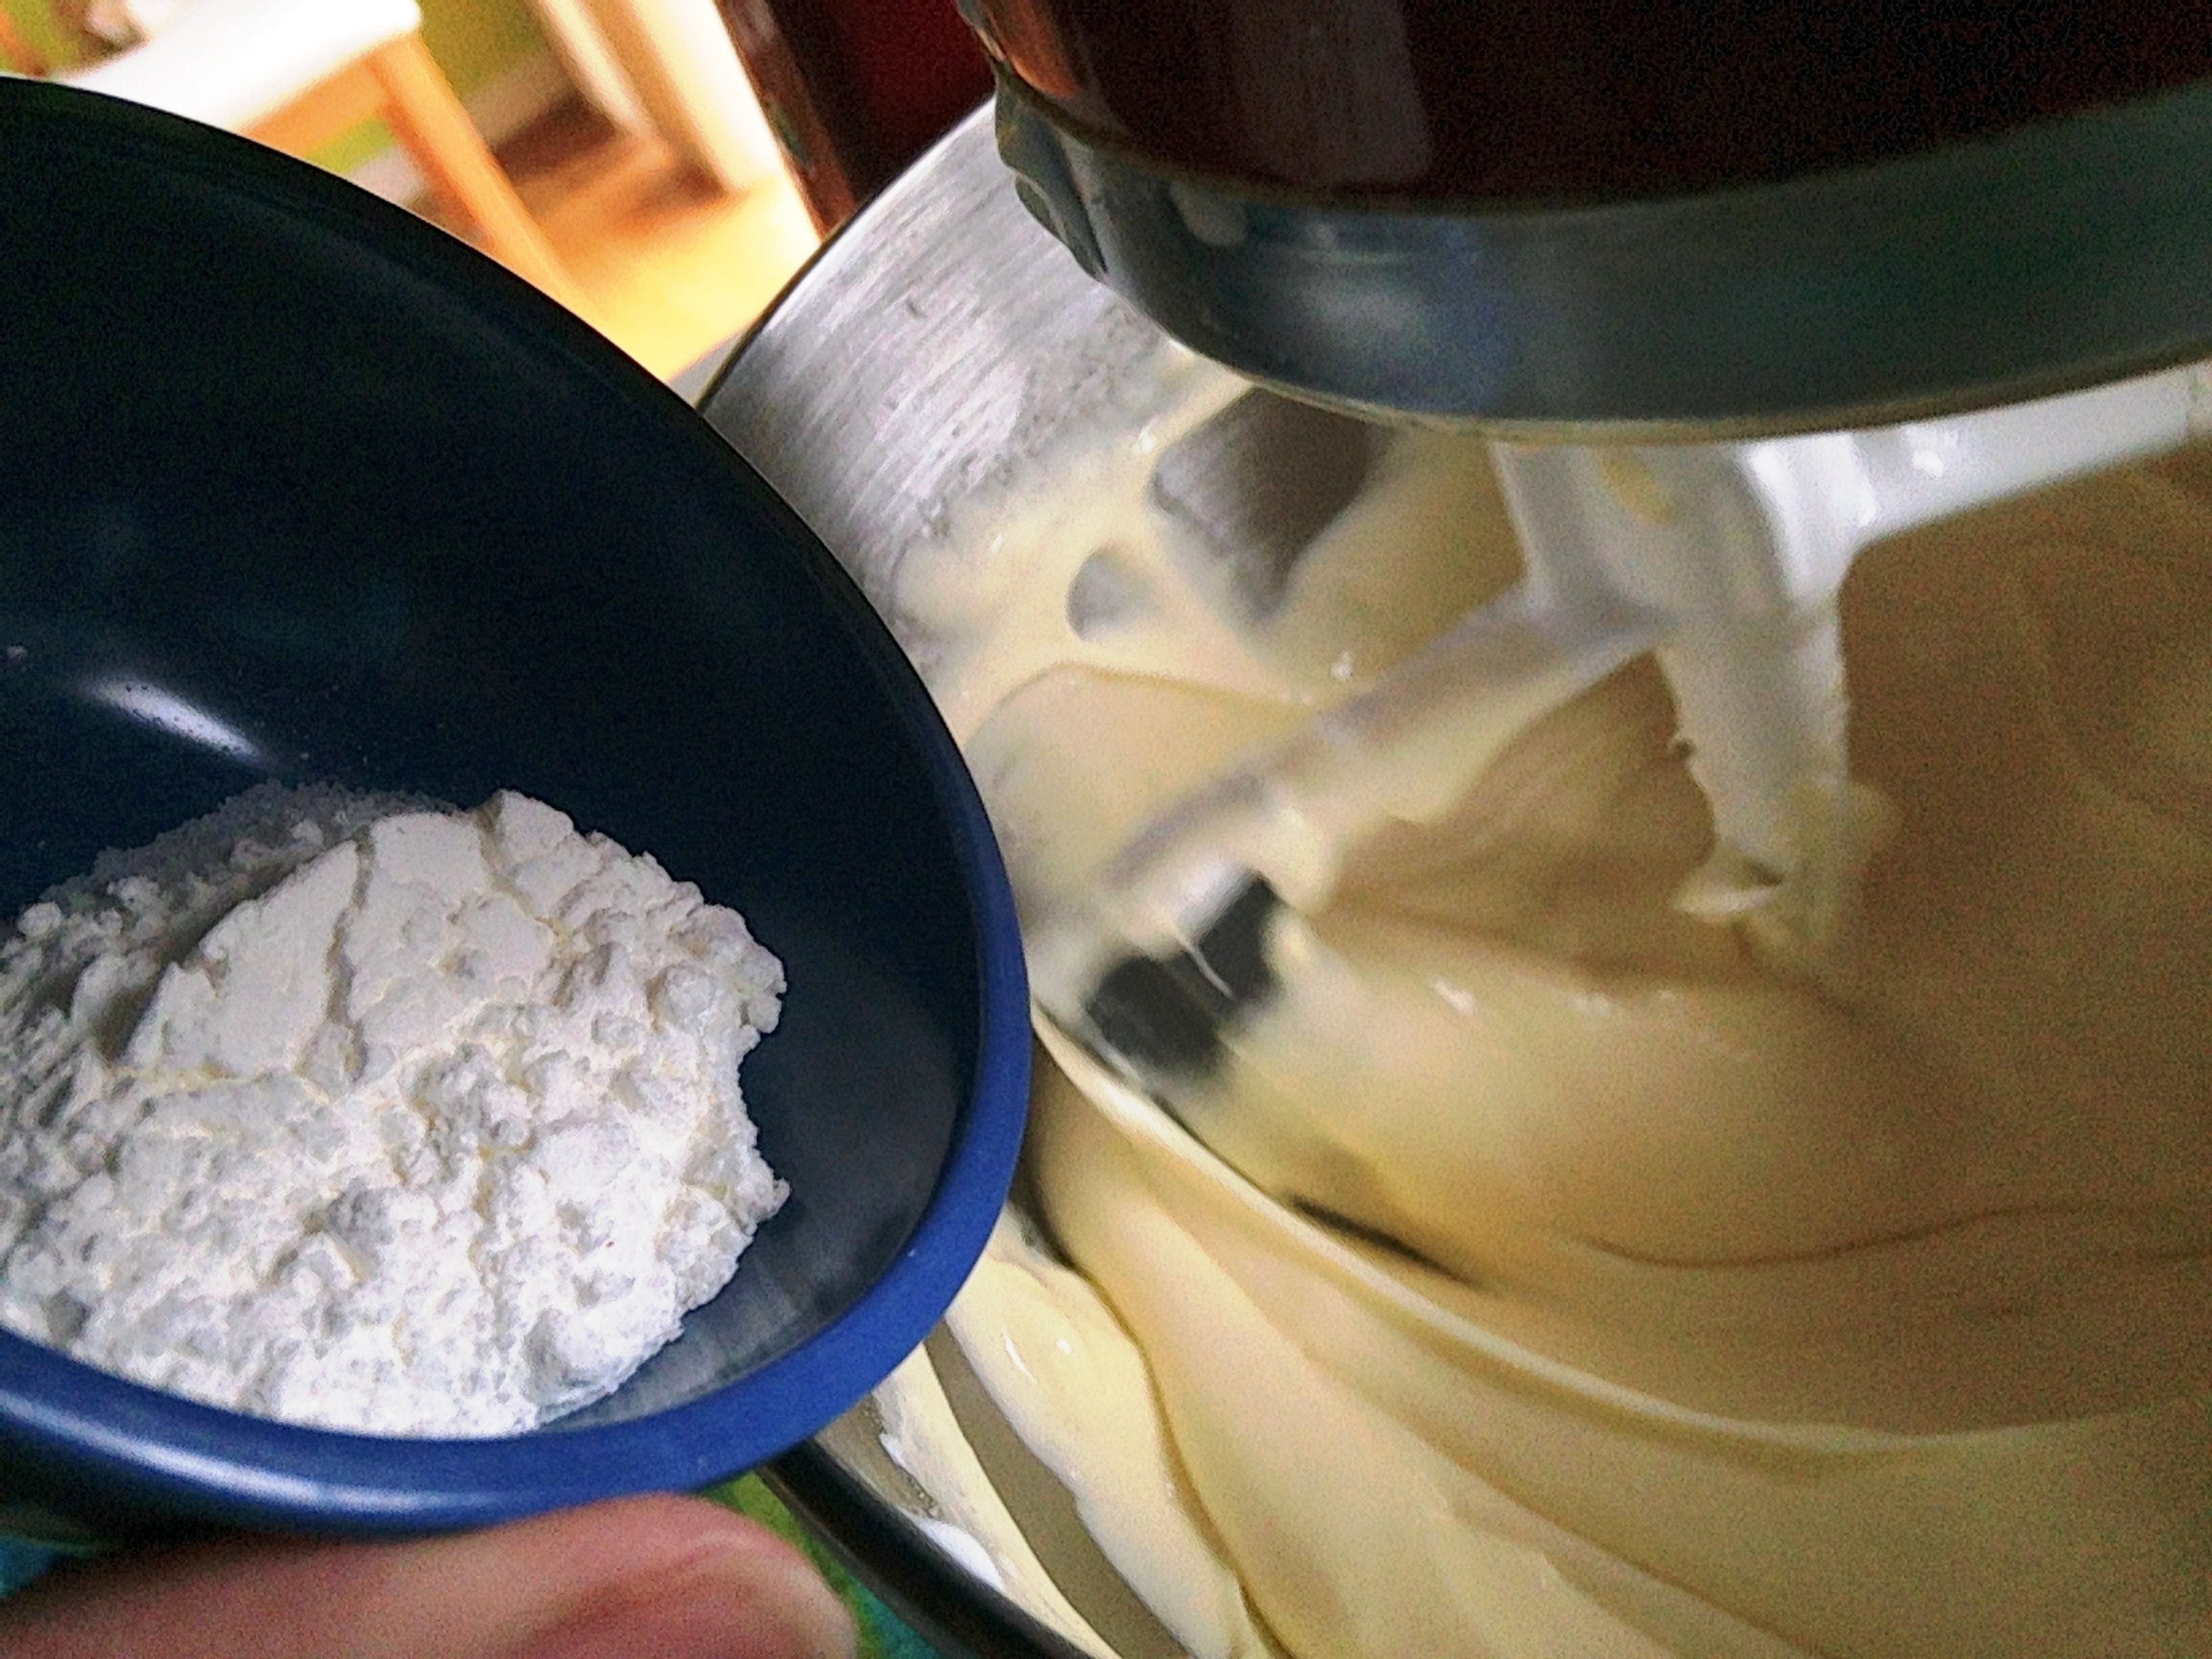
In a large pot add, milk, chips and vanilla, over med high heat, stirring constantly until almost melted, remove from heat and keep stirring until all the chips have melted.
Fold in chopped peeps, pour half into line dish, then top with mini peanut butter eggs, then top with the remaining fudge mixture, spreading to cover eggs.
Fold plastic wrap over top and refrigerate over night.
Let side out for an hour before slicing fudge then cutting into pieces.
This can be store in an airtight container in a cool place or refrigerator for up to two weeks…that’s if it lasts that long.

This was a HUGE hit with my family, it really didn’t hit the table before they were eating it.

2. Sweet Potatoes topped with peeps 

IMG_20130331_135302


Who hasn’t had sweet potatoes or sweet potato casserole topped with marshmallows, this one was a no brainier, add a little sprinkling of brown sugar, some pecans and top with a rainbow of bunny peeps.  How fun!!!

Ingredients – Simple

IMG_20130331_093025

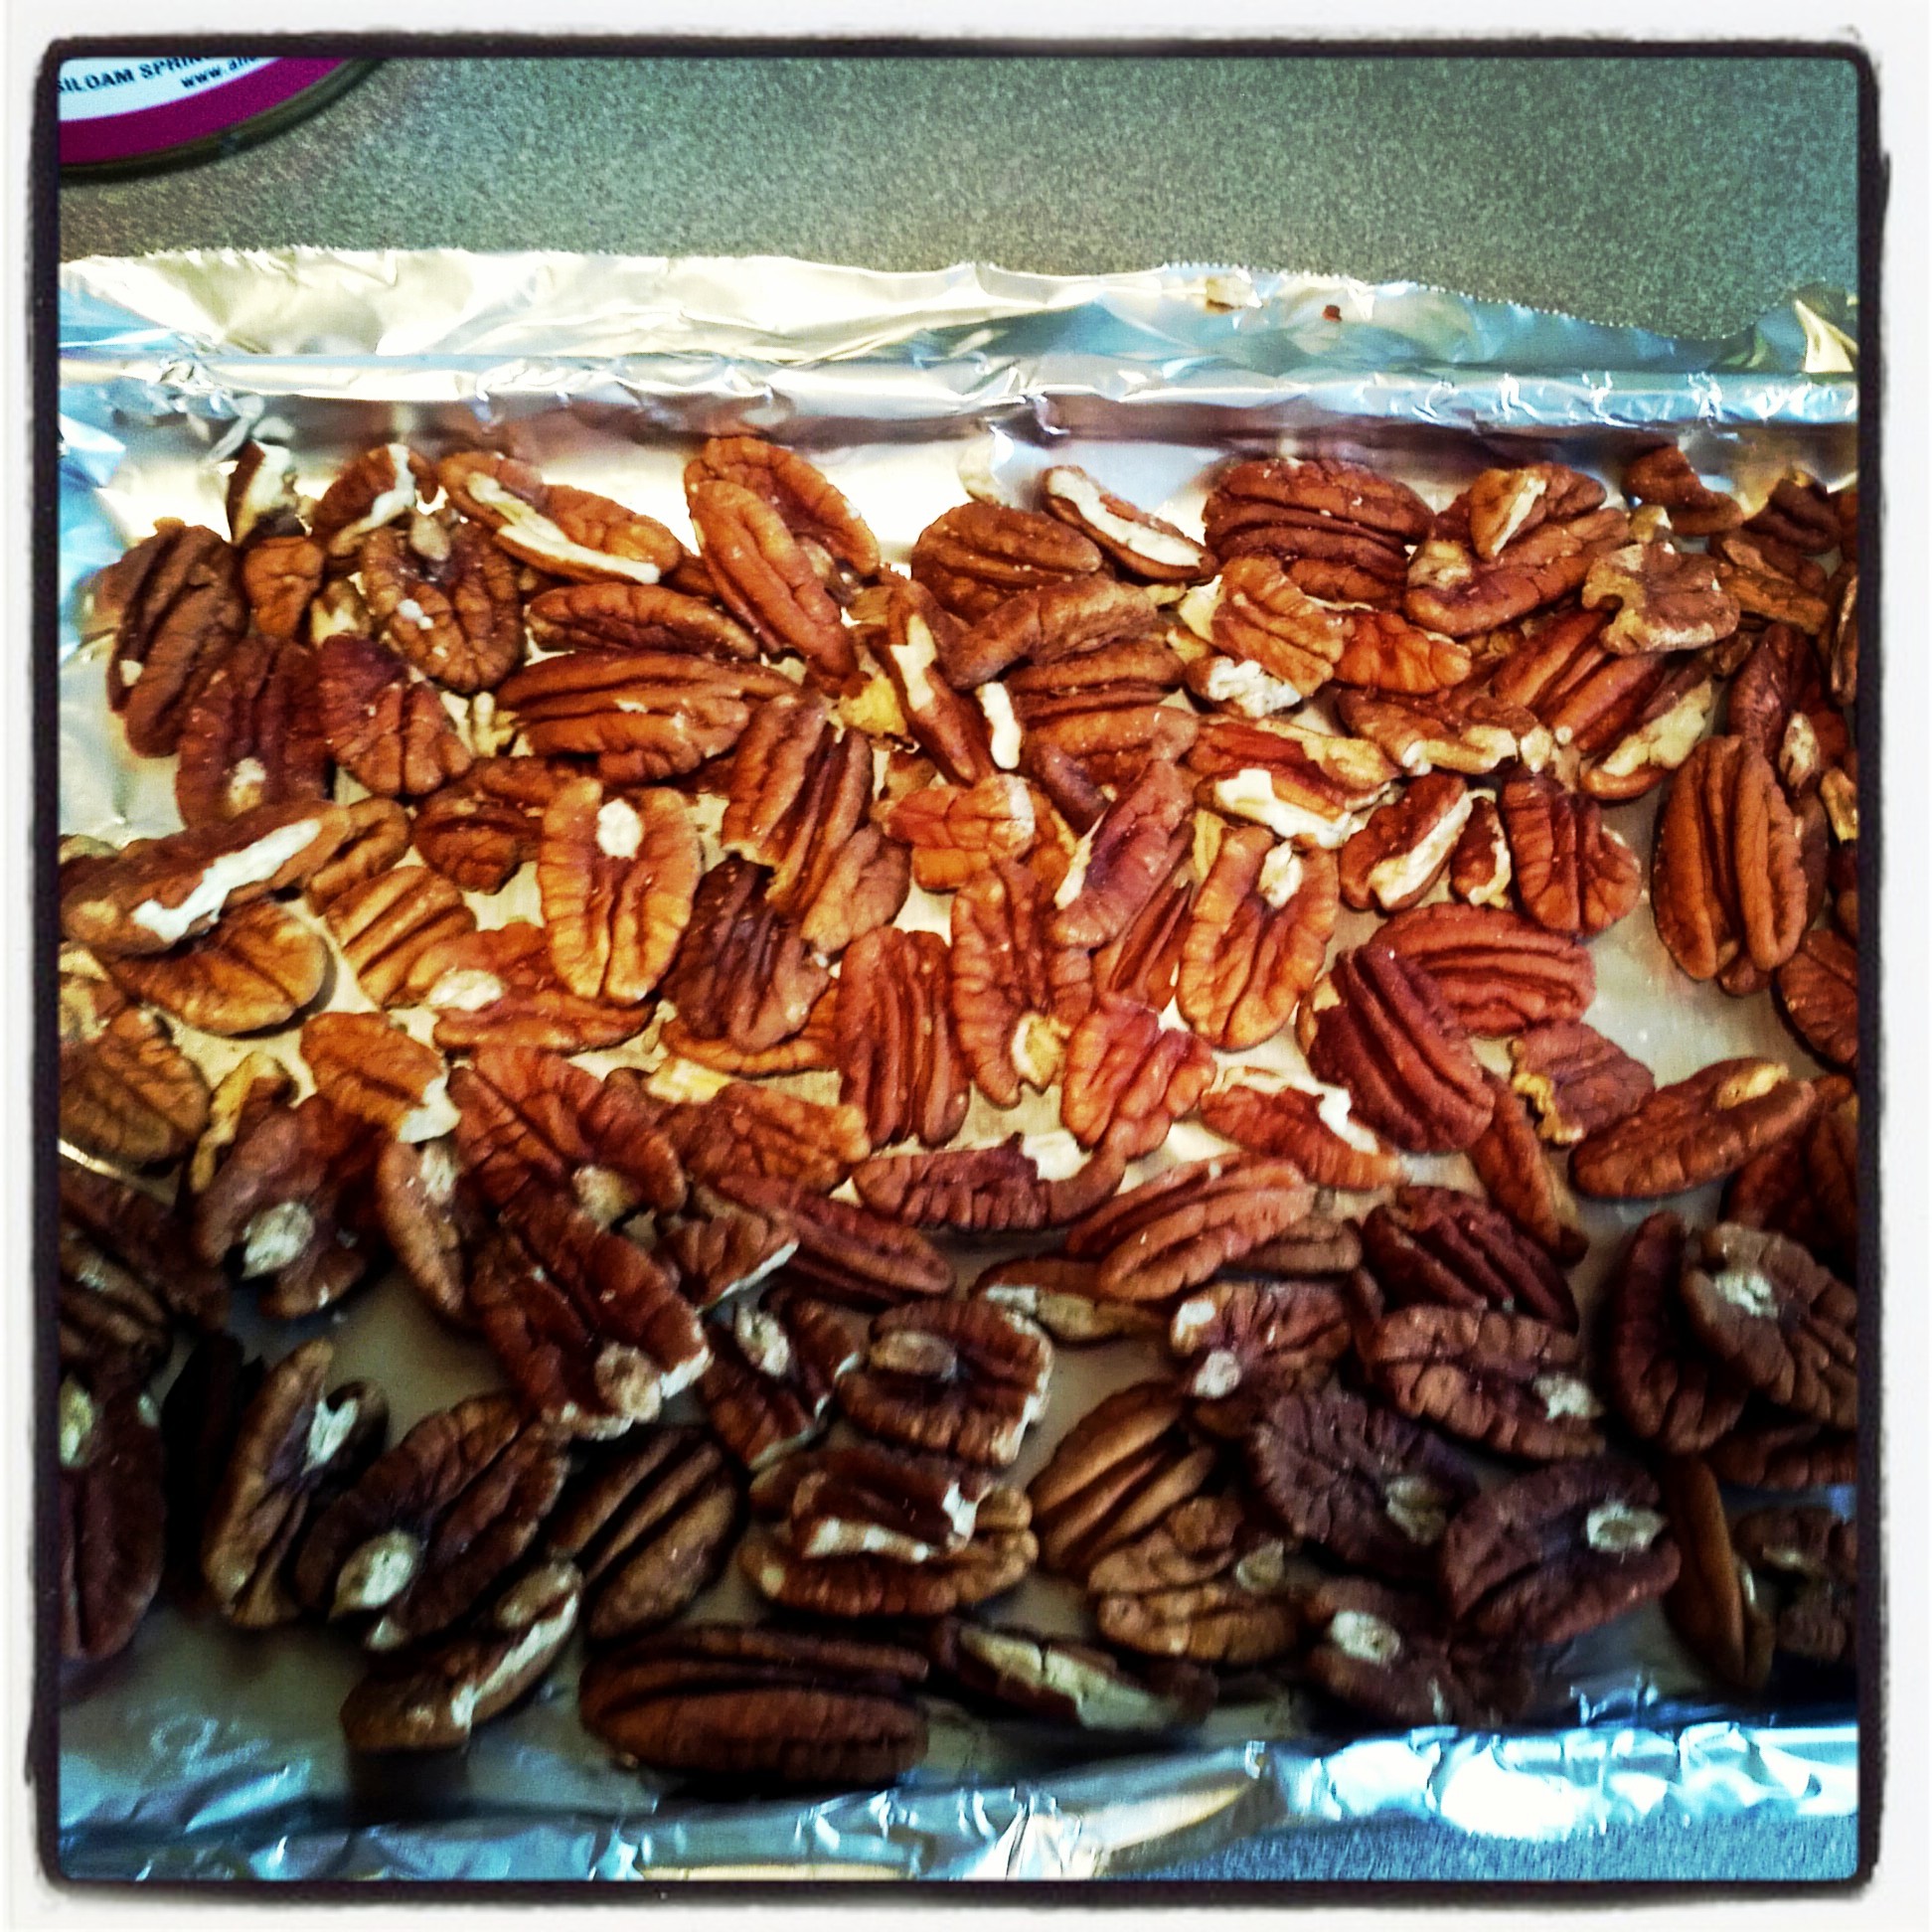
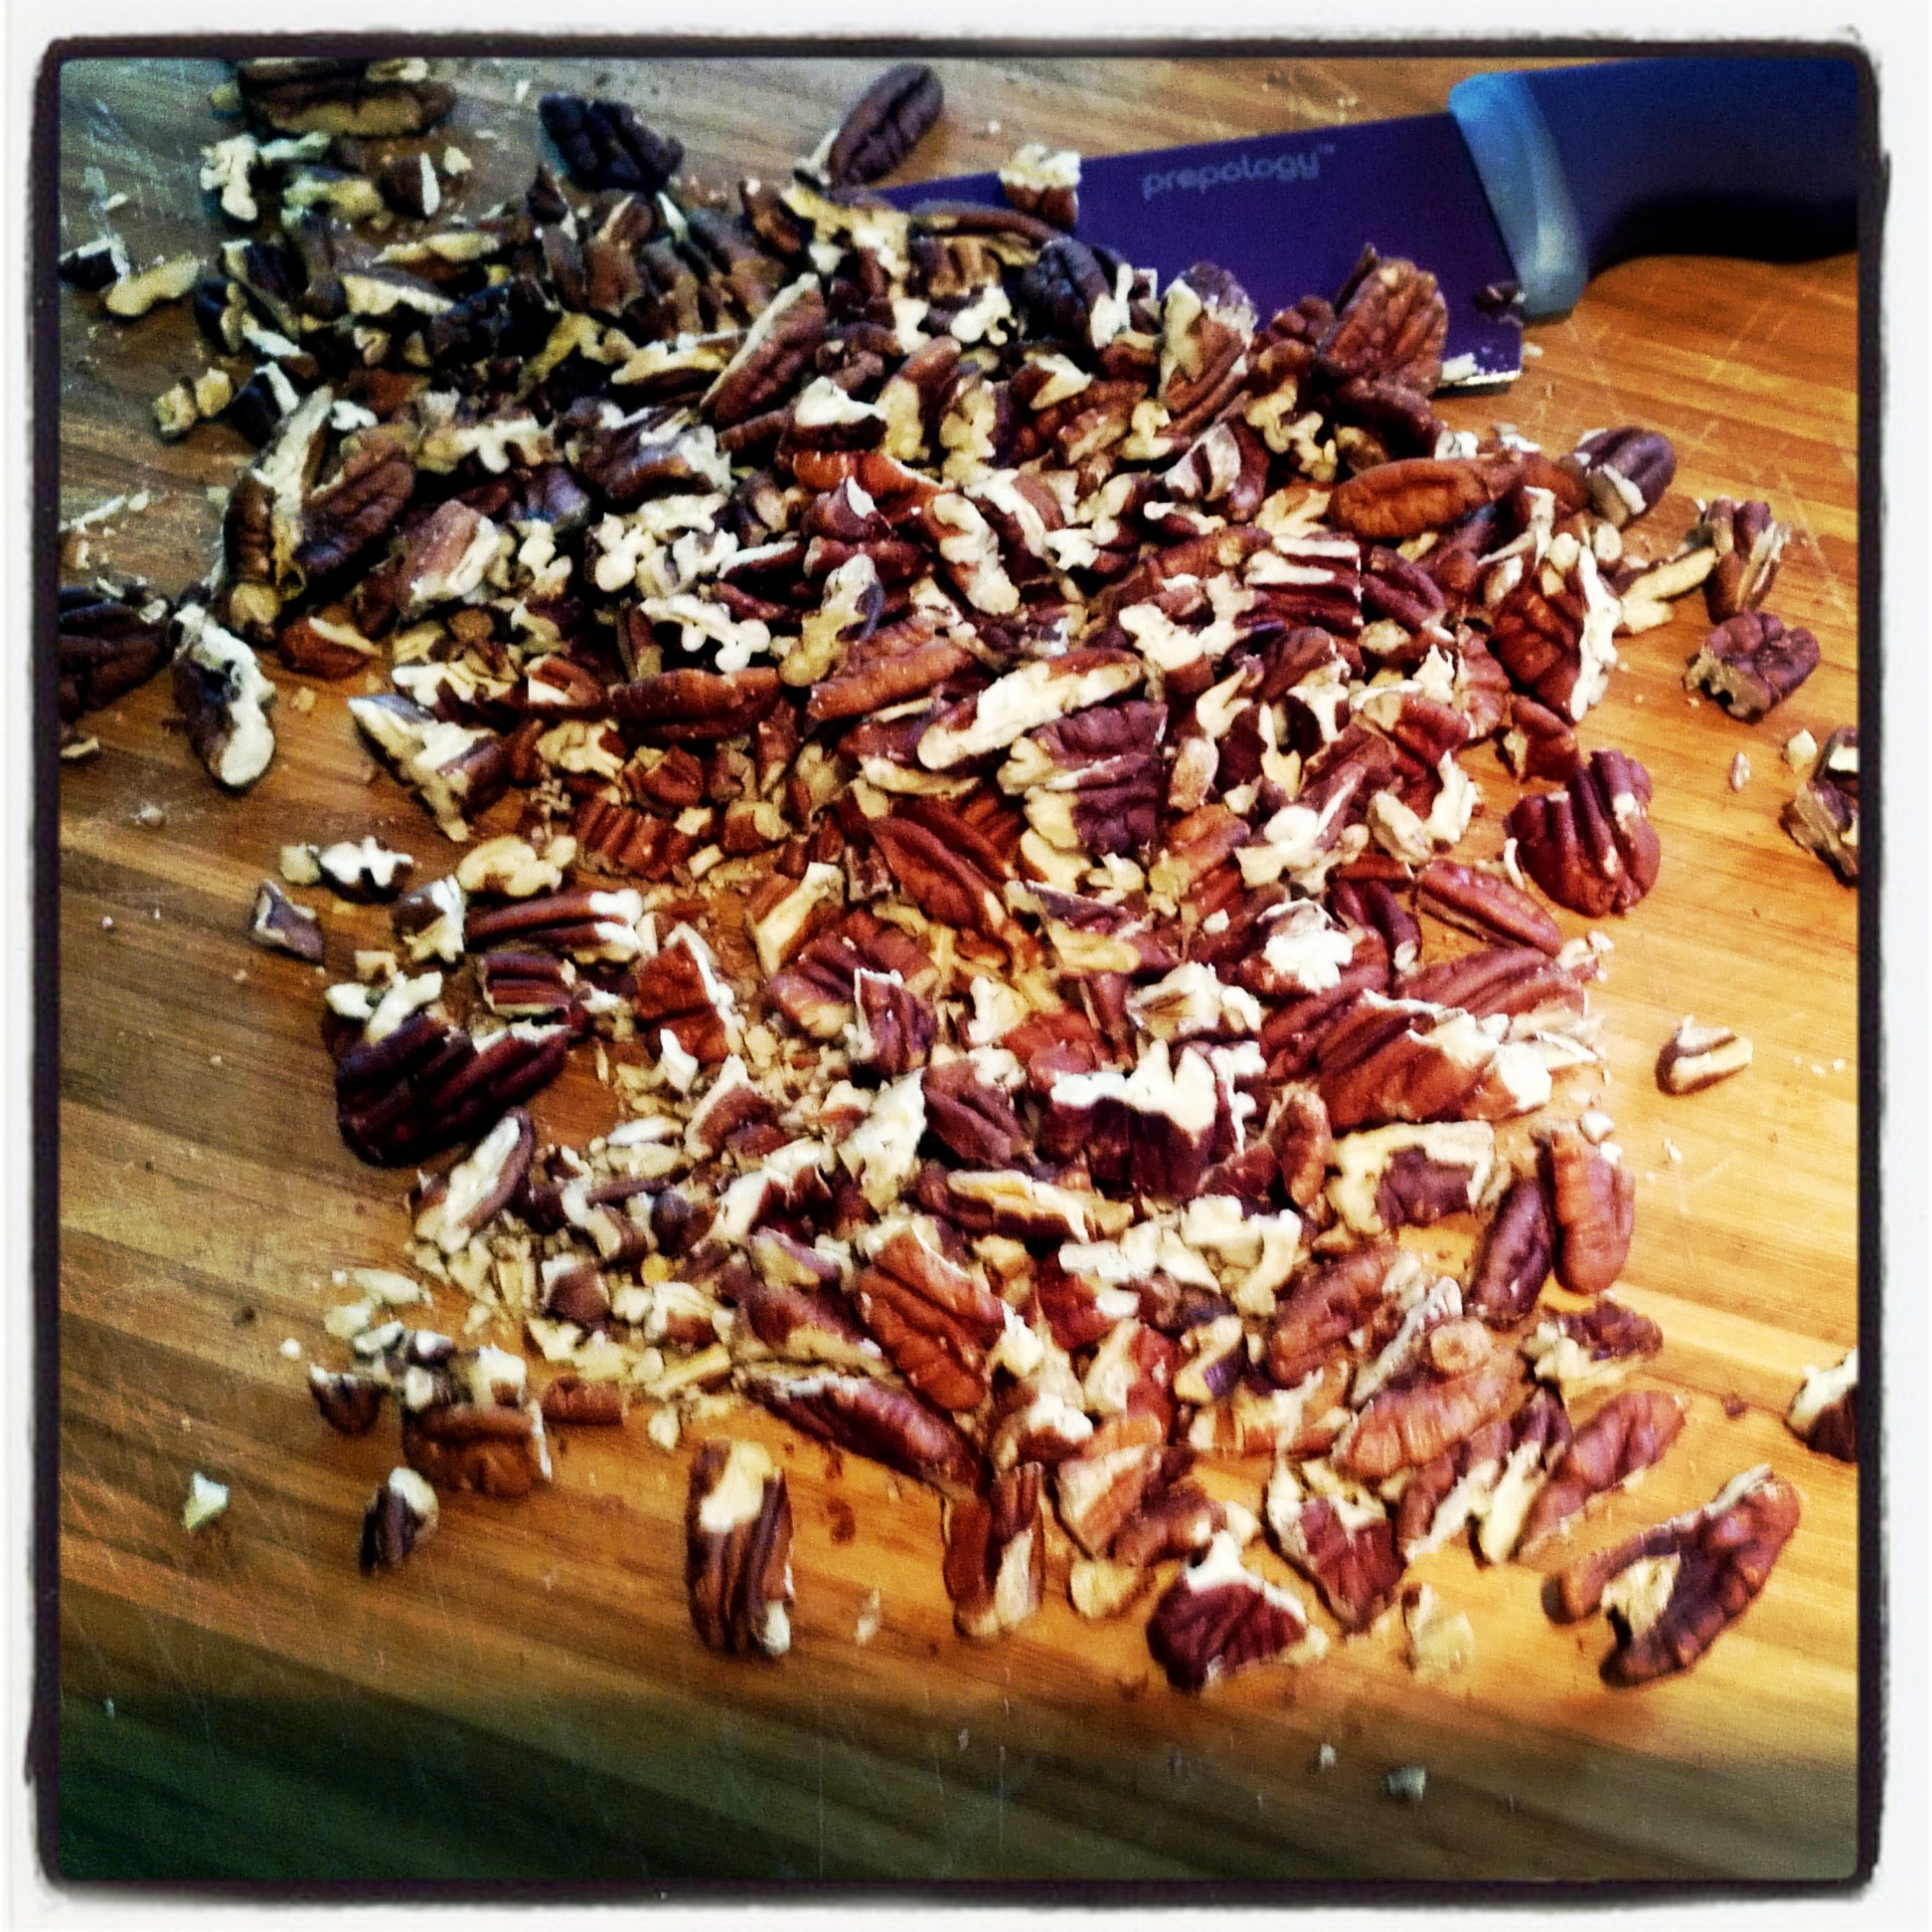
toast pecans                           give a rough chop

IMG_20130331_093559  IMG_20130331_100149

Drain potatoes     –                           then with a potato masher, mash potatoes

IMG_20130331_095221                     IMG_20130331_095708

add pecans and brown sugar, mix to combine

IMG_20130331_100252    IMG_20130331_100442

pour into a baking dish and bake 20 mins

IMG_20130331_133445

then top with peeps and bake another 20 mins

IMG_20130331_133754

done

IMG_20130331_135100

serve it up    IMG_20130331_135141    IMG_20130331_135302

Recipe

2 large cans sweet potatoes, drained
1/3 cup brown sugar
1 good cup of pecans
1/2 tsp salt

peeps

In a large bowl add potatoes, mash, add brown sugar, pecans and salt, mix to combine.  Pour into baking dish, bake at 350 degrees for 20 minutes, then add peeps to the top and bake another 20 minutes.

Serve it up!!  This was good, the peeps give a little bit of a vanilla flavoring to the potatoes which adds nicely, and I like the sugary shell of the peep…Two Thumbs Up!!!
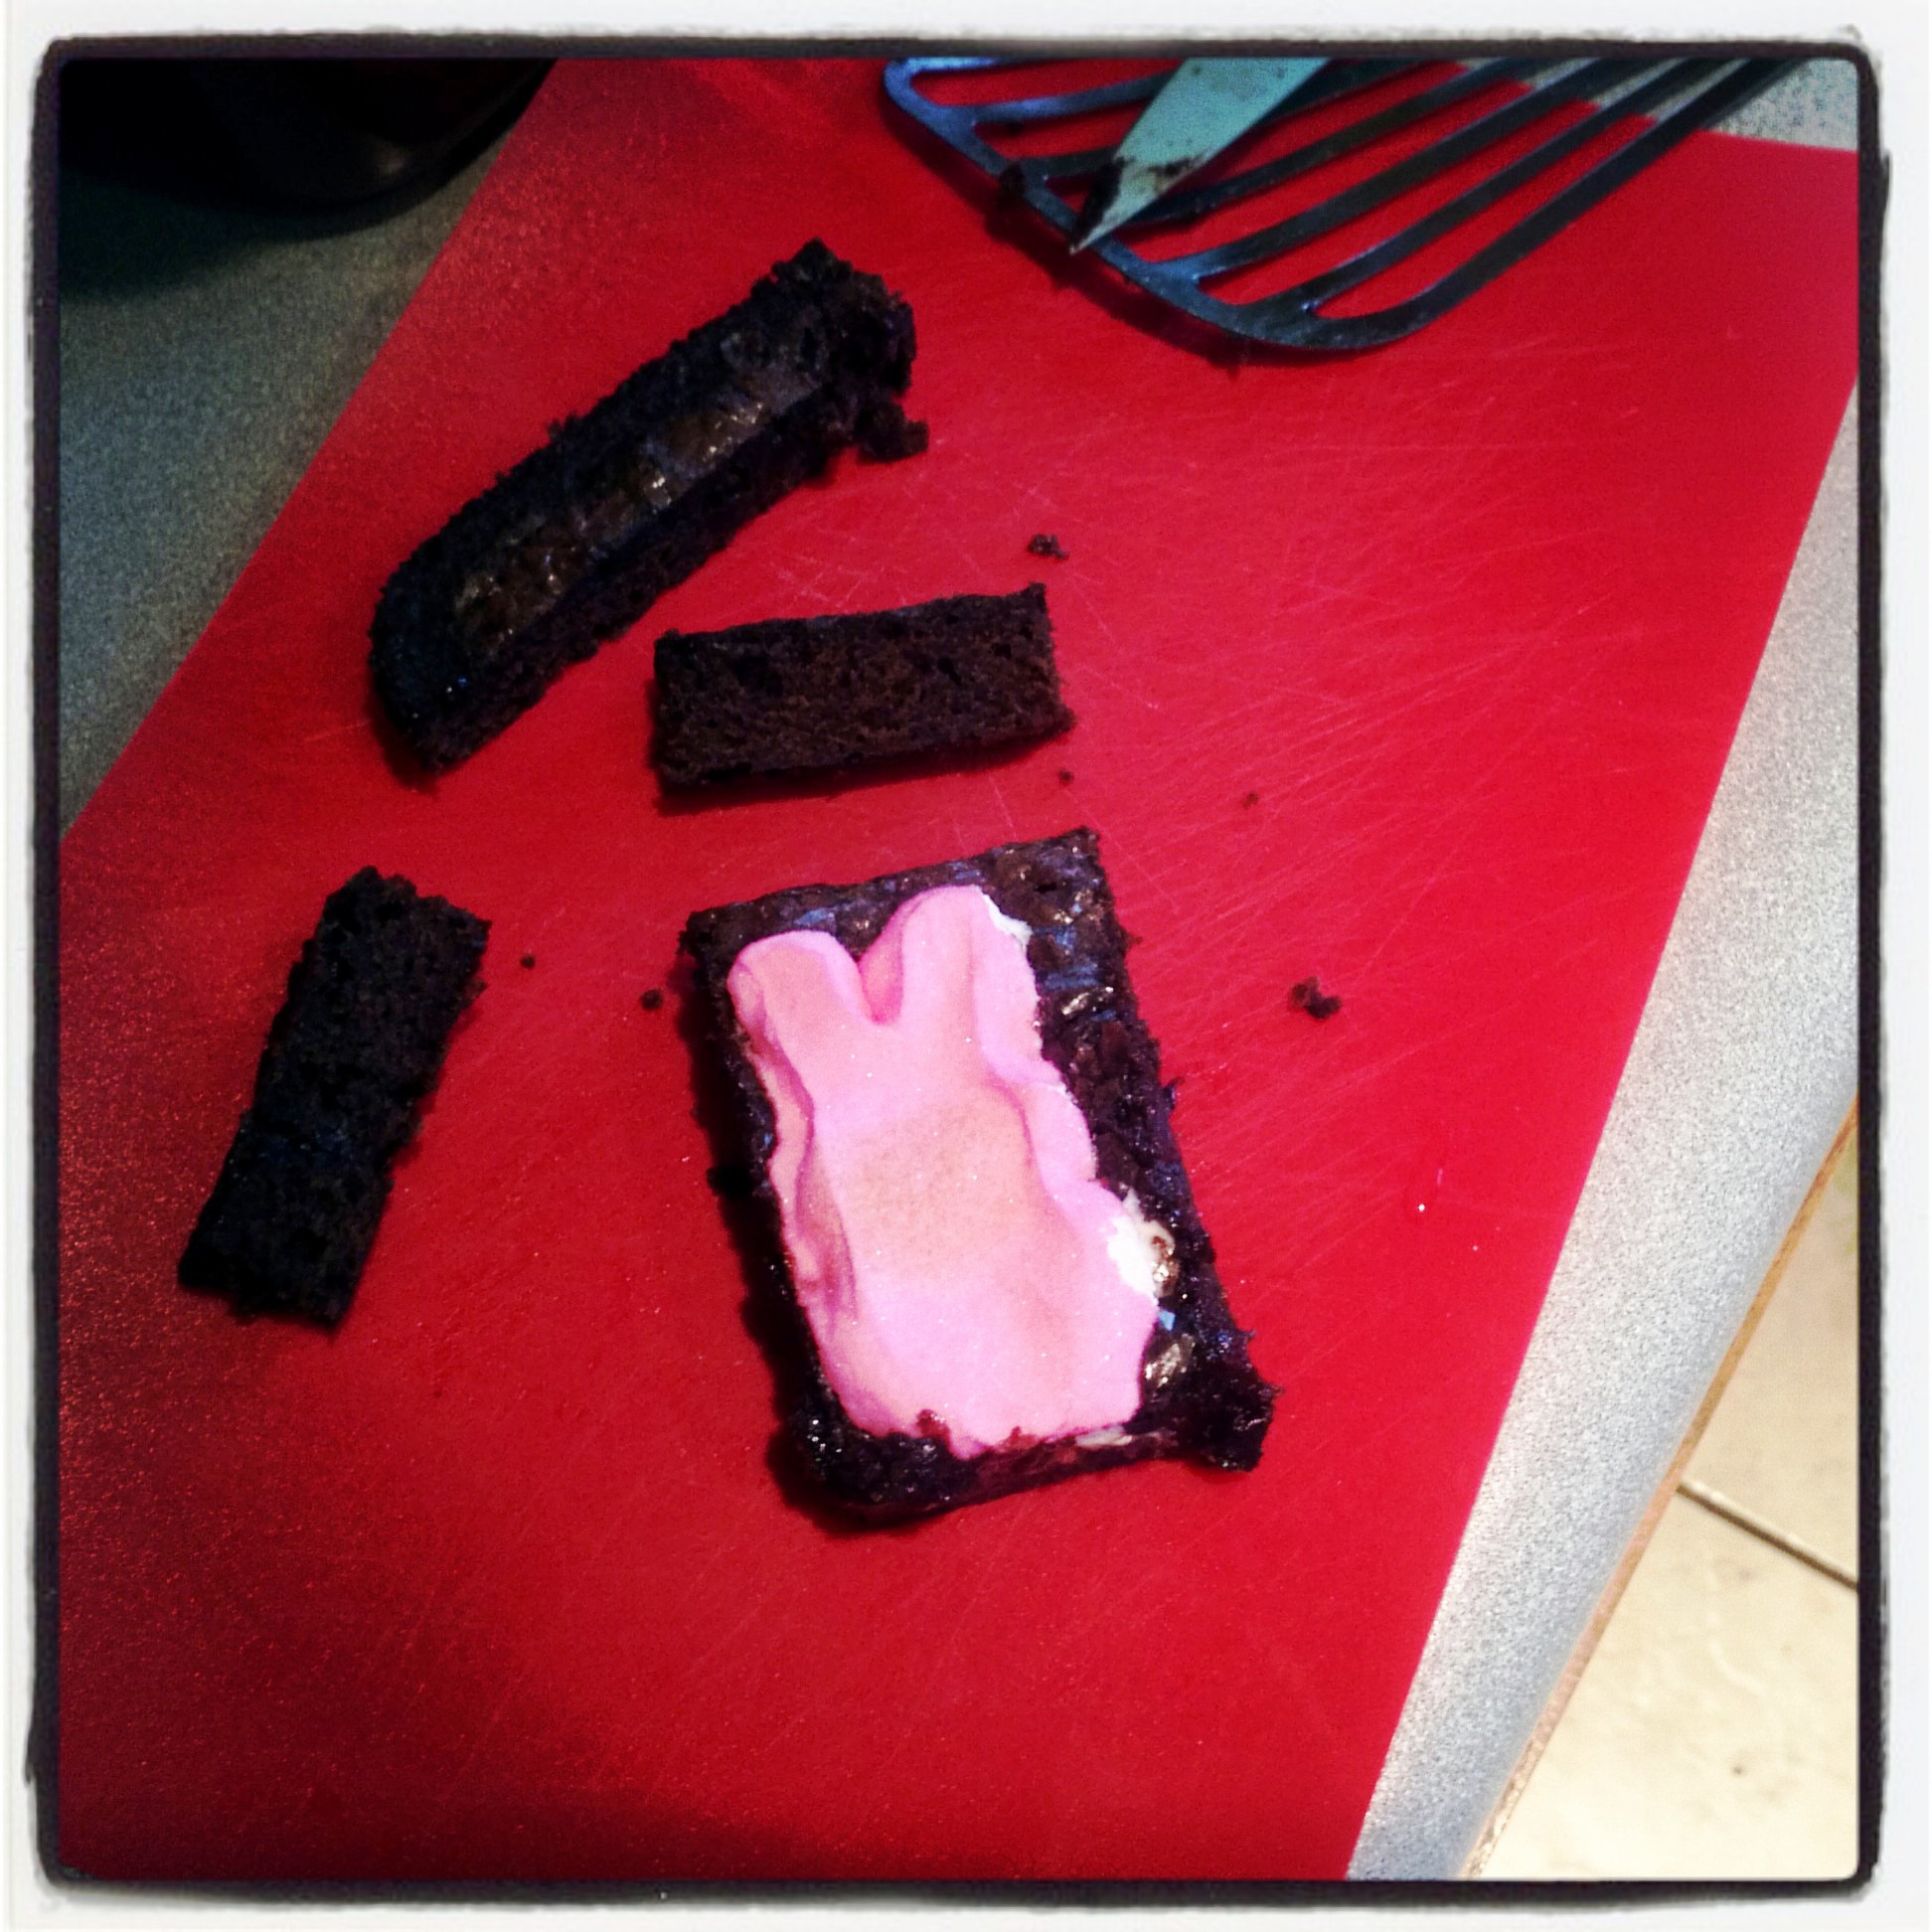
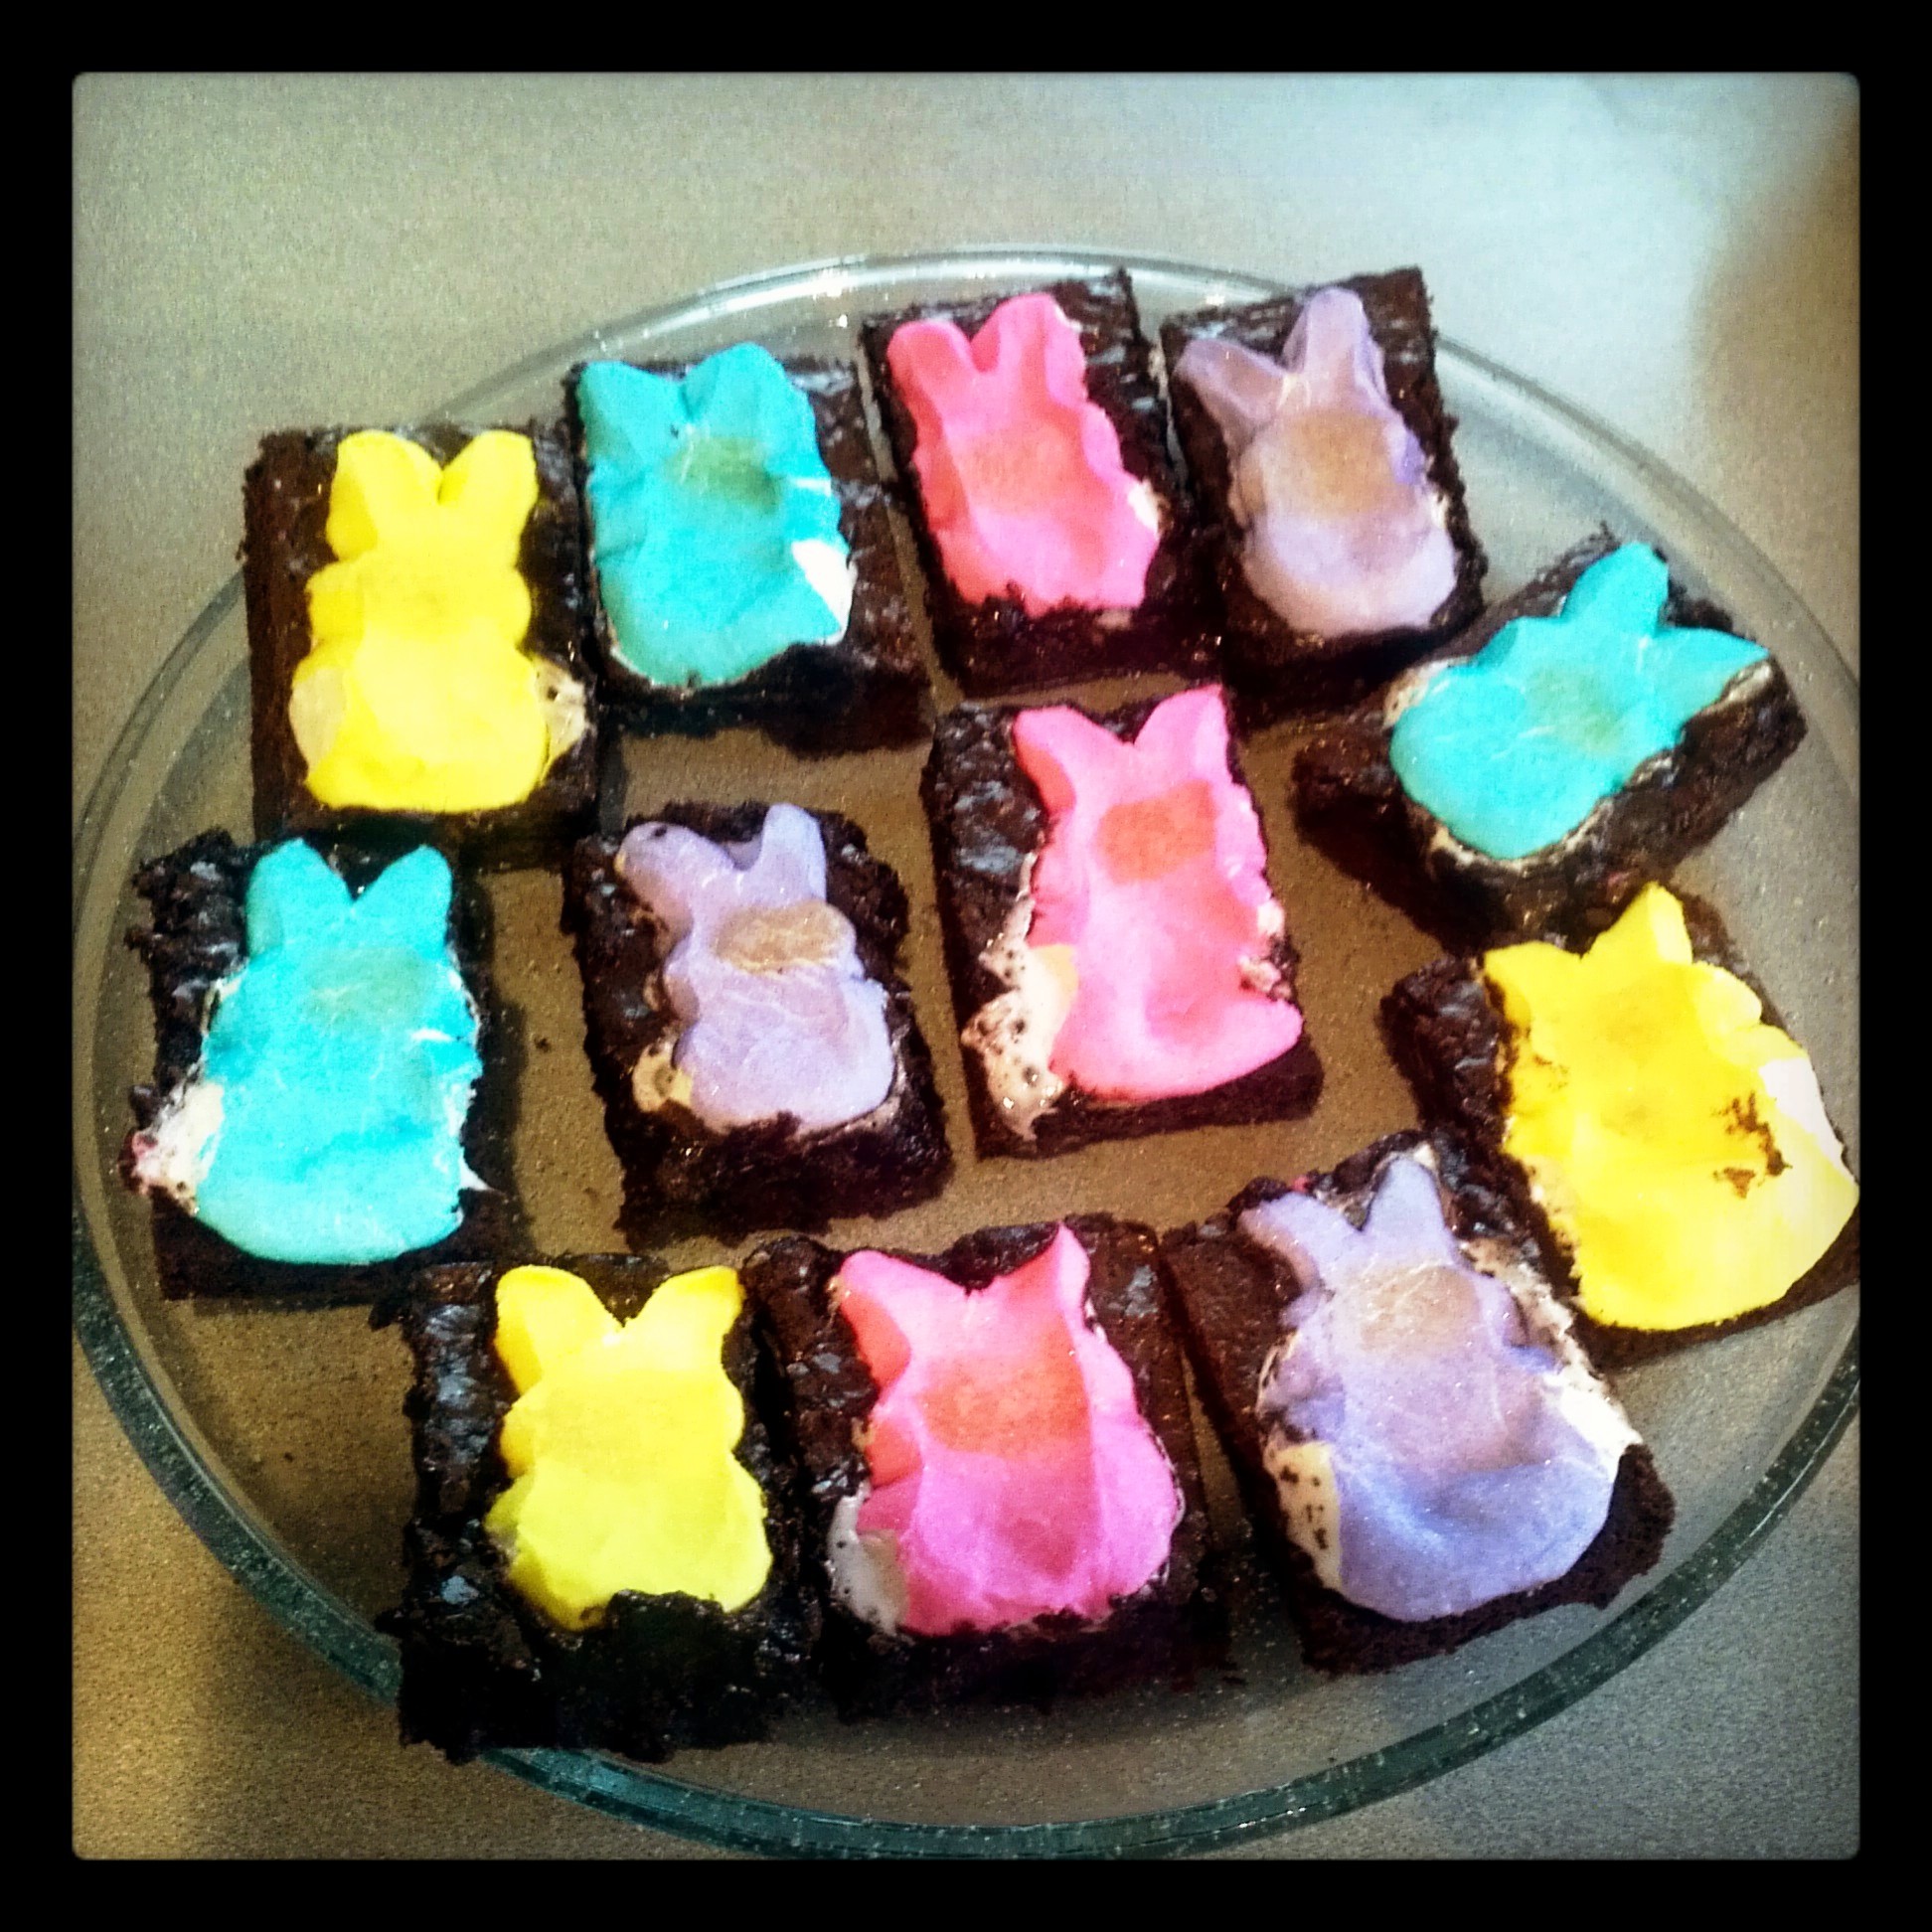
3. Fudge Brownies   

IMG_20130330_173917

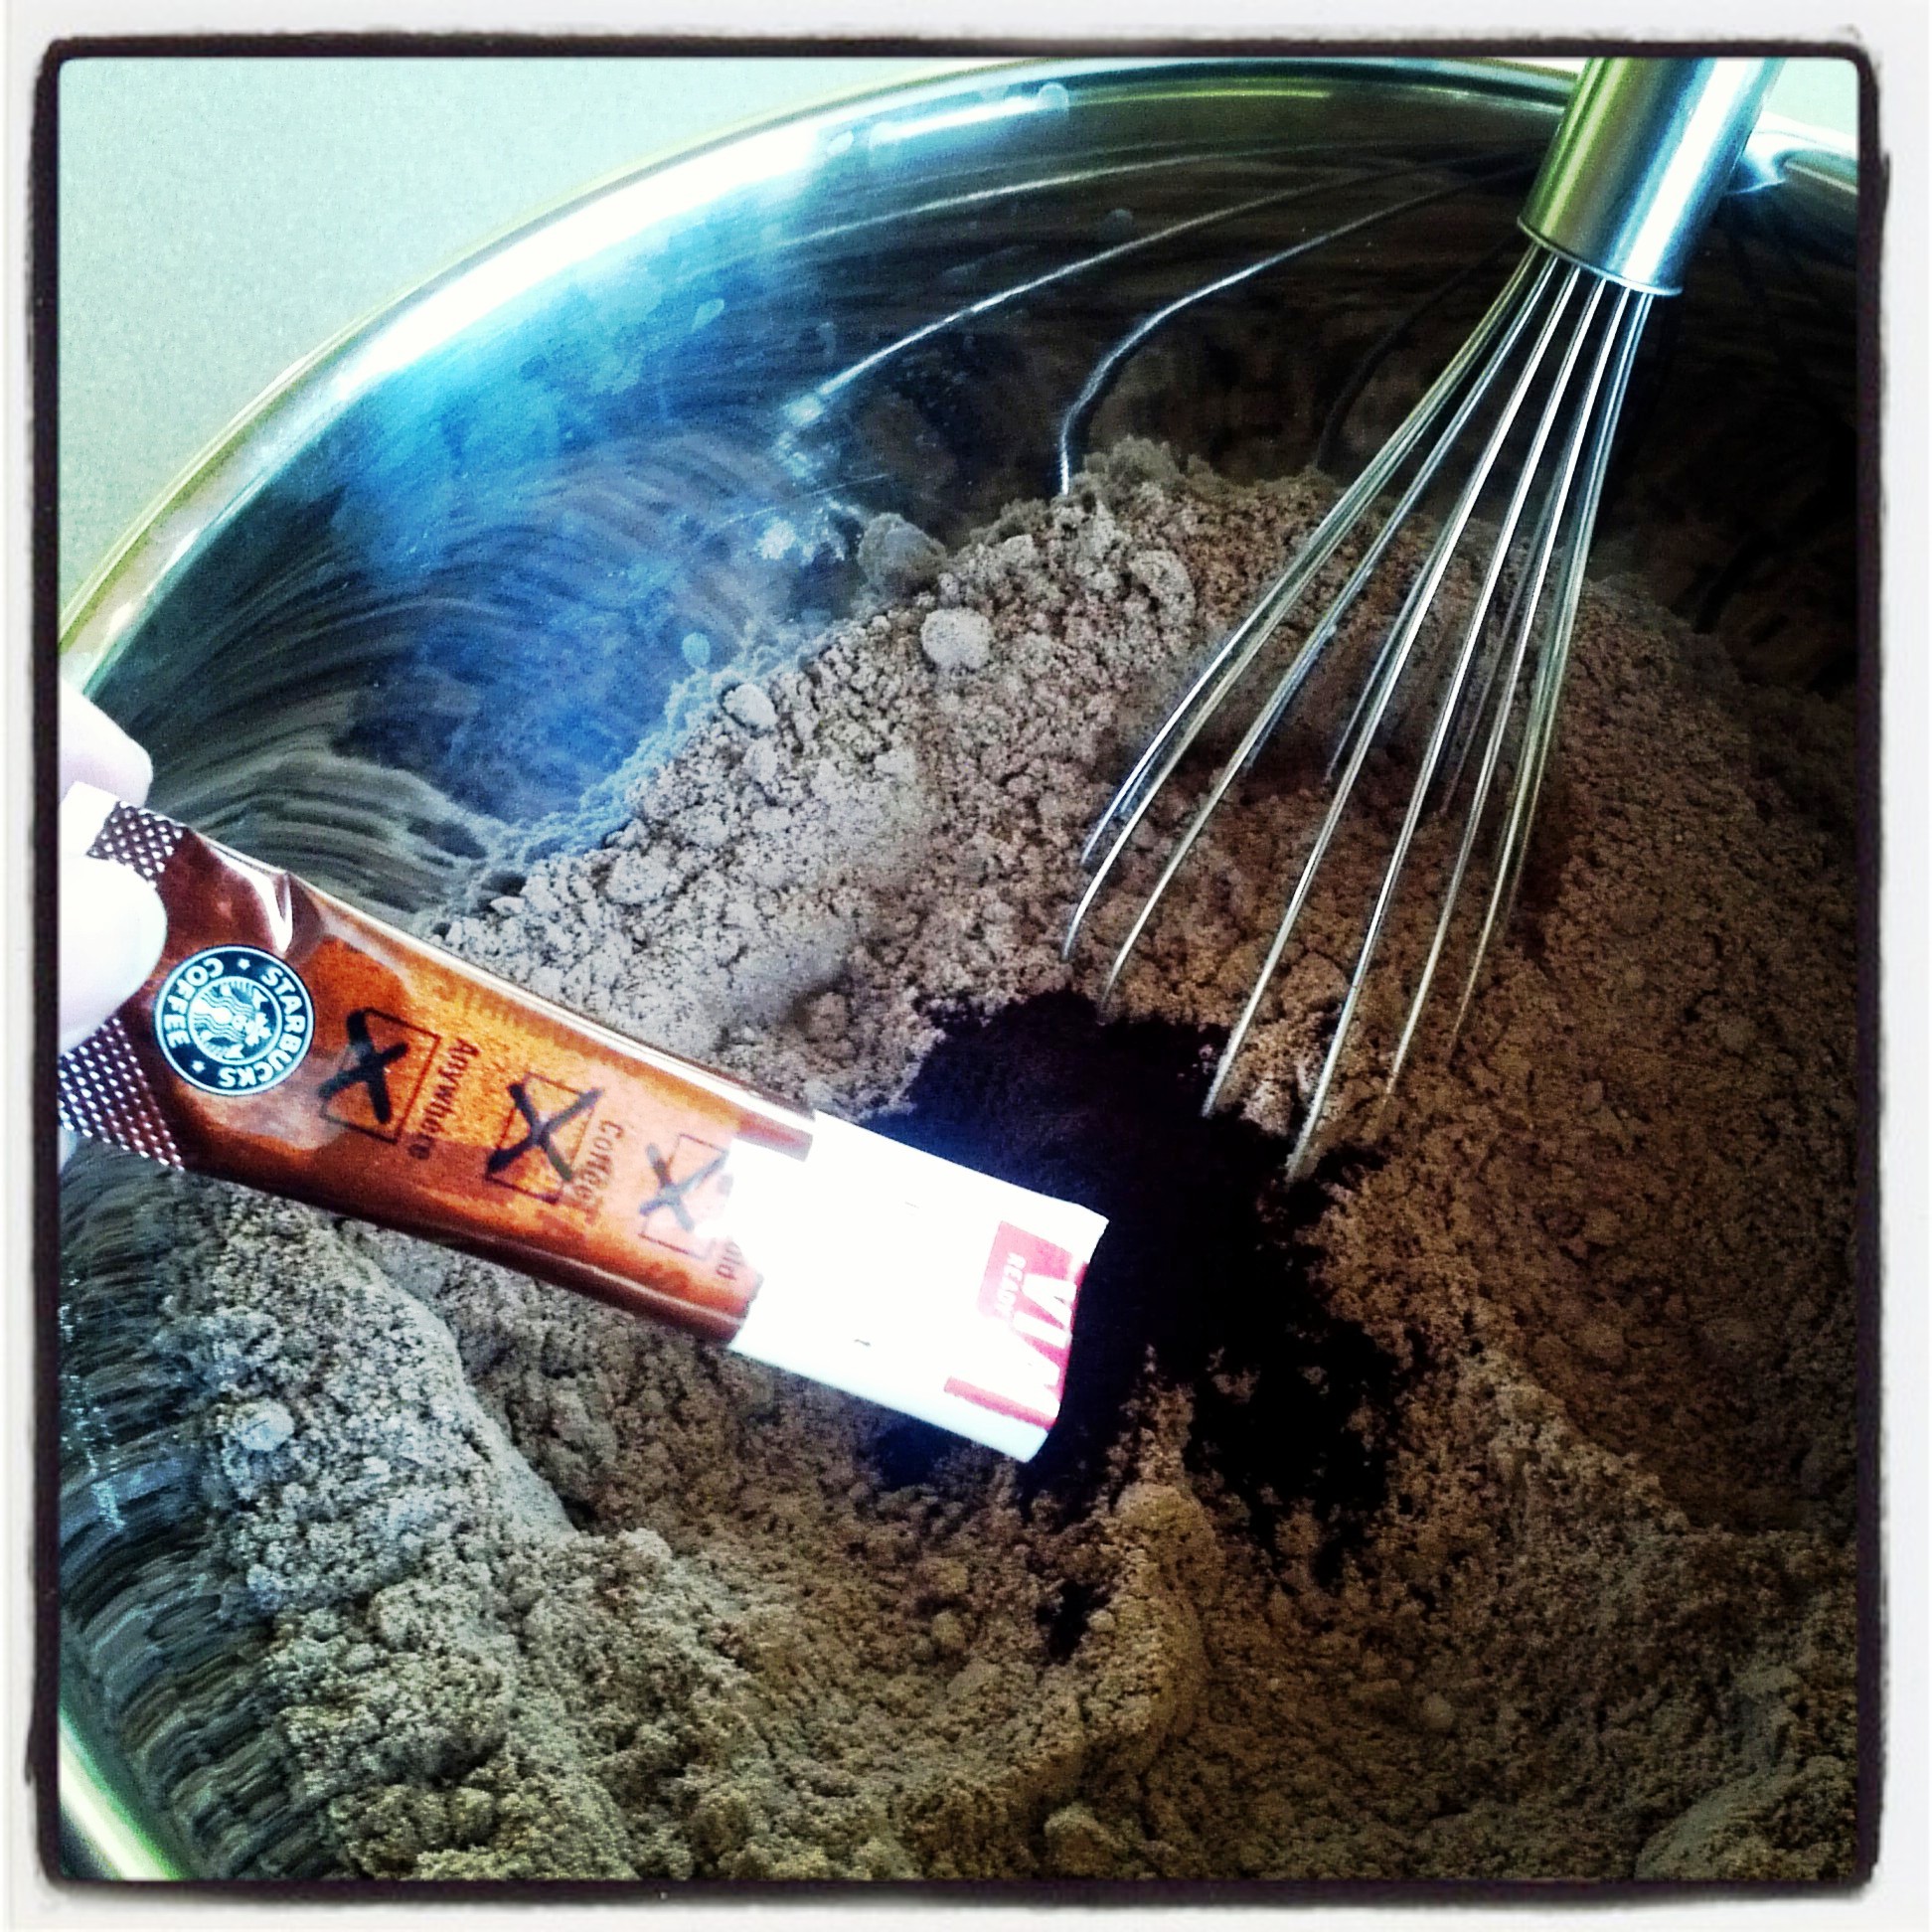
Okay I know its close to the fudge, but indulge me on this one…I’ll made these with some coffee and made them Mocha Fudge Brownies…yes you know I love coffee and this will be quick with a brownie mix…oh and if you love coffee and chocolate go back and check out my Dark Chocolate Coffee Nut Cookies…these were heavenly!!!

Ingredients – just used a box mix

IMG_20130328_173652

added the coffee & whisk                                           then  add oil & eggs

IMG_20130328_180947                                              IMG_20130328_181200

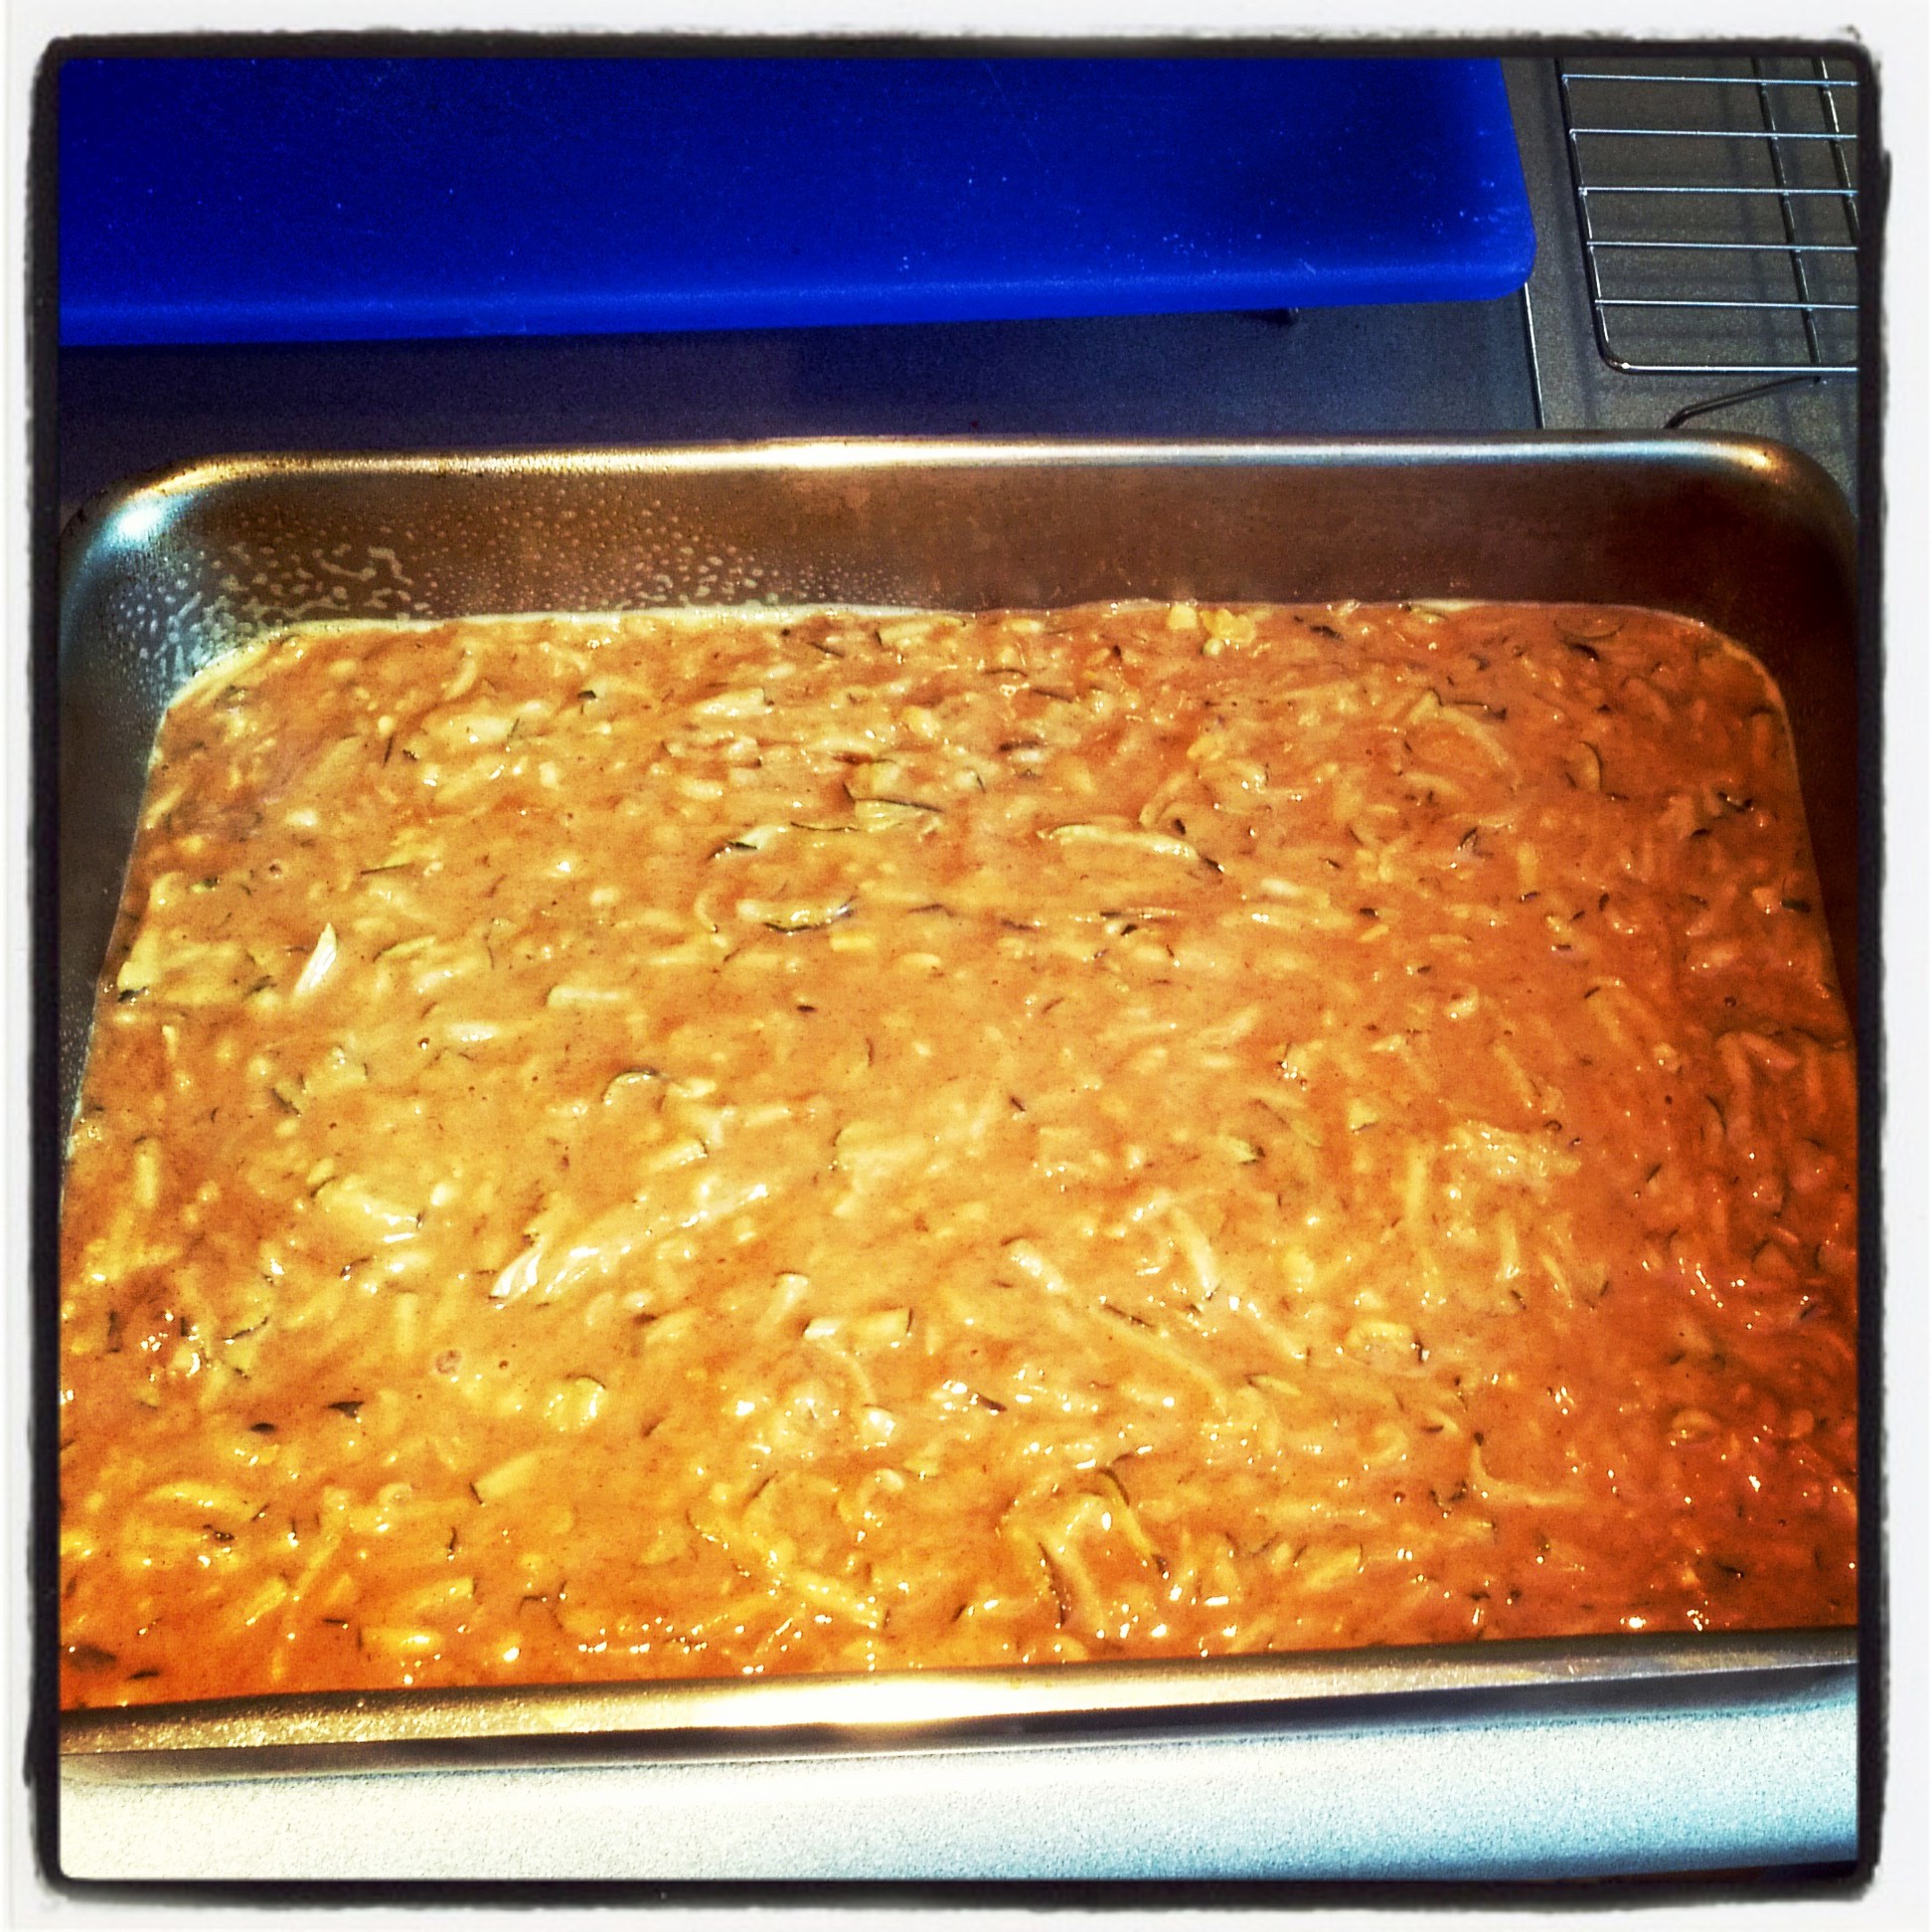
mix, then put in baking dish and bake

IMG_20130328_181305

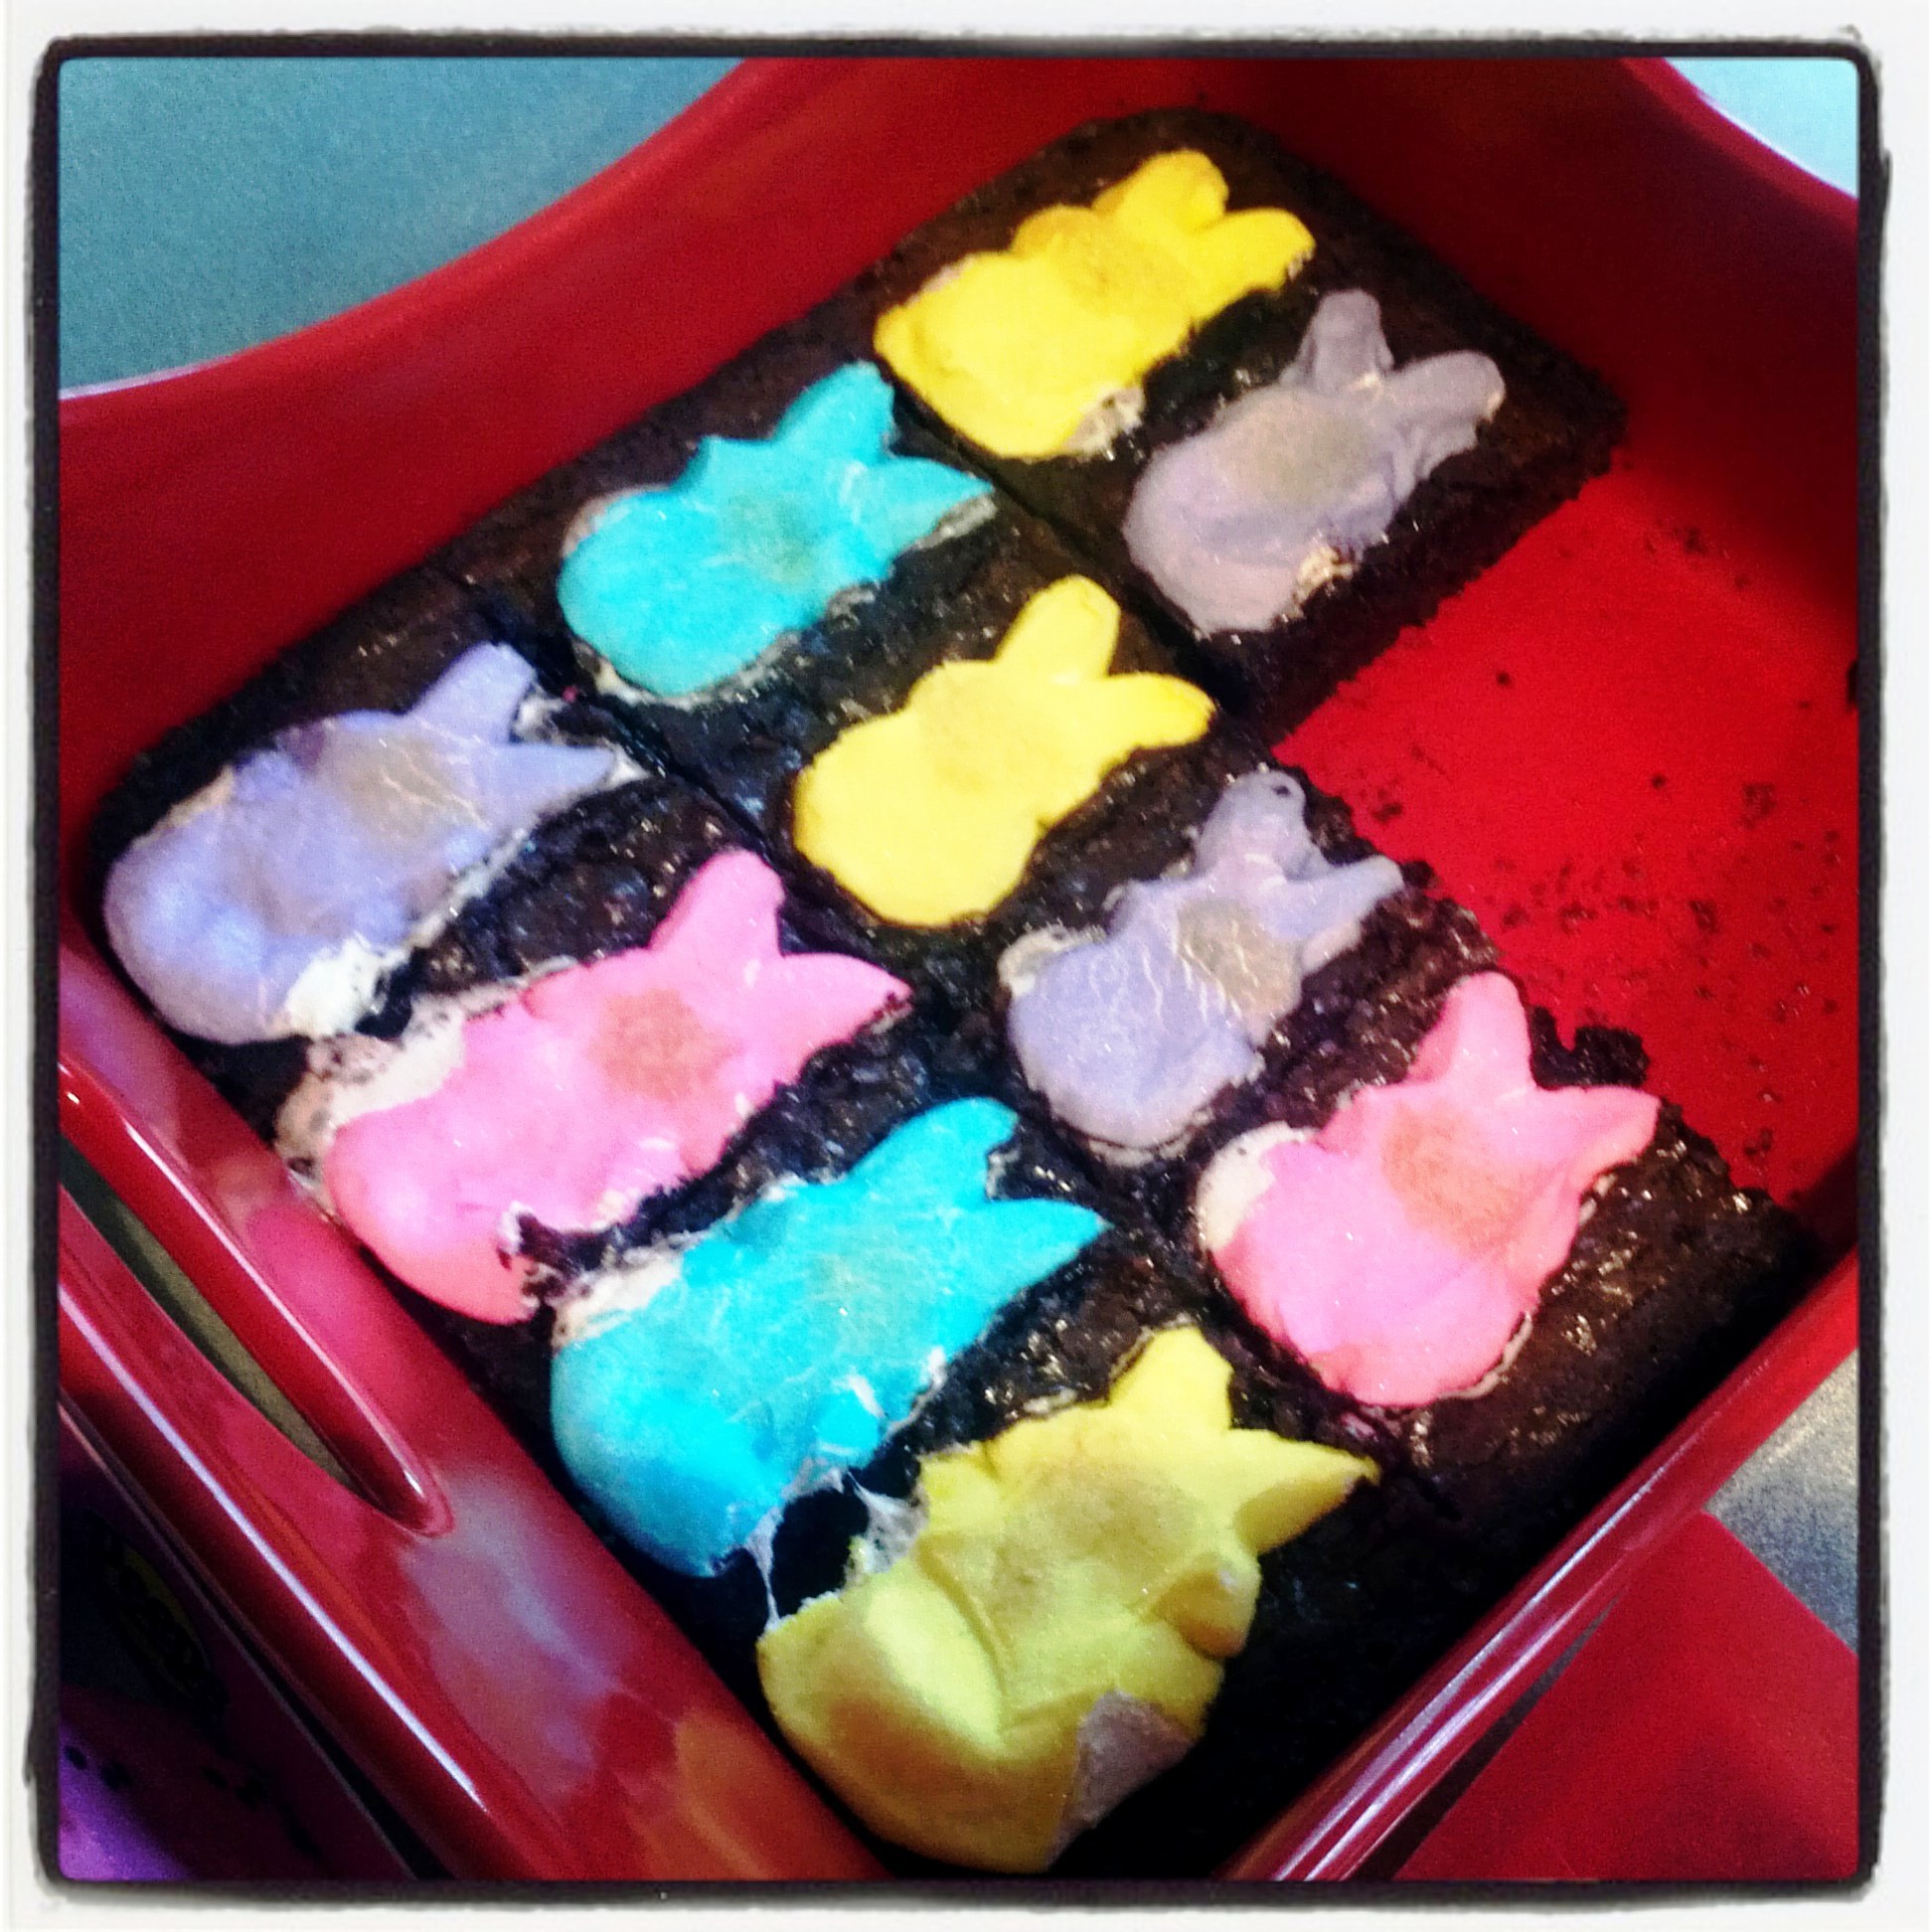
about 3/4 of the way done, top with your peeps and bake the rest of the way

IMG_20130330_172619                               IMG_20130330_172829

let cool

IMG_20130330_173917

slice and serve   IMG_20130331_100904

IMG_20130331_100843 I trimmed the edges to square them off

IMG_20130331_101508

Recipe

Box brownie mix, following directions on the box
1 instant coffee stick (next time I would use 2)
peeps
Pour mix into baking dish, bake as directed, but when about 3/4 of the way done, add peeps, just push done a little to nestle the peeps in the mix.

Bake the rest of the way, let cool then slice and serve.
These were a BIG hit for sure…Gooey and Sinful but Heavenly!!

Oh and speaking of Heavenly!!

4. Heavenly Hash or some call it Ambrosia Salad

IMG_20130331_131812

I can’t believe I thought of this last, I love “Heavenly Hash” which is what we called it, my Grandmas (my Dad’s Mom) would make this for every holiday.
Growing up it really wasn’t a holiday dinner without it, whether it was Mother’s Day, Thanksgiving, Christmas or Easter, there is was on the table in a big bowl, this white fluffy goodness with fruit, marshmallows and cherries!!!
Oh the memories for sure!!!
My Grandma has pasted since then, but boy I sure do miss those times that we would go to her house, me and my cousins would love to play all the way up on the 3rd floor.
Of course they were older and would tease us young ones about house being haunted (which is was not)…but it was always great times and wonderful memories that I will never forget!!!

Ingredients

IMG_20130331_090308

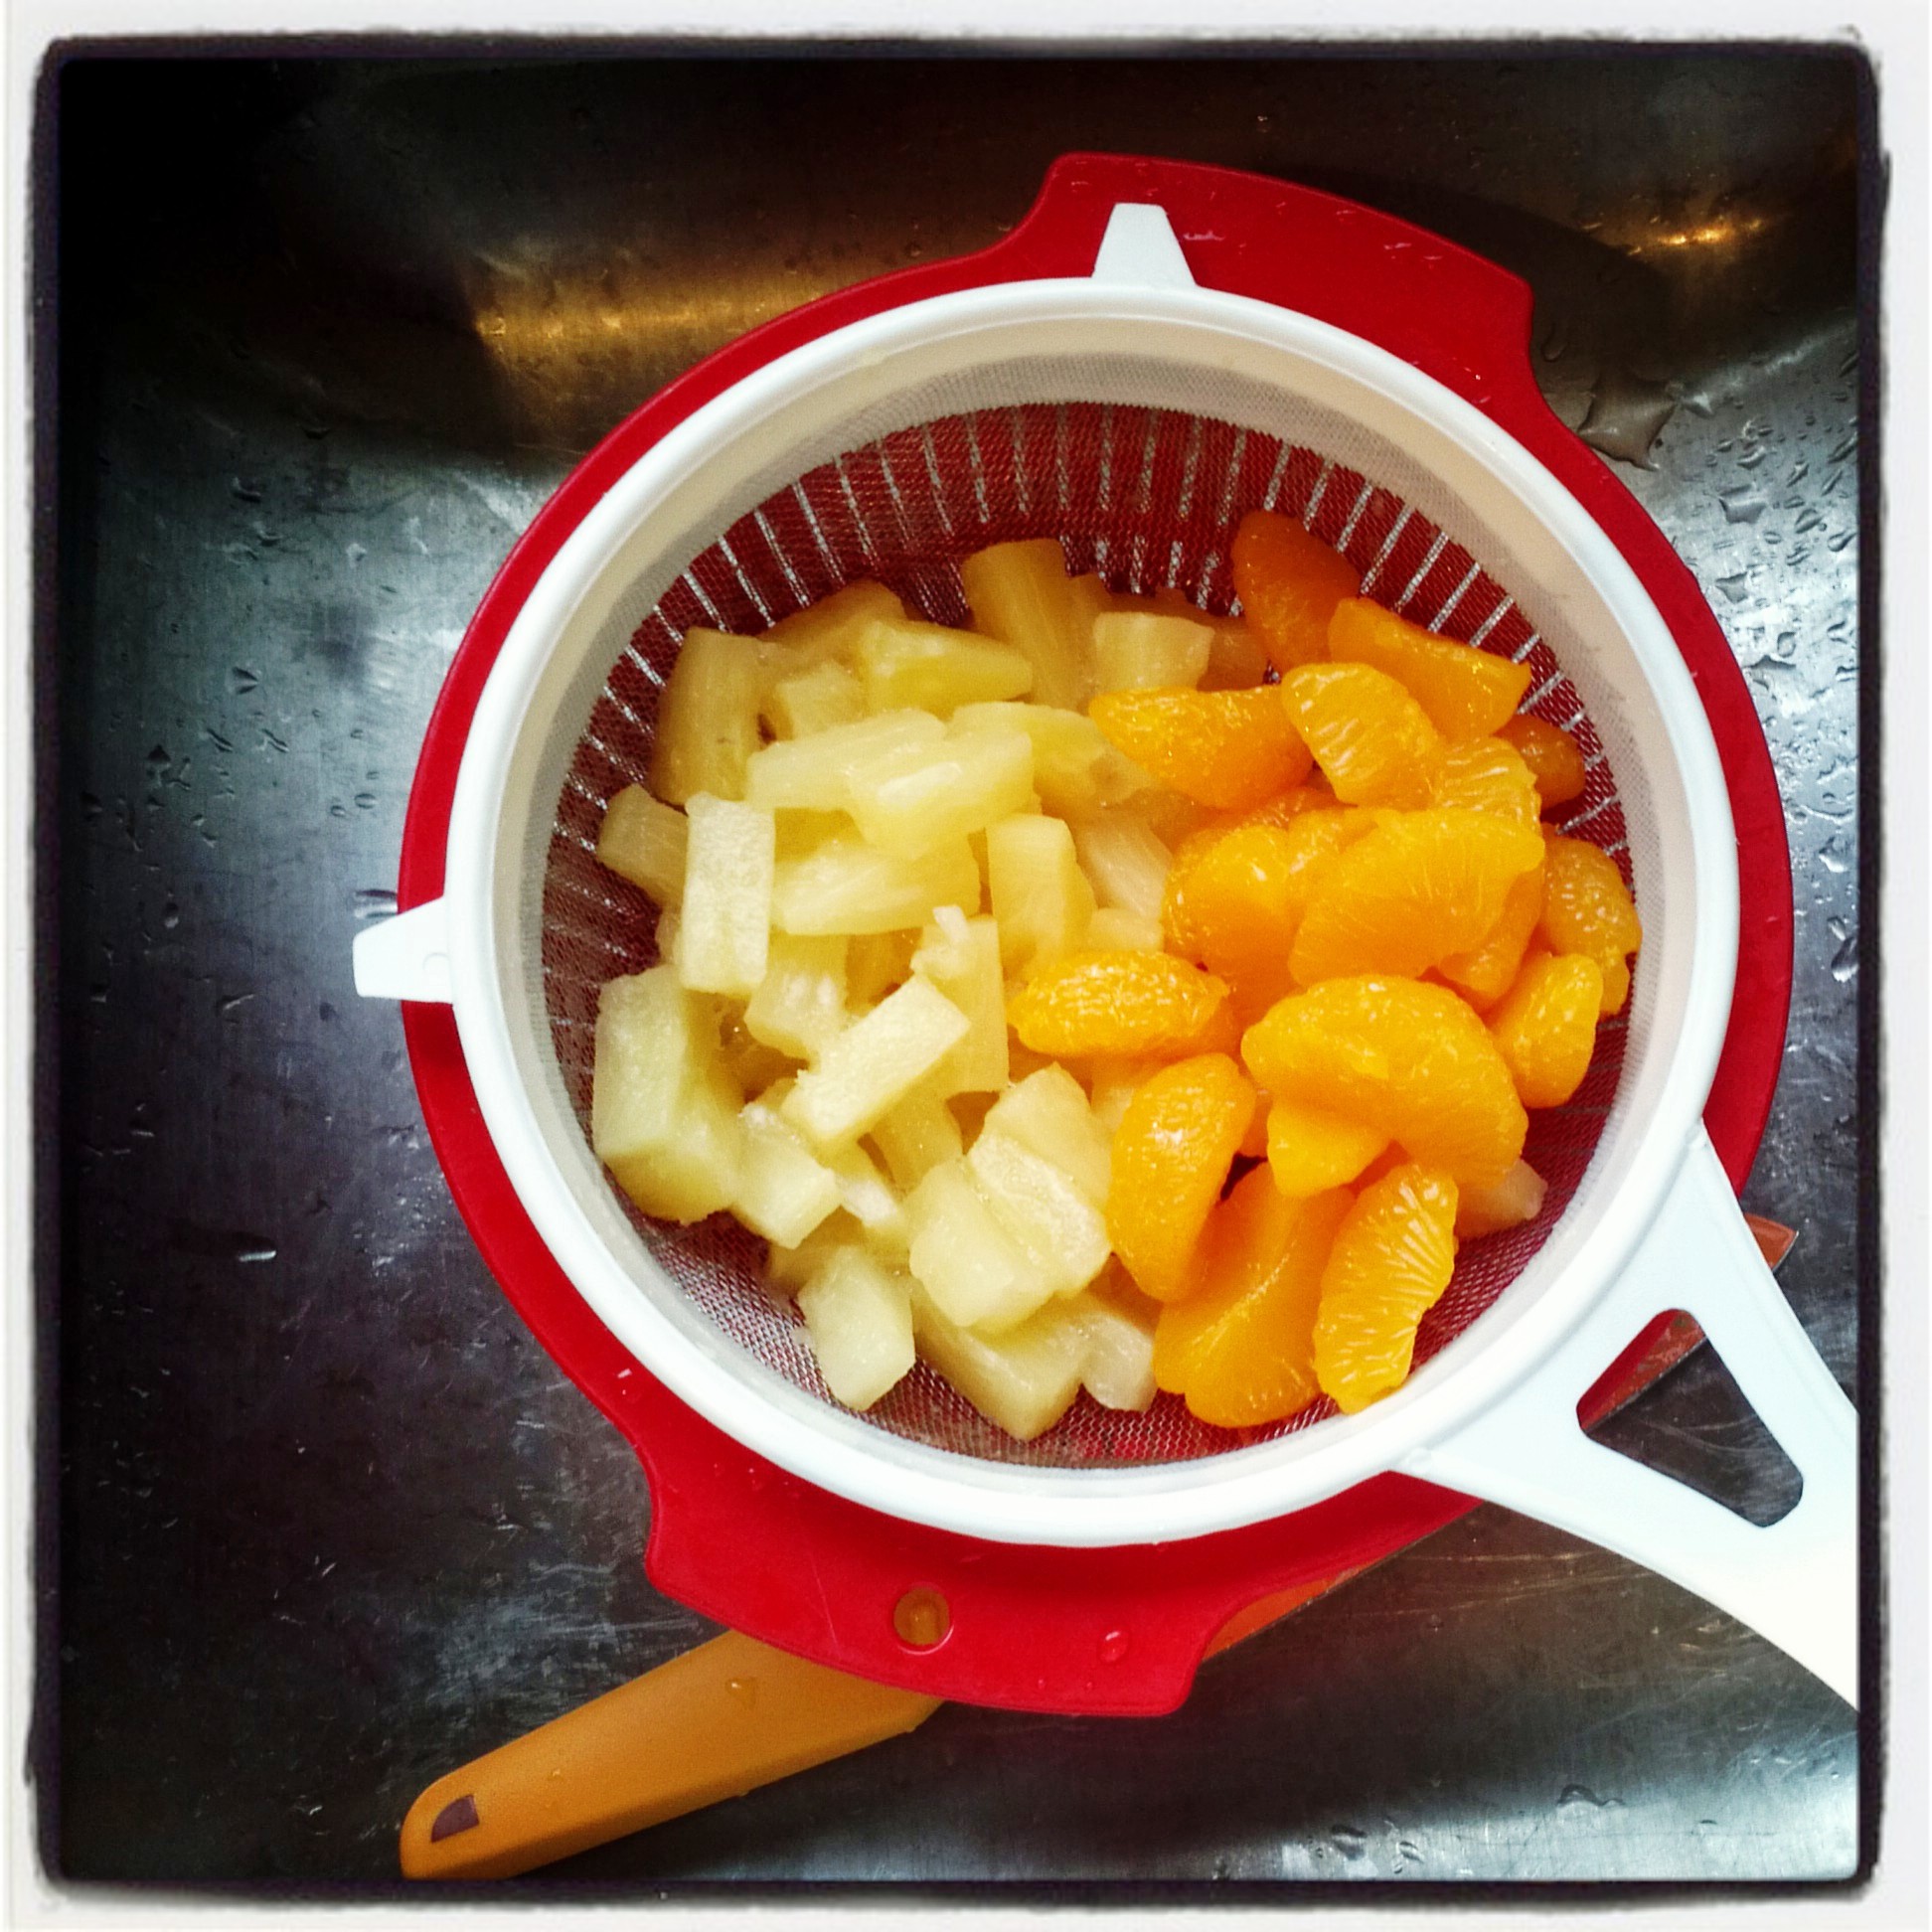
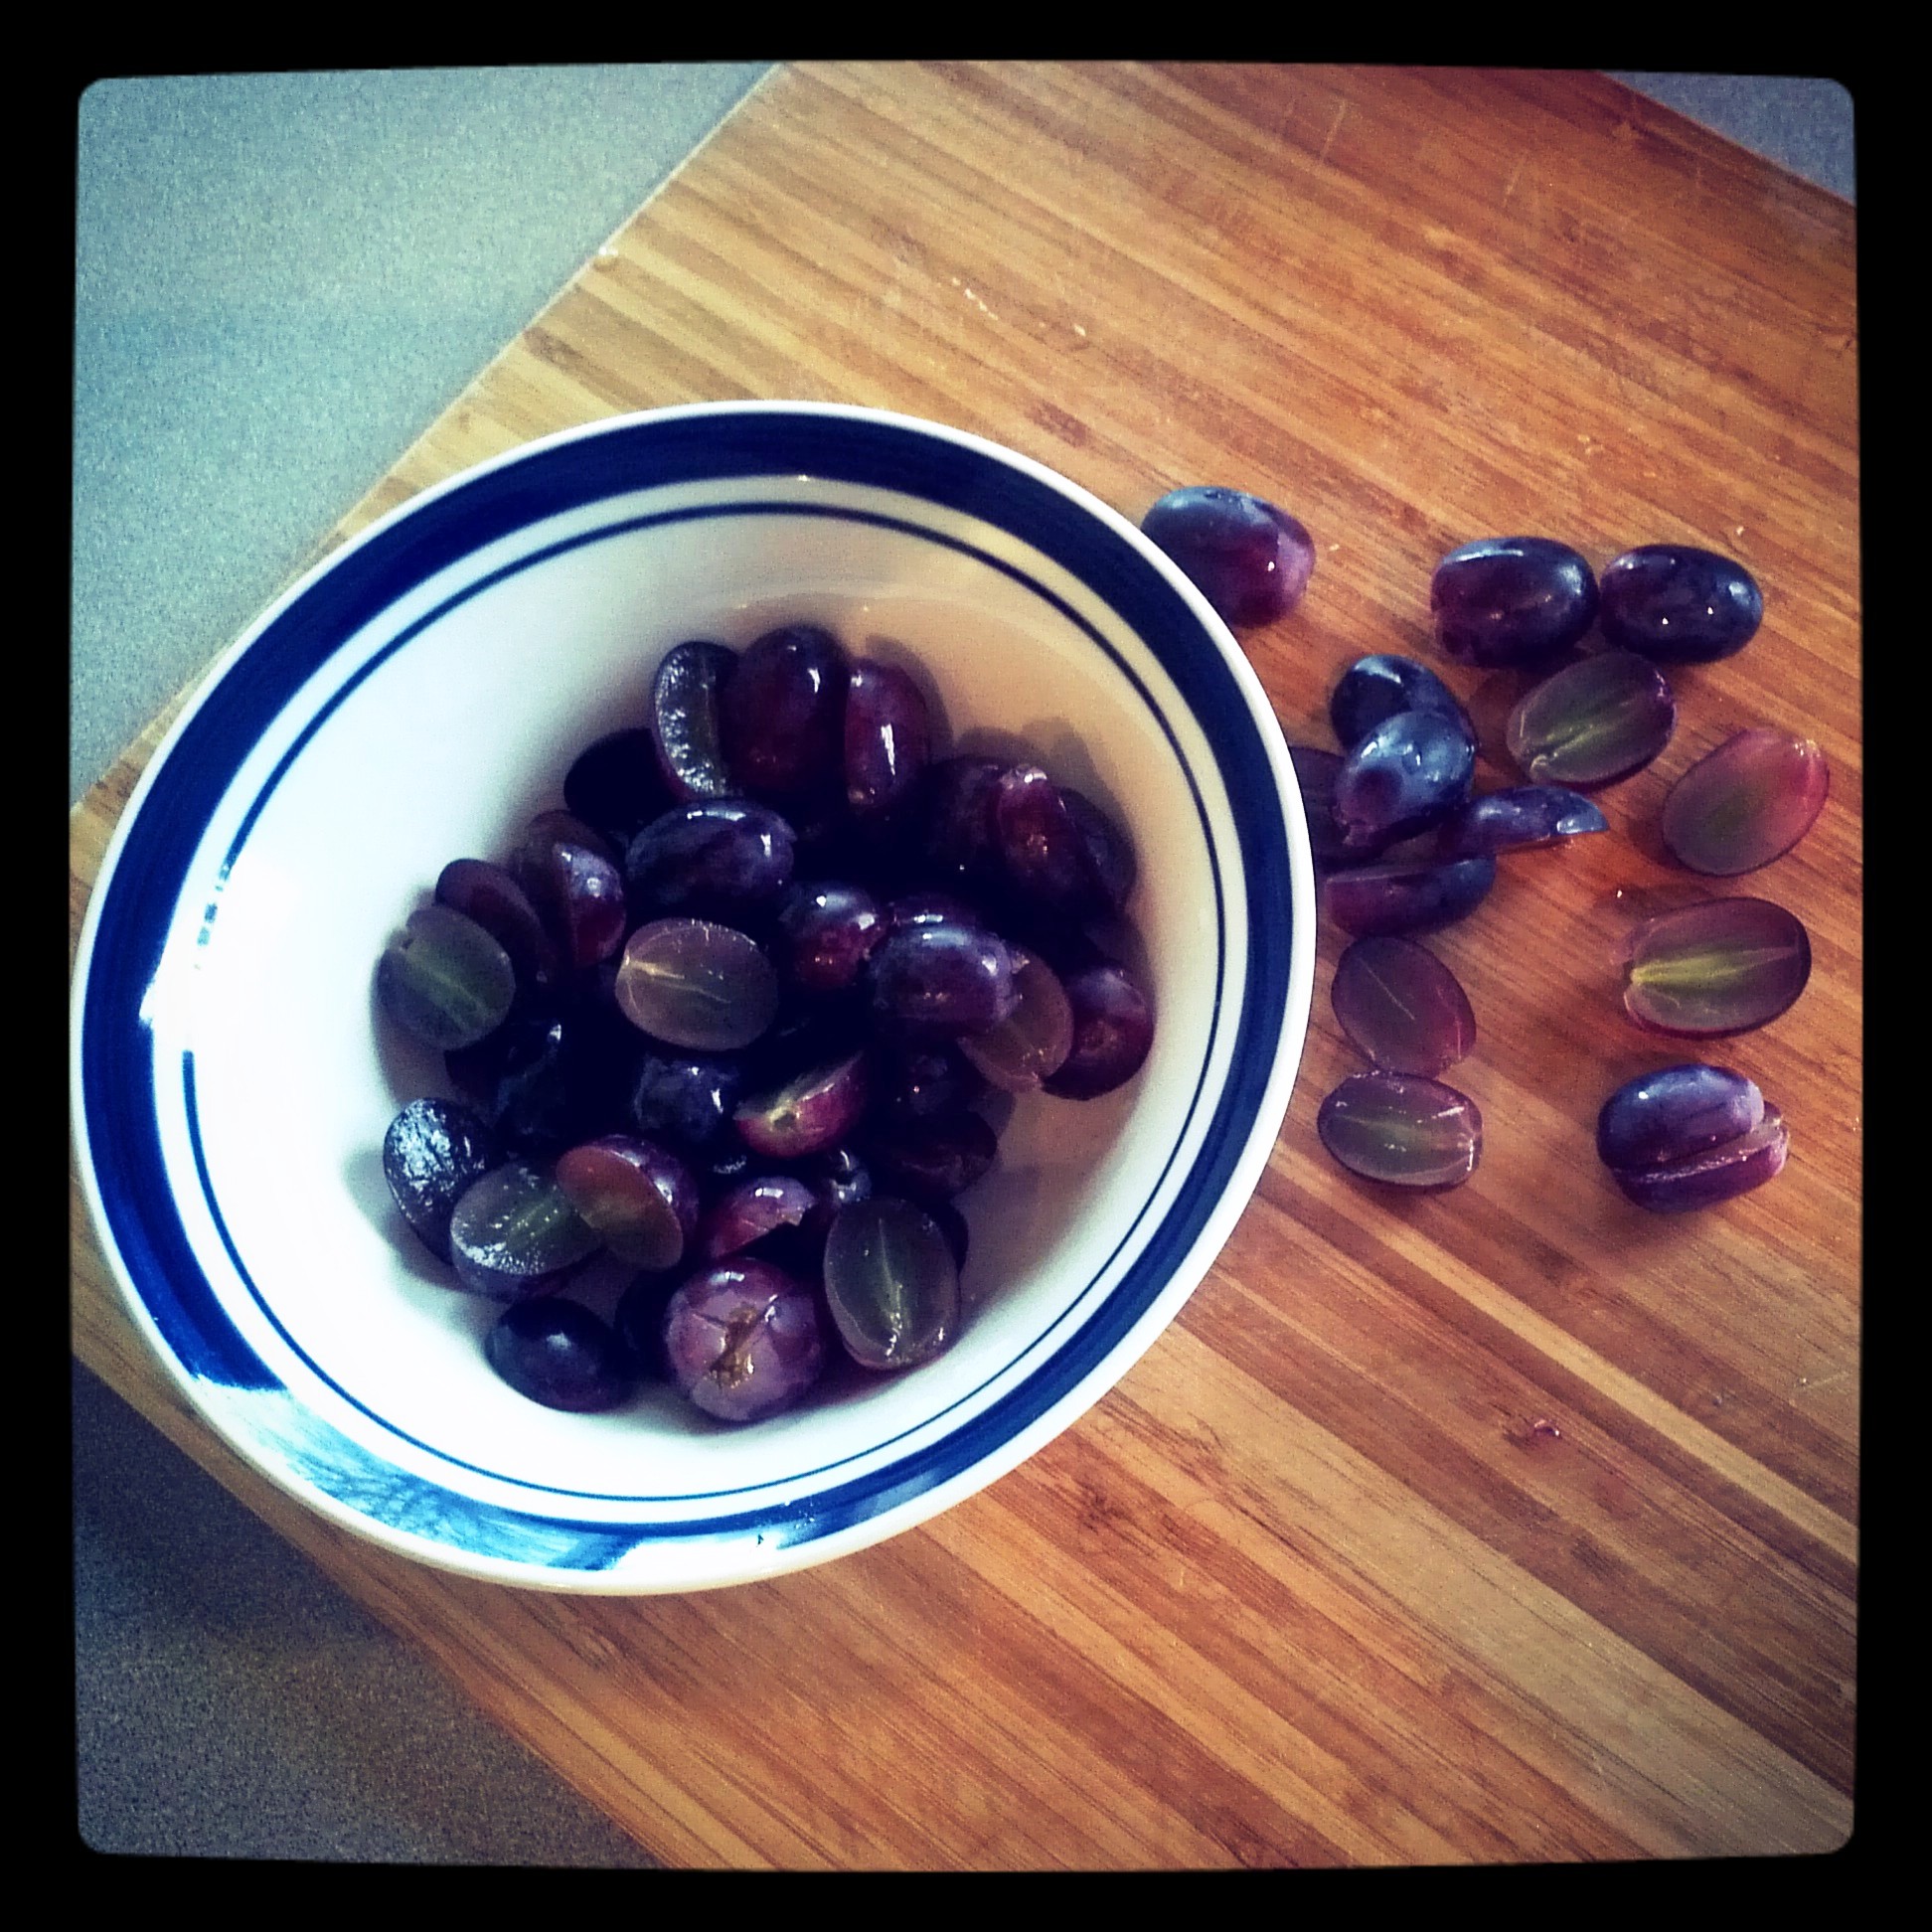
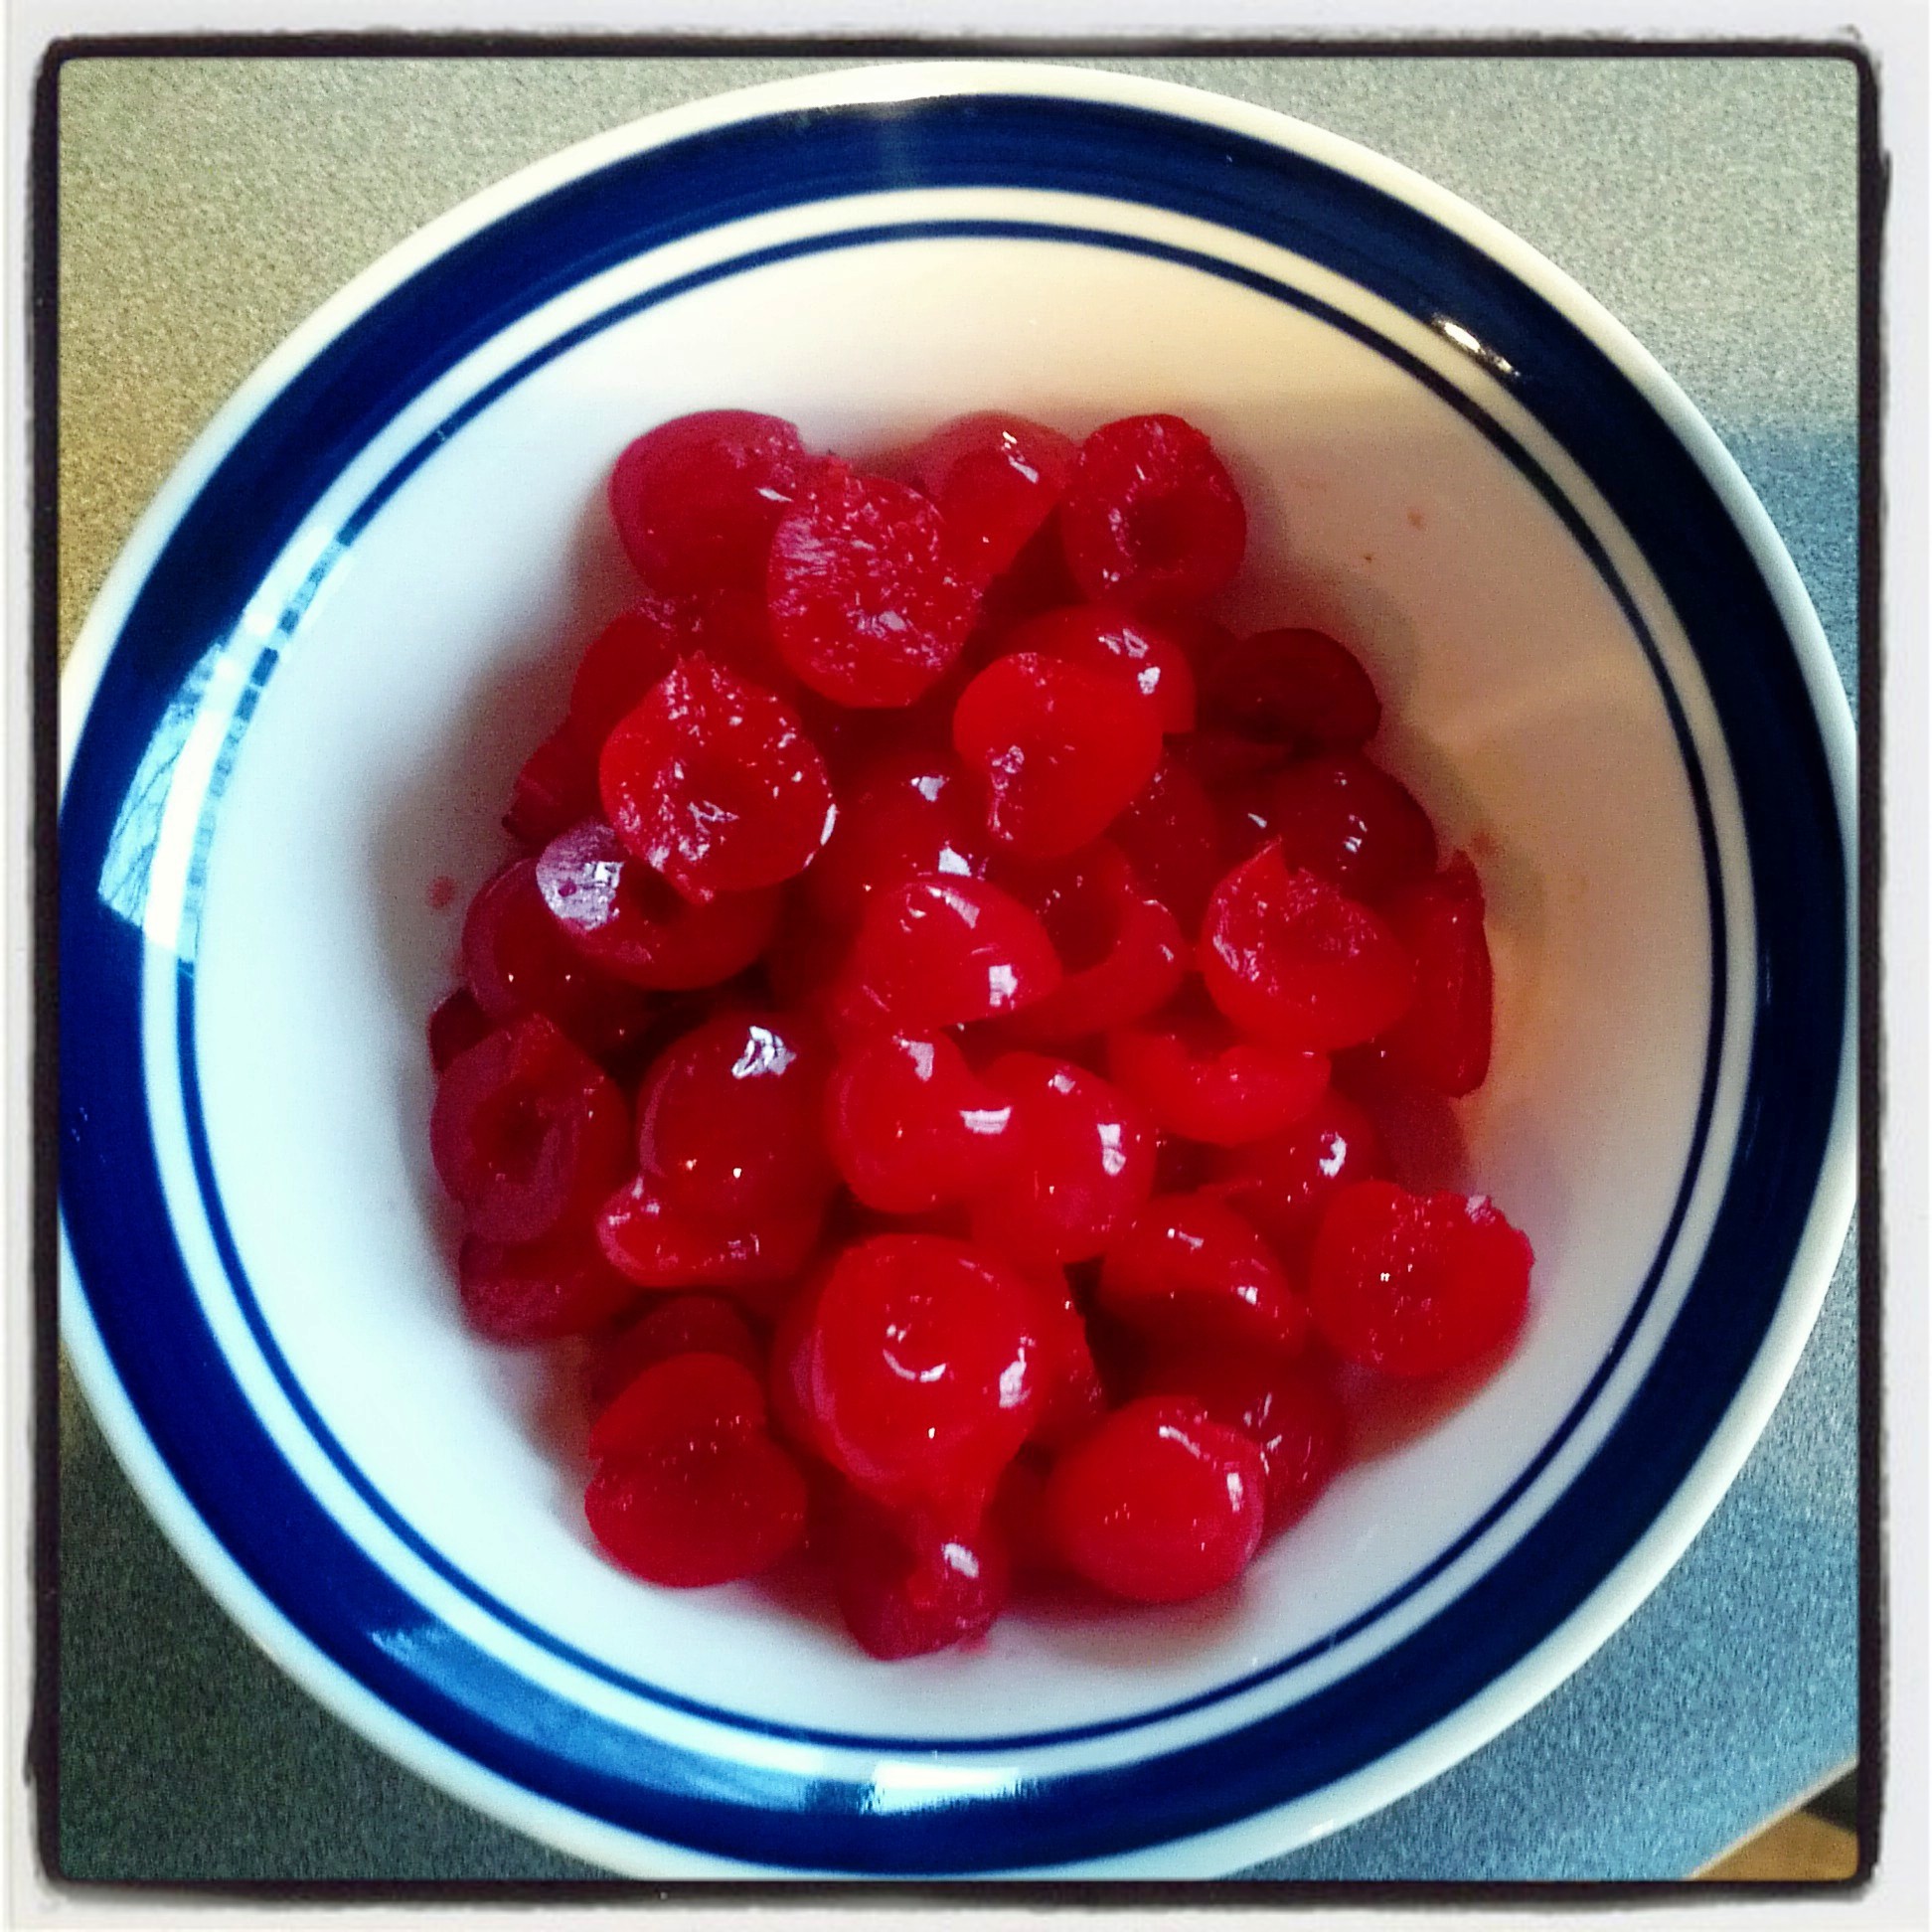
Drain pineapple & oranges                                          cut grapes in half

IMG_20130331_092534                                                     IMG_20130331_091939

drain cherries                                                           cut cherries in half
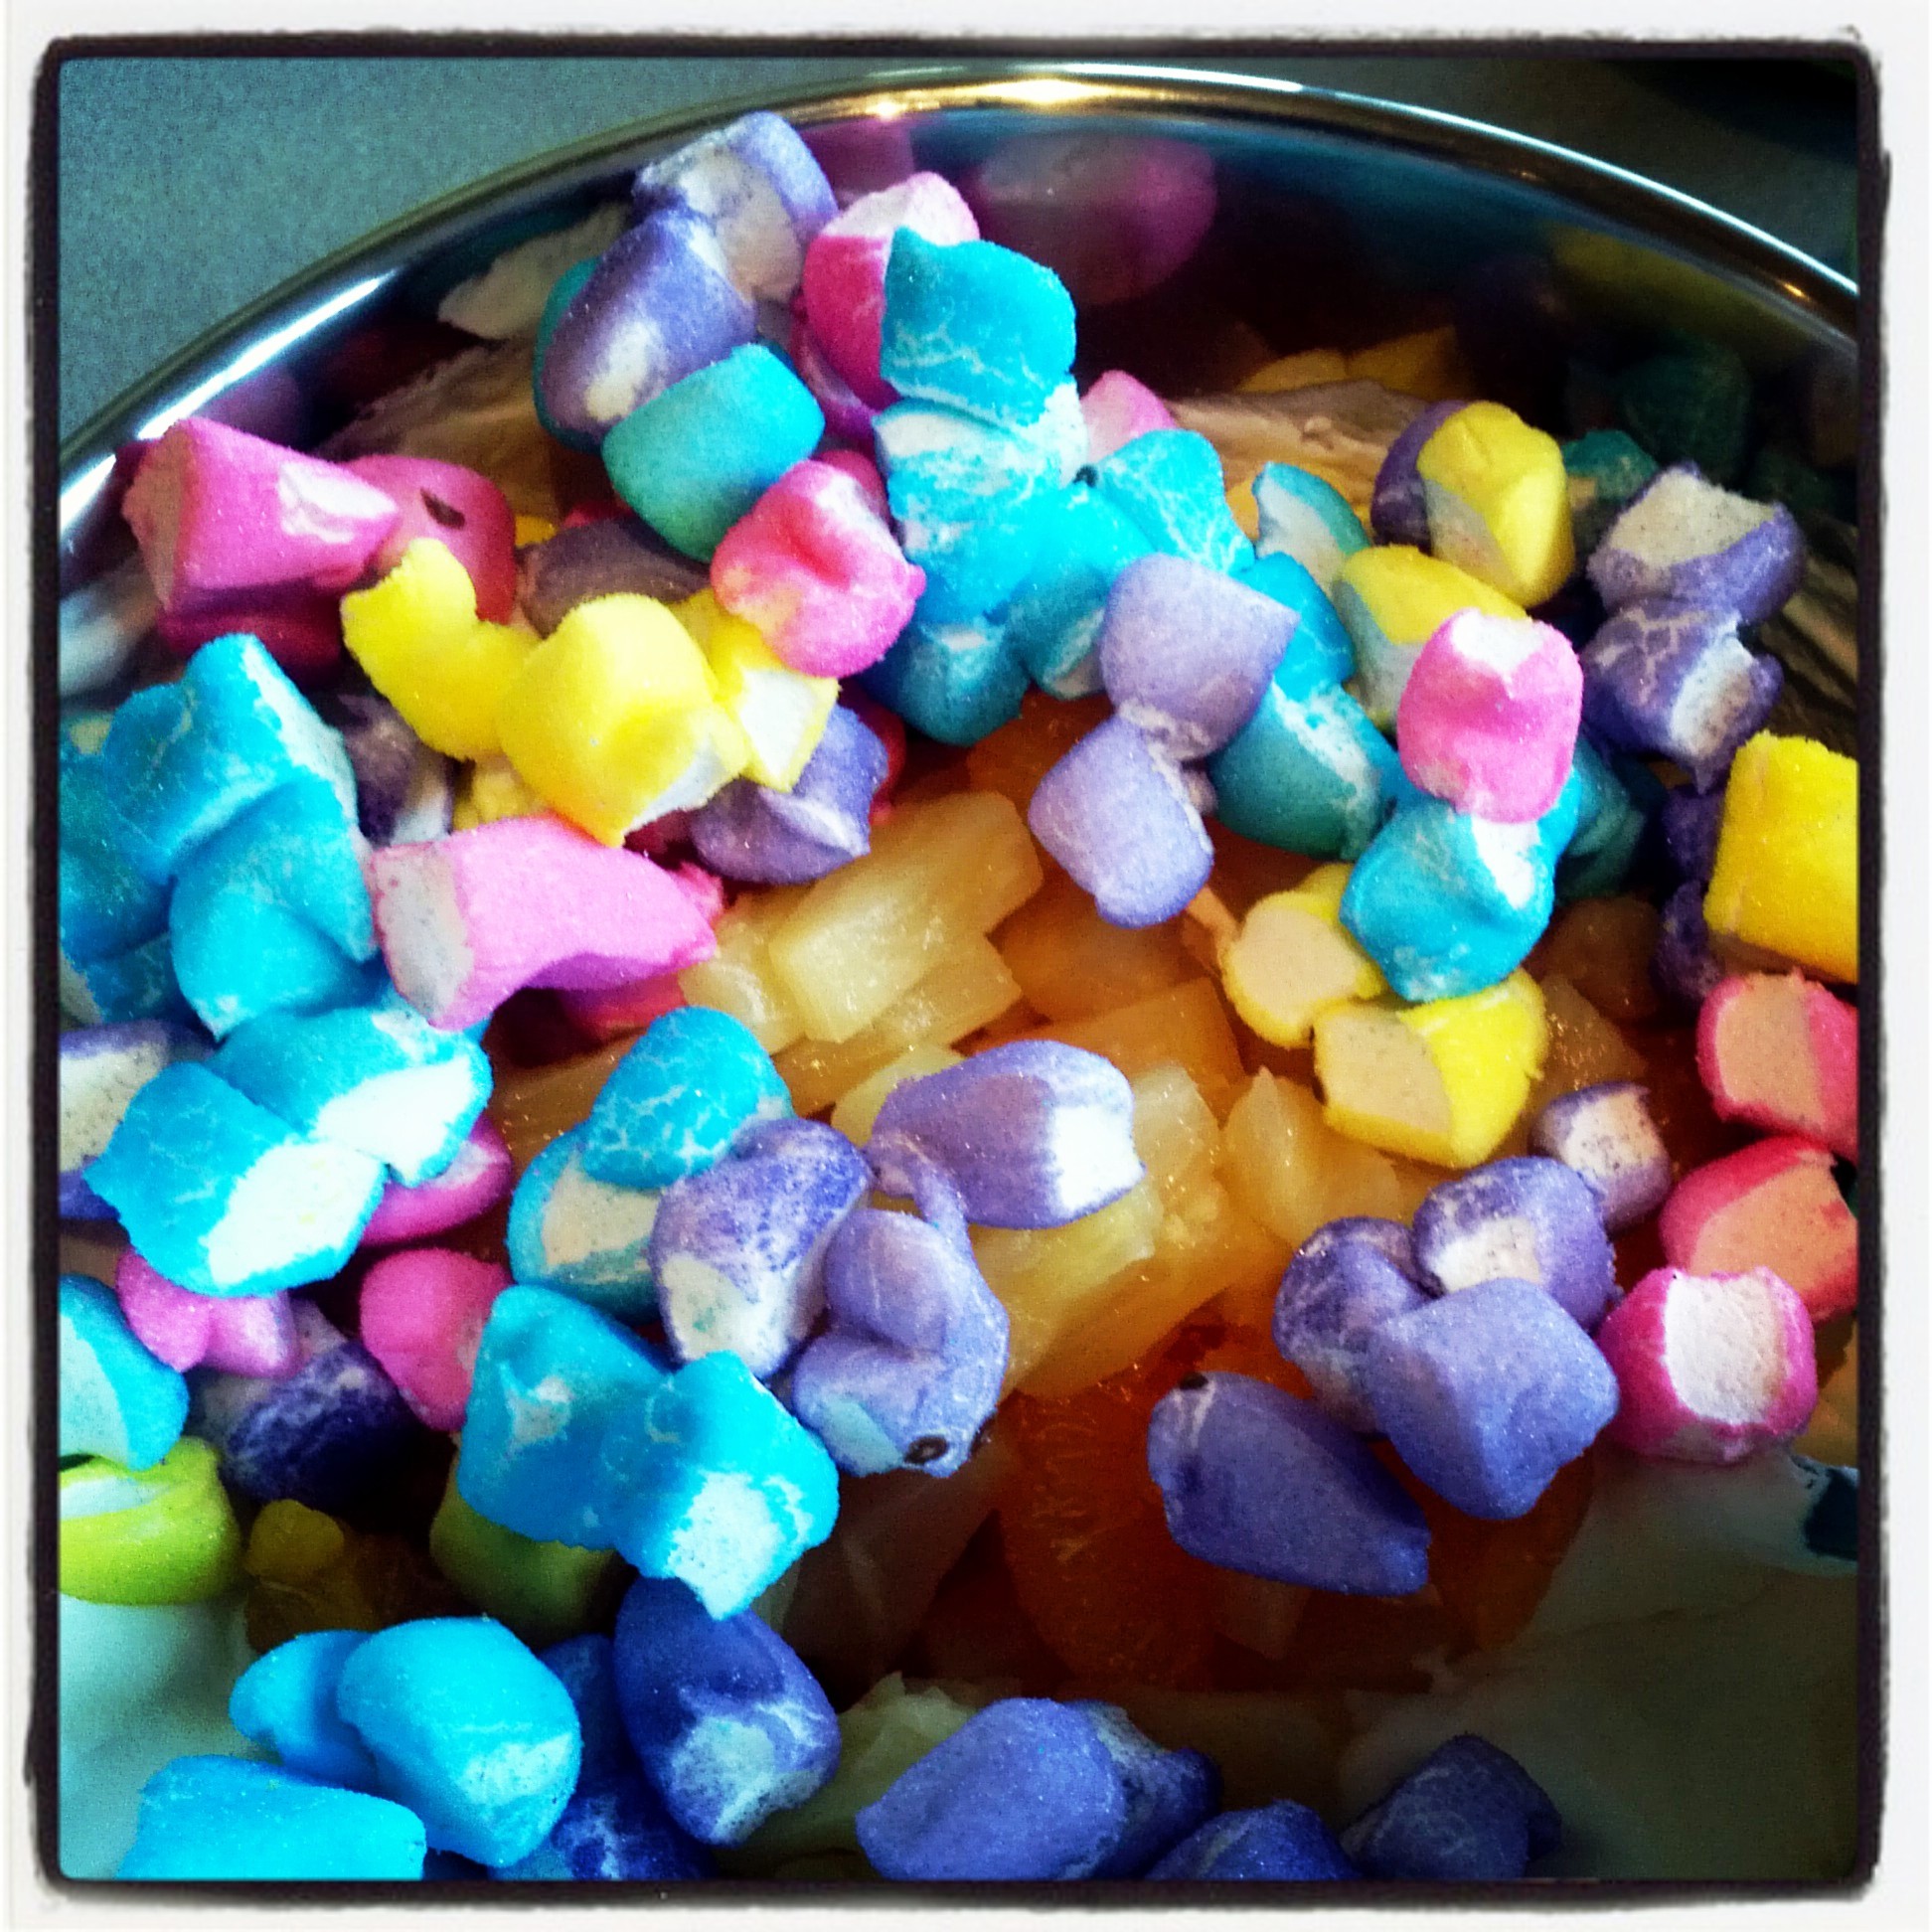
IMG_20130331_093347                                             IMG_20130331_095105

Cut peeps                                                 set aside

IMG_20130331_090908                  IMG_20130331_091603

in a large bowl add whipped topping & 2 tbsp. instant vanilla pudding, combine well

IMG_20130331_112403

add oranges, pineapple and peeps to whipped topping, fold to combine

IMG_20130331_112452

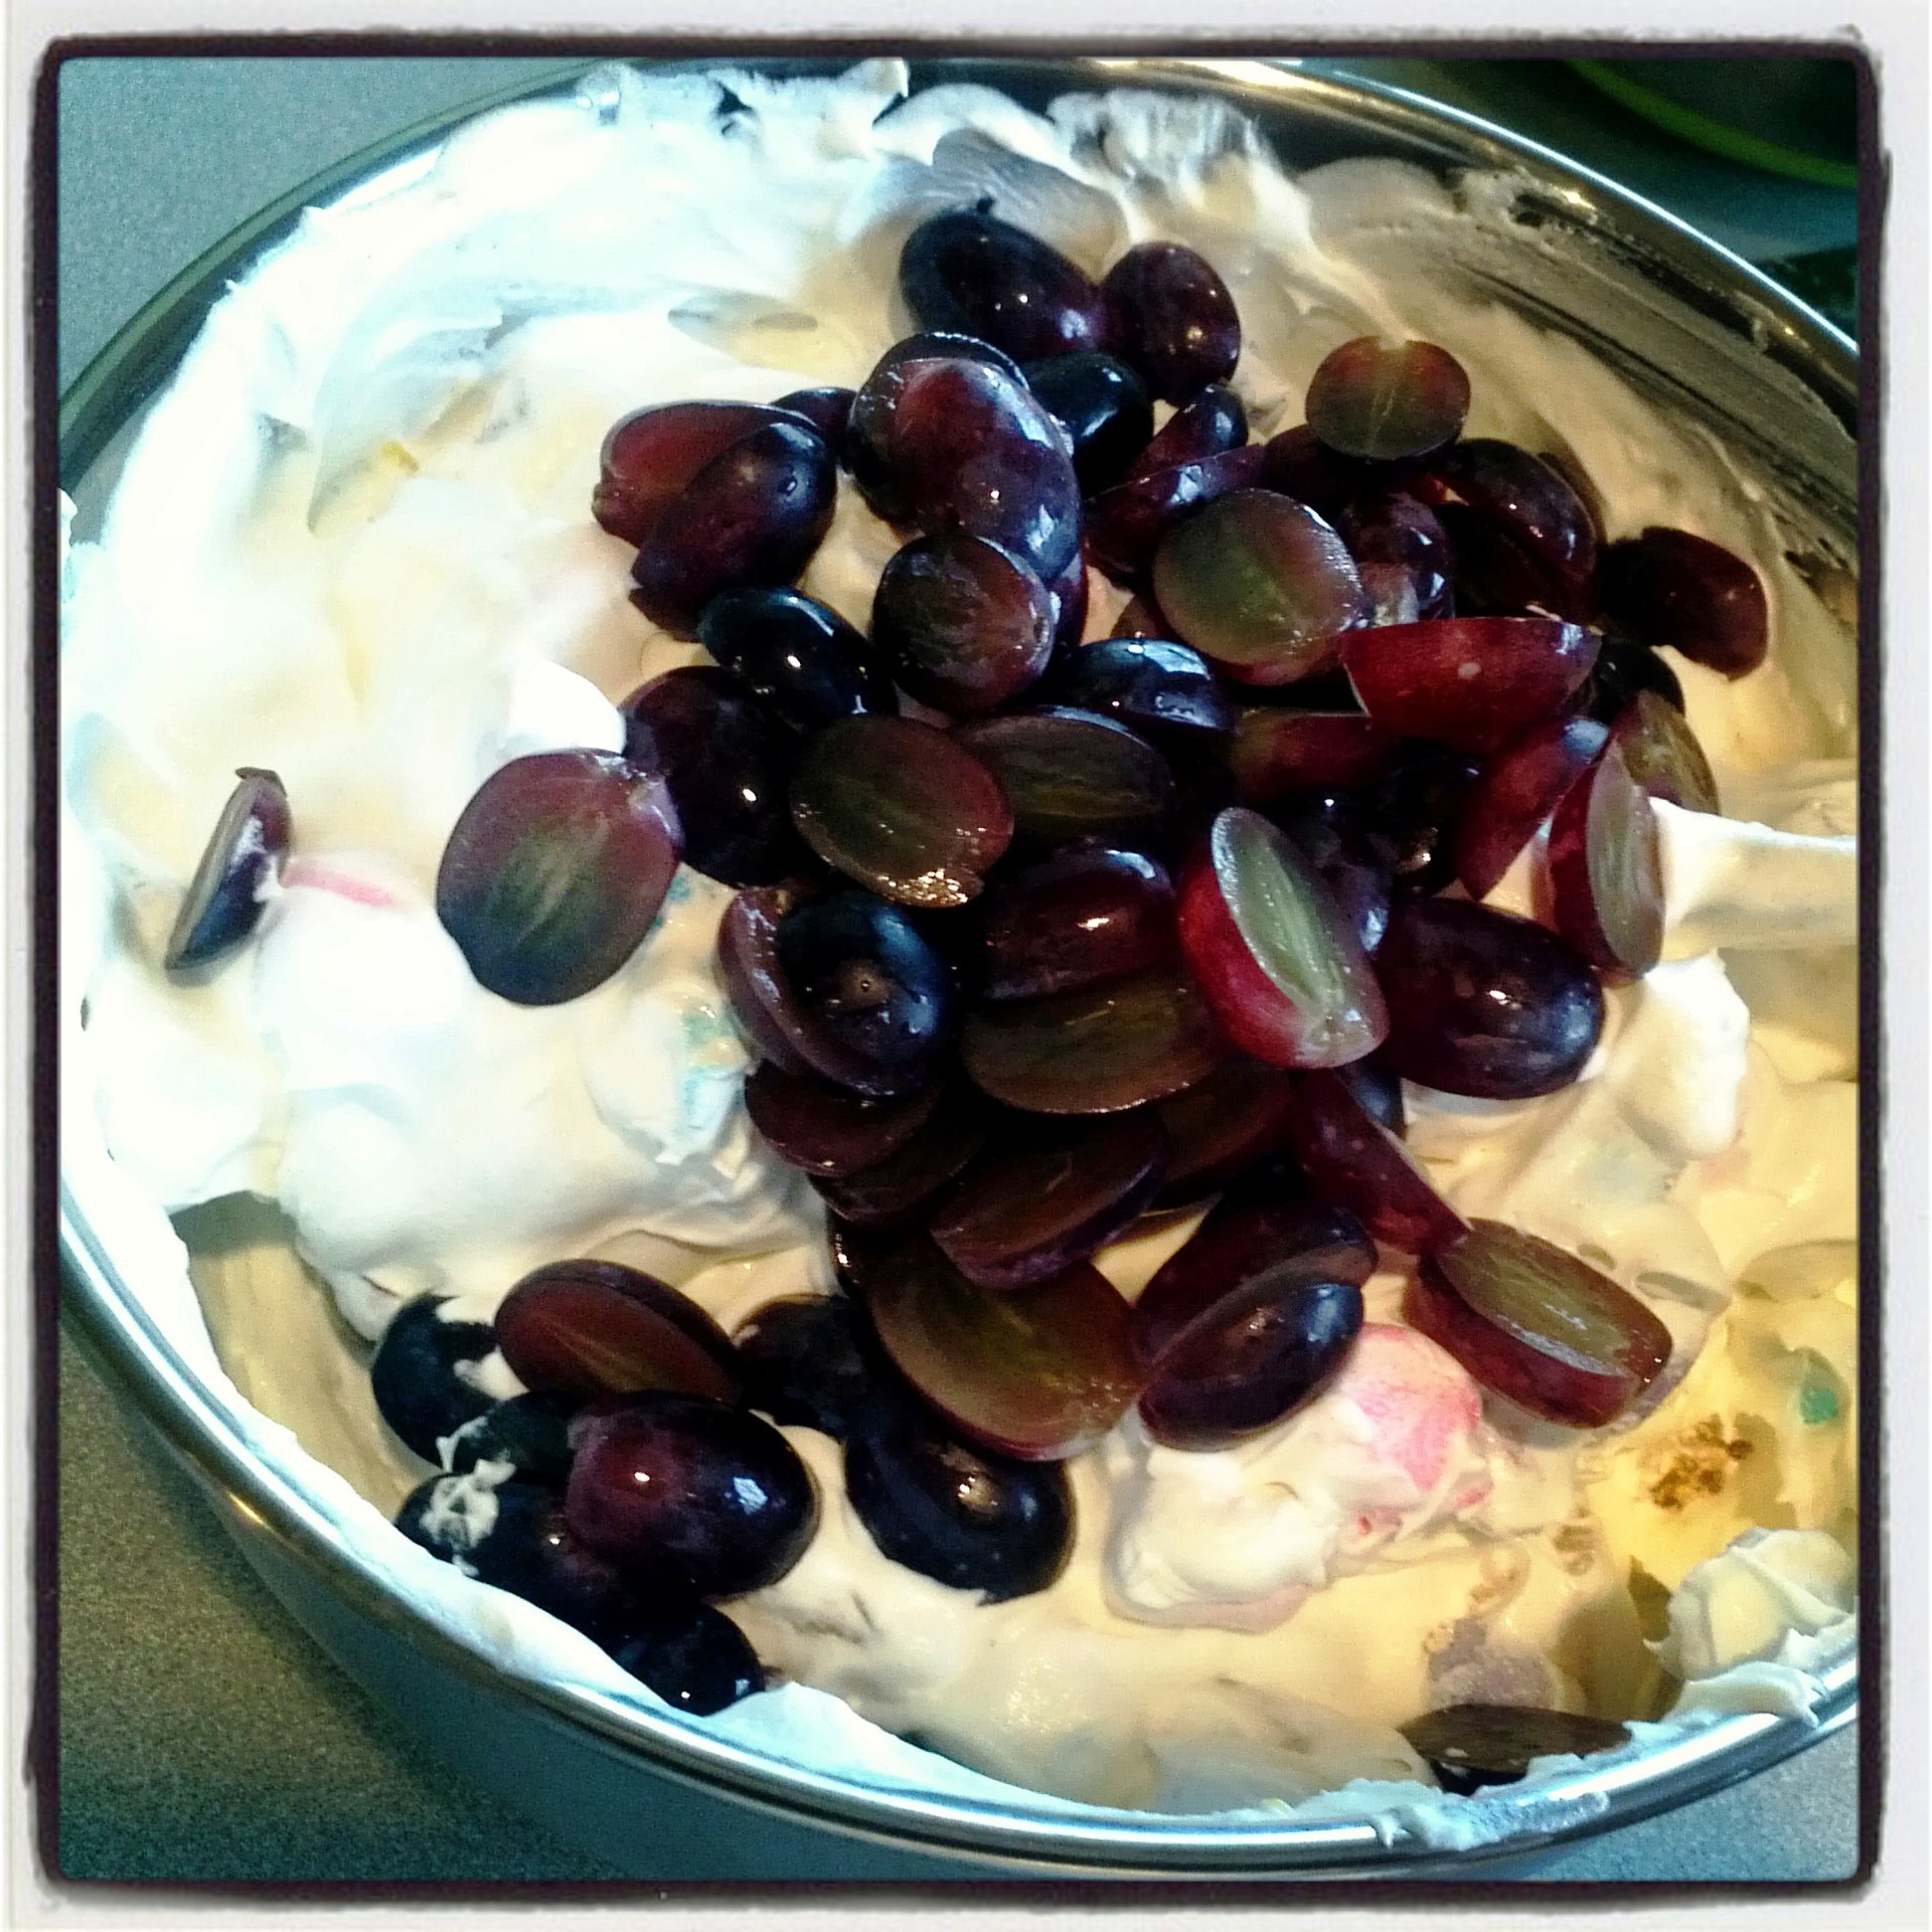
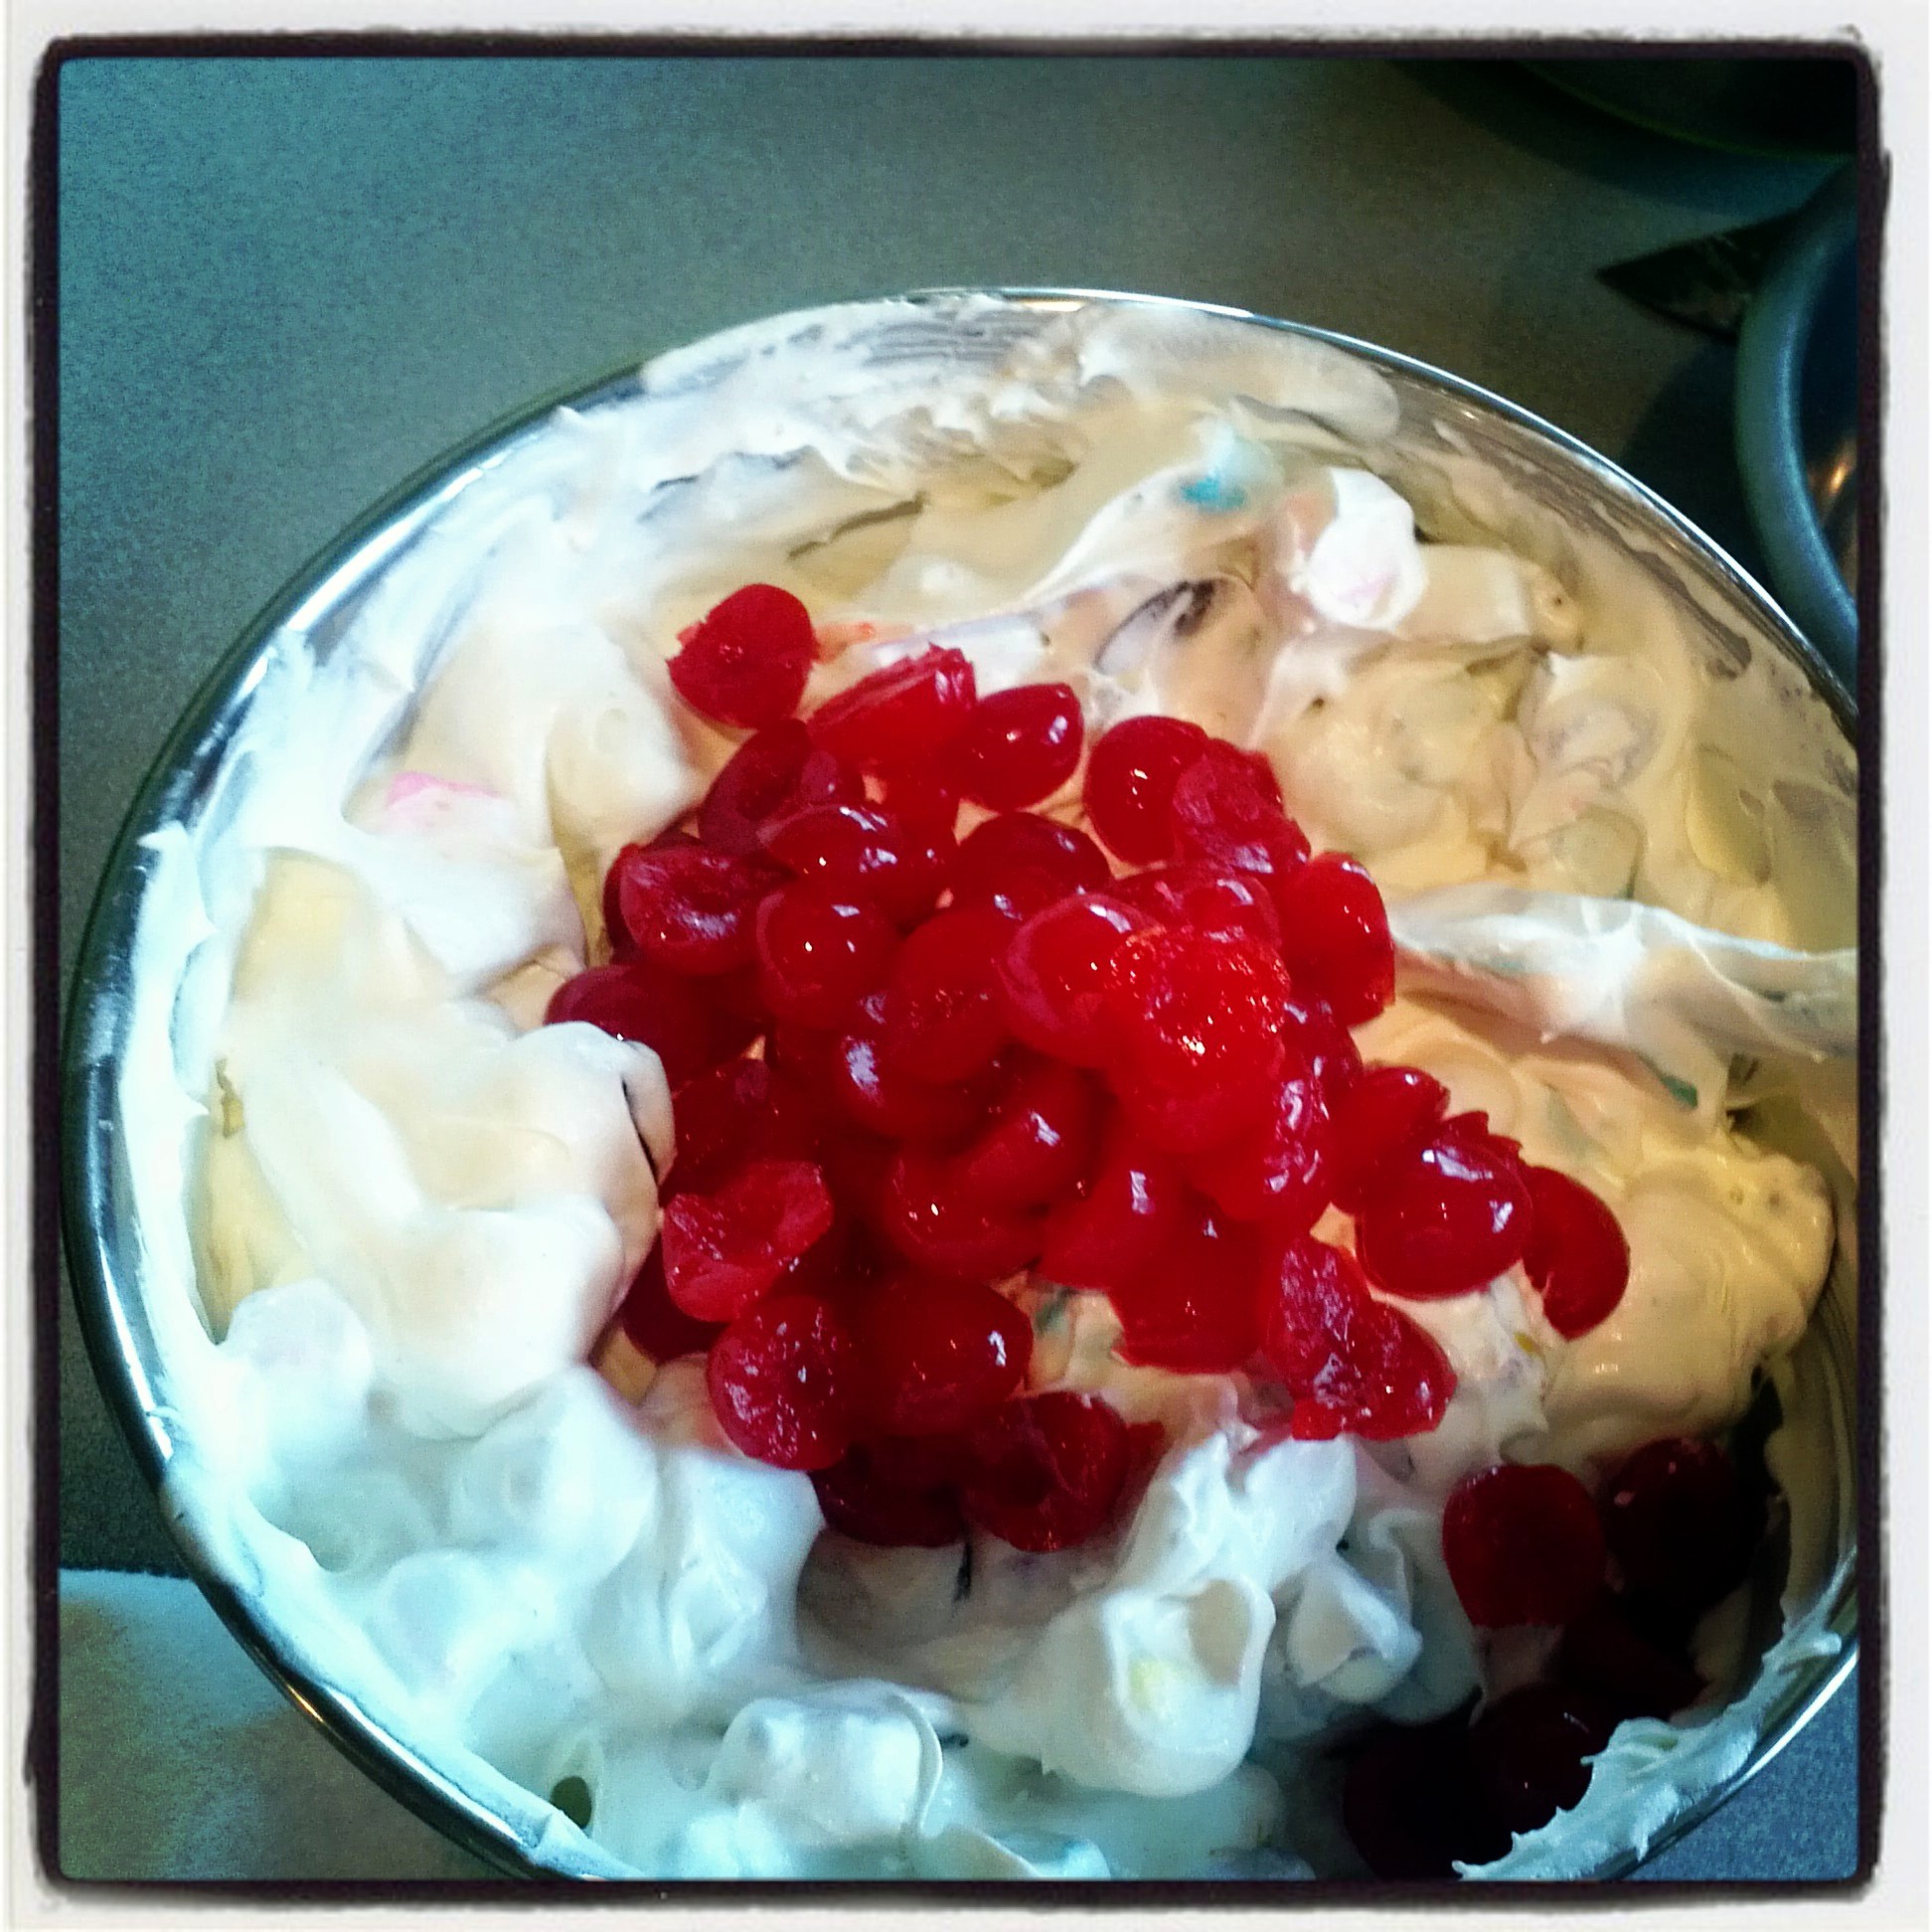
fold in grapes                                                     then fold in cherries

IMG_20130331_112551                                           IMG_20130331_112649

pour into a serving dish

IMG_20130331_112804         IMG_20130331_112914

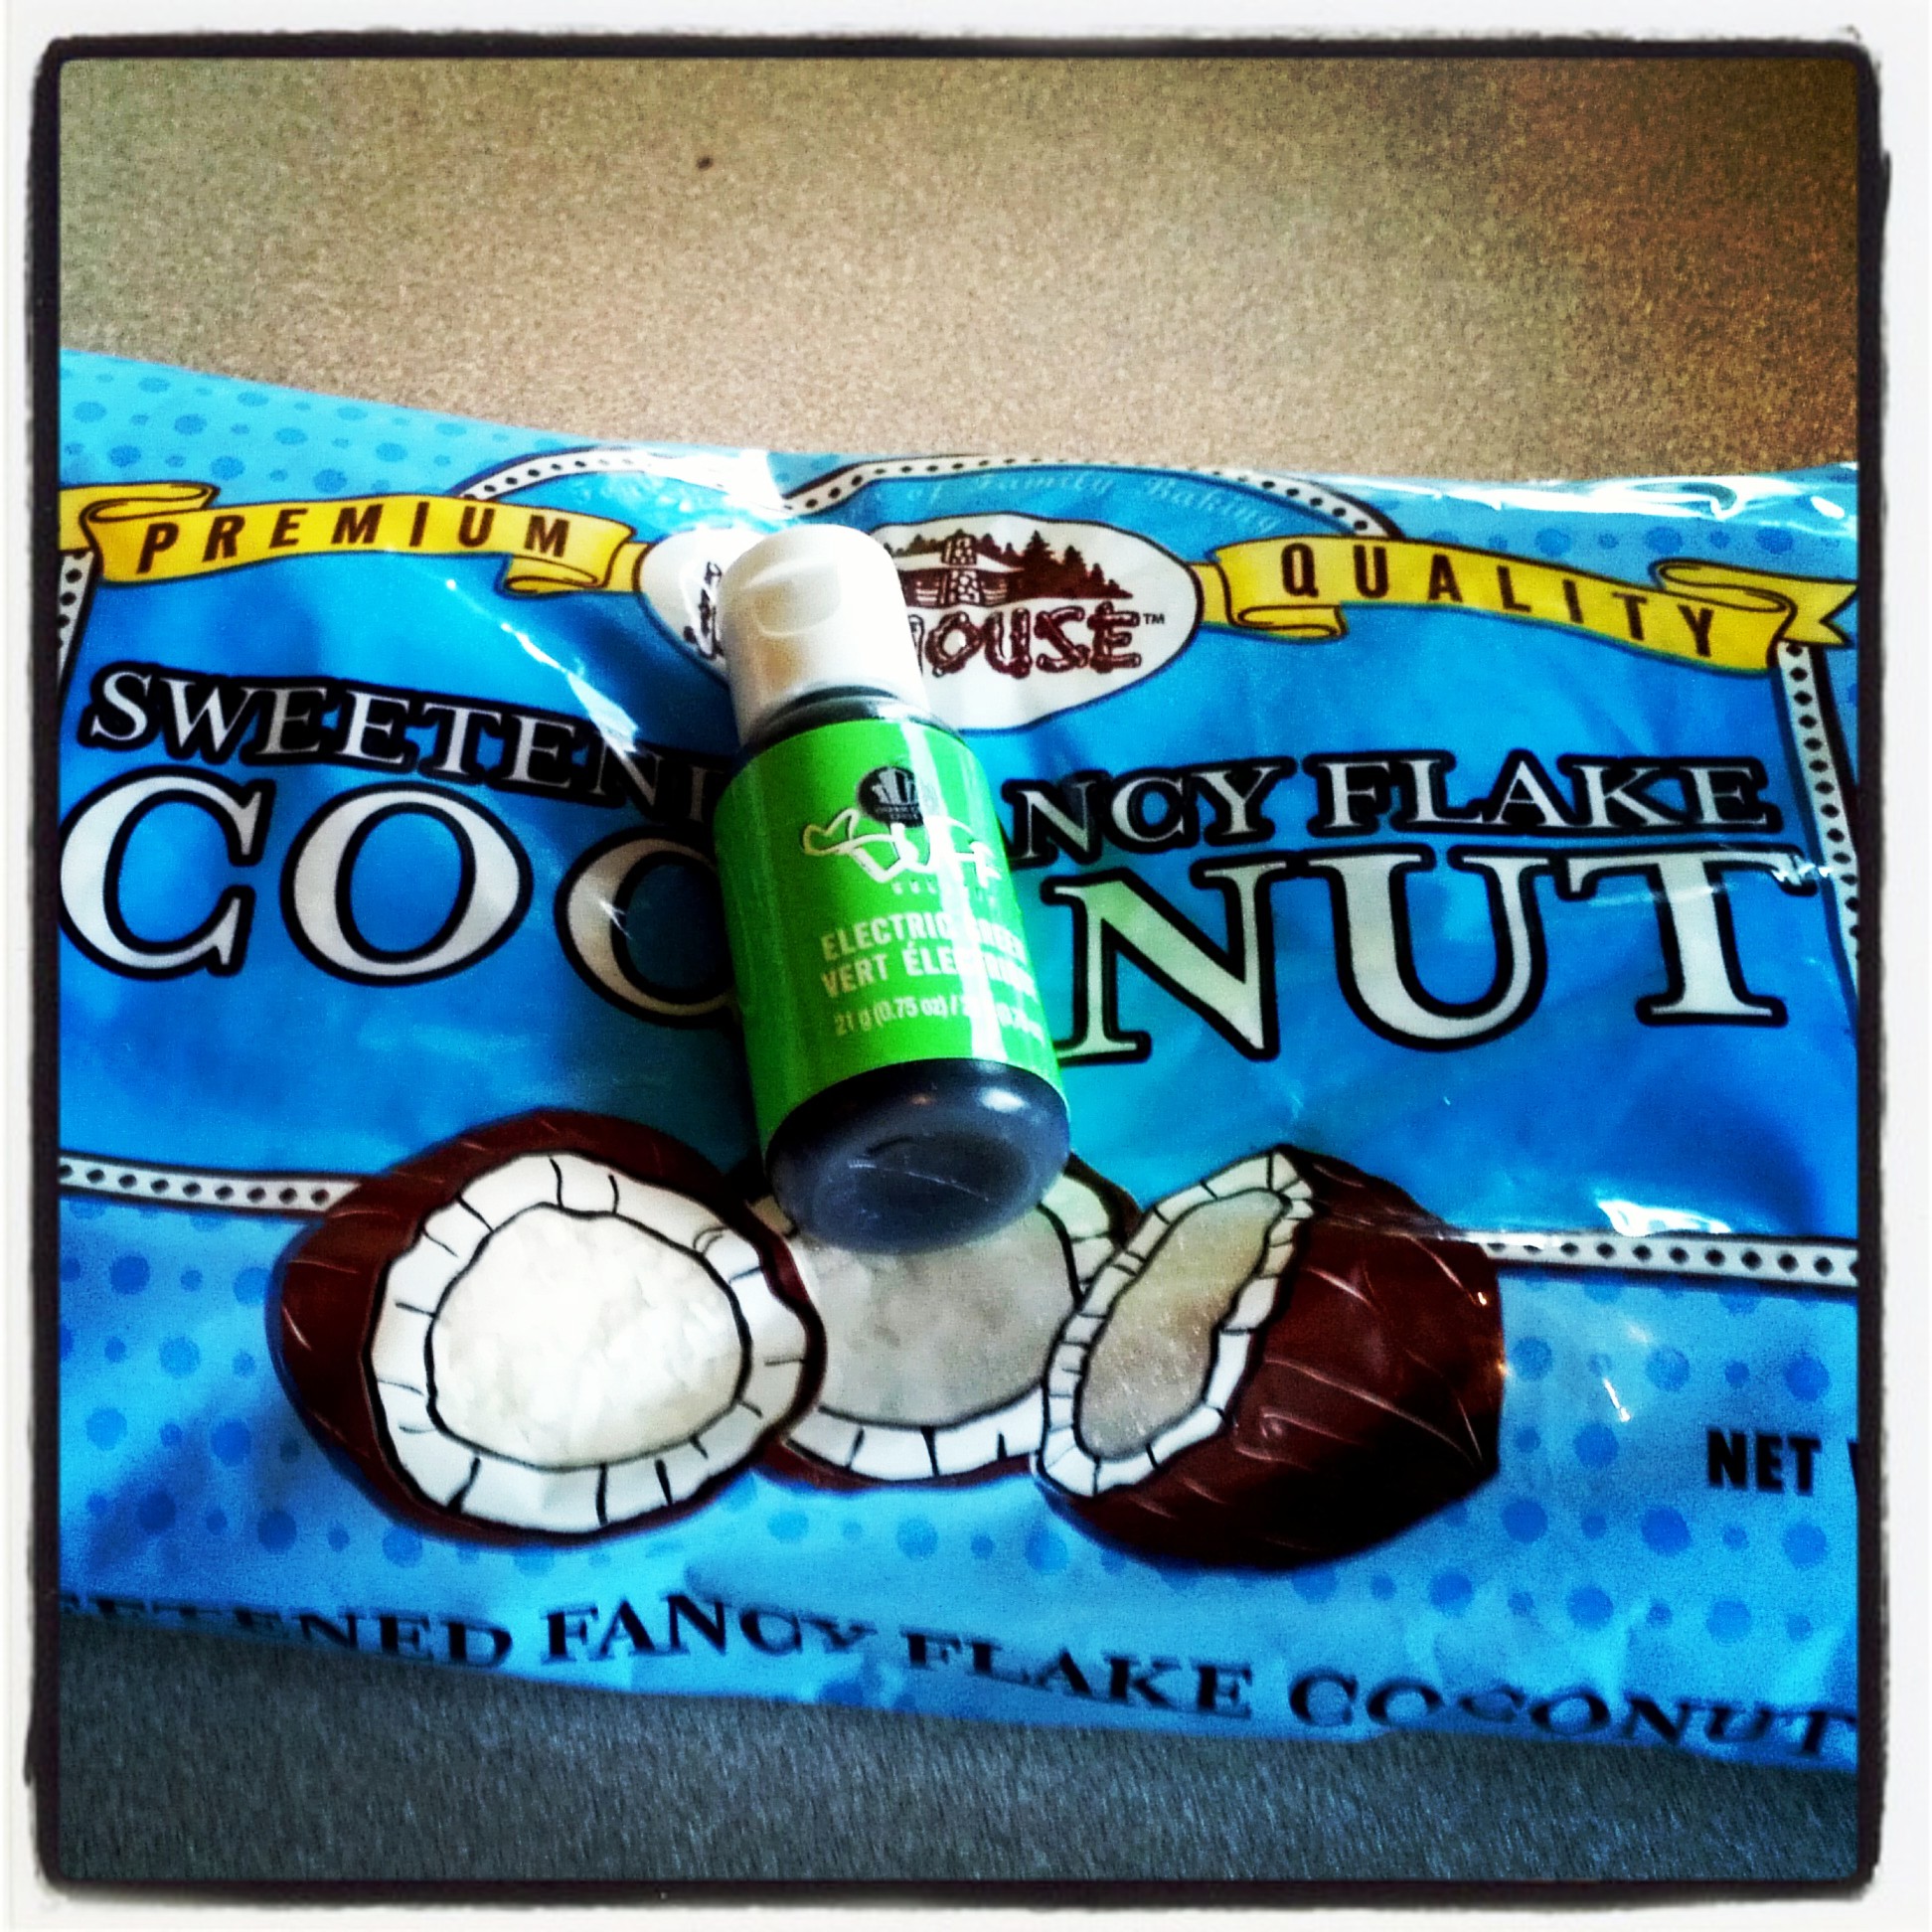
Now add a little fun touch, take coconut & green food coloring 

IMG_20130331_111339      IMG_20130331_111436

mix to make green and now you have green grass

IMG_20130331_111809

add a few extra bunnies sitting on grass

IMG_20130331_131812

Recipe

2 8 oz. whipped topping
1 8 oz. can Mandarin oranges, drained
1 can (12 oz.) pineapple tidbits, drained
1 16 oz.  jar maraschino cherries, drained, halved
2 cups halved red grapes
2 tbsp. instant vanilla pudding powder
6 bunny peeps of each color, total 24 peeps, plus 3 extra for decor
1/2 cup sweetened coconut
green food coloring gel

Drain all the fruit and set a side, cut cherries in half.
Cut peeps in half then cut again into 4’s, set aside

In a large mixing bowl add whipped topping and vanilla pudding powder and mix to combine

Fold into whipped topping the pineapple, oranges and peeps, then fold in grapes, then cherries making sure everything is well mixed.
Pour into serving dish, and smooth out.
 

For Decorations –  add coconut to bowl or ziploc bag, squeeze a little food coloring gel onto coconut and mix with your fingers to color coconut. (if you use a bowl like I did, put a sandwich size baggie over your hand and mixed the coconut up, so your fingers don’t turn green)
Add your extra peeps on top of the hash add the grass around them….Chill and serve!!!

This also was a big hit,  I love how  you can see the colored peeps mixed in, but both my parents say my Dad’s sister (Mae) always made it the best…she would whip heavy cream instead of pre made whipped topping to make hers…now that’s the good stuff.

I hope you’ve enjoyed my fun whimsical post today, it was fun to do, so thank you to my friend Joe 🙂 for giving the idea in using Peeps!!!

Ciao Bella…..Limoncello

8 Comments

cover Limoncello is simply delicious, and I’ve always wanted to make it, but it does take some time and you must be patient.

FYI – below was taken straight from Wikipedia

Limoncello (Italian pronunciation: [limonˈtʃɛllo]) is an Italian lemon liqueur mainly produced in Southern Italy, especially in the region around the Gulf of Naples, the Sorrentine Peninsula and the coast of Amalfi and islands of Procida, Ischia and Capri. It is also produced in Sicily, Sardinia, Menton in France, and the Maltese island of Gozo. Though there is debate about the exact origin of the drink, it is at least one hundred years old.

Traditionally, it is made from the zest of Femminello St. Teresa lemons, also known as Sorrento lemons or Sfusato Lemons. Lemon zest, or peels without the pith, are steeped in grain alcohol until the oil is released. The resulting yellow liquid is then mixed with simple syrup. Clarity and viscosity are affected by factors like the relative temperatures of the two liquids. Most lemons, including the more-common Eureka lemon, will produce satisfactory limoncello

Limoncello is traditionally served chilled as an after-dinner digestivo. Along the Amalfi Coast, it is usually served in small ceramic glasses themselves often chilled, the Amalfi coast being a center of both ceramics and limoncello production. This tradition has been carried into other parts of Italy.

Limoncello is the second most popular liqueur in Italy but has recently become popular in other parts of the world. Restaurants in the United States, Canada, the United Kingdom, Australia, and New Zealand are increasingly offering limoncello on their beverage and dessert menus. In the United States commercial producers using California lemons have introduced USA made limoncello, including Rometti Limoncello, Ventura Limoncello, and Fabrizia Limoncello. Limoncello is an increasingly popular ingredient in cocktails. Limoncello imparts a strong lemon flavor without the sourness or bitterness of lemon juice.

Okay let’s get making this good stuff!!!

 There are so many recipes out there for Limoncello, using Everclear, vodka, a lot of sugar a little sugar, steep for 7 days, steep for 21 days, steep for 45 days.  

This is the way I did it, first I choose to let steep for 42 days, so part two coming in 42 days, then part three coming in another 42 days.
I used 10 lemons, and I used “Potato Vodka” 80 proof…yes I know its better with Everclear or Vodka that’s 160 proof, but I have been wanting to drink “Potato Vodka” for awhile now so instead I decided to make my Limoncello out it.

Now part two will be adding the simple syrup, then letting steep for another 42 days…so I figure on April 25th will be the post date for part two and then part three post and drinking day should be on June 7th.  Ahhhh just in time to start the summer, I can already picture me sitting on my back deck, at dusk, listening to the fountain that runs in my little pond, maybe having some friends over for the 84 day celebration to sip on my first batch of Limoncello!!

Wait 84 days!!!!!  to make one batch…maybe I will start another batch in April, then another in May…just so I have enough to last the summer and if its good!! Well I might have a batch making party monthly!!!!  We will see!!

This is what you will need to the process

pic 1

wash the lemons!!!

cover

peel your lemons, only the yellow part, try not to get the white pith part the best you can
I found out that the fresher your lemons are the easier they are to peel, so try to look for nice bright firm lemons.

pic 2

put peels into a glass jar that can seal tightly

pic 3

filter the alcohol, now you don’t have too, but some people do, its a debate all around whether to do this or not, most say to use a brita filter, but I didn’t have one so I used a coffee filter…will I filter next time…NO

pic 4pic 5

make sure all the peels are covered by the alcohol

pic 6

seal tightly and put in a dark cool place, every few days or once a week give your jar a swish

pic 7

Now what to do with all those lemons…juice them and make Fresh Lemonade!!!

pic 8

Or you can pour the juice into ice cube trays and freeze, then once frozen put cubes in a ziploc bag and now you have fresh lemon juice when you need it for a recipe.

Okay “Part Two” Limoncello in 42 days!!

Recipe

Part One

750 ml  pure grain alcohol (like everclear or 150 proof vodka)
I used 80 proof Potato Vodka, next time I will try it with a higher proof
10 firm lemons
1 large with a tight lid (i used a half gallon Ball canning jar)

Part Two in 42 days

1 cup sugar
1 1/2 cup water

Wash lemons with vegetable wash or soap…I did
then peel the zest of the lemons, you only want the yellow part, do you best not to get the white pith part or at lest very much of it.
Put peels in the jar, and pour your alcohol over top of the peels making sure all are covered.  You can use a coffee filter and strainer to pour the alcohol through as I did, next time I will not do this process.  I will just pour it straight in the jar.

Store the jar in a dark cool spot, and every few days give a swish until Day 42.

On Day 42 in a small sauce pan add  sugar and water, cook over medium heat, stirring until sugar is dissolved  once dissolved let cook for one more minute then remove from and a cool completely.  Once mixture has cooled pour into jar with the peels and alcohol and stir.  Then put it back into that cool dark spot for another 42 days.
When day comes, strain (to catch peels) jar contents into a pitcher, then using a funnel pour liquid into decorative bottles or bottle, you can give them out as gifts if you want, or like me I’ll be keeping my “Liquid Gold”.
Whatever you keep store it in the freezer, that is how you want to serve it, ice cold in small glasses just for sipping.  

Let me know when you start your own batch!!  Enjoy!!!