Eggplant Parmesan…my way!!

20 Comments

IMG_3144

As I have mentioned in a recent post my Dad has a garden and so another vegetable that has been a plenty is Eggplants.
Most of the summer, I would grill them or just roast them in the oven, and a couple of times I made Eggplant Parmesan.  I would post my pictures on facebook and of course my friends say tell me the recipe.

So this last time I tried to remember as making it to take pictures of the process and what I do 🙂

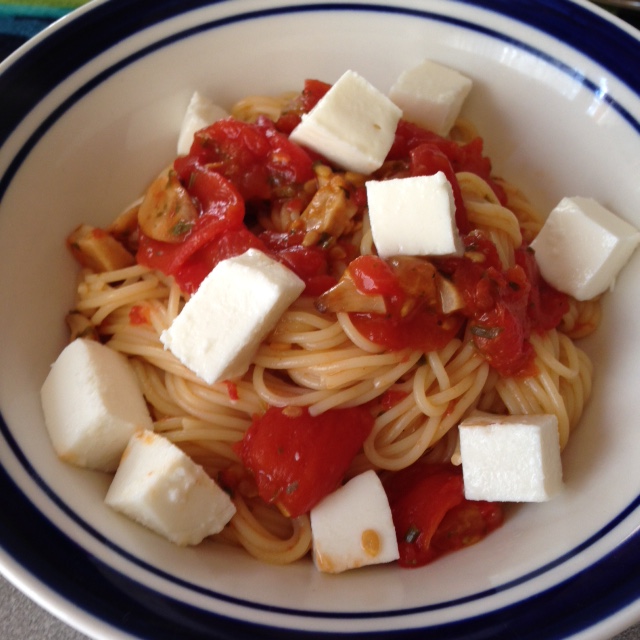
First I used my homemade tomato sauce that I made out of the tomatoes from my Dad’s garden and I love using Fresh Mozzarella 🙂

So enjoy!!

First I peeled, sliced then sprinkled slices with salt in a colander
for 30-40 minutes, then pat each slice dry with paper towel. 
(LOL of course the first picture of that I forgot to take)
Then place them on a baking sheet 

IMG_3177

I took panko bread crumbs and fresh grated Parmesan Cheese

IMG_3174

Mixed in some Sandwich Sprinkle from Penzeys
(coarse salt, garlic, black pepper, basil, oregano, rosemary, thyme and marjoram)
you can add Italian seasonings as well

IMG_3176

Put about 2 Tbsp. on mixture on top of each slice

IMG_3178

with your hand press down crumb mixture

IMG_3179

Then I sprayed each piece with PAM – Olive oil spray
of course you could drizzle with olive oil if you wish too.

IMG_3180

IMG_3182

Then bake in a 385 degree oven until tops are brown

IMG_3185

Sauce you can use any you like, so pick your favorite
I used my homemade sauce and I added
some of the Sandwich Sprinkle to the sauce

IMG_3183

I have some Fresh Sliced Mozzarella

IMG_3184

In a sprayed baking dish, place a eggplant down
and top with sauce

IMG_3186

Then top with a slice of mozzarella

IMG_3187

Place another piece of eggplant and repeat
with sauce and cheese

IMG_3188

I topped the final piece of cheese with the rest of the sauce

IMG_3189

I had crumb mixture leftover

IMG_3190

and I sprinkled some over top the entire dish
And bake at 385 degrees until brown 

IMG_3191

and cheese is melted and brown

IMG_3194

IMG_3195

IMG_3196

This was so good, most of the time I don’t measure anything so when
I cook unless I write it down it really just turns out to what I have 
in my pantry and such.  So when I am experimenting and it turns out good, I have to remember what I did so I can share in a blog, and then most the time I don’t take picture either 😛 LOL
The last time I made this (pictures below), I did the same except I didn’t have
any crumb mixture left, so I sprinkle the final layer with a little parmesan chesse

They both turned out delicious 😛 so as you make yours just make to what you like and
it will be just as Delicious!!

IMG_3148

IMG_3151

IMG_3150

Eggplant Parmesan

  • Servings: 4-6
  • Difficulty: easy
  • Print

4 medium size eggplant, peeled, sliced a 1/2- 3/4 inch thick (6 slices from each)
3 cups of tomato sauce
3 Tbsp. Penzeys Sandwich Sprinkle or Italian seasonings, divided
2 cups panko bread crumbs
1 cup fresh Parmesan cheese, grated
Fresh Mozzarella sliced, 2 slices for each stack
(used 1 1/2 logs for 8 stacks, so 2 logs would work for 12 stacks)
PAM Olive Oil spray

Sprinkle each slice of eggplant both sides lightly with salt, place slice in colander in the sink,
let set for 30-40 mins.  Then pat each piece with a paper towel, doing this helps draw out the bitterness that some eggplants tend to have.

In a bowl add panko, Parmesan and 2 Tbsp. seasonings; mix together.  Place slices on a baking sheet and put about 1- 1 1/2 Tbsp. of mixture on top, press mixture down with hand then spray with olive oil spray.
Crumb mixture does fly around a little that is why I press down the mixture, you can drizzle tops with olive oil if you wish.  Bake at 385 degrees until tops are brown about 25 minutes or so. 

Meanwhile get your tomato sauce ready, mix in 1 Tbsp. seasoning, have mozzarella slices ready.
Spray a baking dish that will hold the amount you are making.

Once eggplant tops have browned, place half the slice in the baking dish, top with 1 – 1 1/2 Tbsp. sauce,
then a slice of cheese, repeat again, eggplant, sauce and cheese.
At this point you can top each stack with leftover sauce and sprinkle with any left over crumb mixture, or just sprinkle some a little Parmesan cheese over top.  Bake at 385 degrees until light brown and cheese is bubbly.  

You can really make this your own, you like more sauce use more sauce, or cheese even, if you want to stack 3 high then stack 3 high.  These a great meal served with a simple salad on the side.

Enjoy!!!


You Say Tomato I Say Tomahto!!

25 Comments

Tomatoes, who has tomatoes…I DO!!!!!!!!
IMG_3098

My Dad’s garden is producing a plenty, his plants are 8 feet tall and going wild!!!

I have a few pictures here from the beginning stages, they are about 5 to almost 6 foot at this point,
my Dad here is growing, leaf lettuce, kale, peppers, cucumbers, onions, green beans, eggplants and of course Tomatoes!!!
There maybe be more he grows but I can remember, I do know he has another patch that asparagus is in and the green house that things grow too…

11666054_10153314920656438_2145071700432593791_n 11665606_10153314920601438_1139968286137009740_n 11391469_10153314920561438_153863238068122867_n 11180320_10153314920521438_125284806512604321_n 1978911_10153314920481438_8295813812636403610_n


but I just decided to write this blog about tomatoes last night, so I don’t have recent pictures of it 🙂 these picture were about the 2nd week of June

So I have been eating a lot of tomatoes lately, but they have really only been from my Dad’s, I don’t buy them usually, but I do love when I get them from him and his garden.

As anyone knows they just taste better than you can get in the store and it’s really the only eat time I do eat them.
My Mom and Dad will freeze them, stew them, roast them, sauce them, slice them for BLT (which I think they east daily during the summer) and chop them for salads.  Plus whatever else they do with them 🙂

I on the other hand I tend to eat them a little differently 🙂

First I blanch them and remove the skins, I have issues with the skins, that’s all I will say 🙂

Here are a few pictures of ways that I have enjoyed using my Dad’s fresh tomatoes from his garden.

I hope you will enjoy too!!!

Making sauce, in my Vitamix are tomatoes, roasted garlic, some Italian herbs, red pepper flakes and salt.
The Vitamix will also cook it too you let it run about 5-7 minutes and you have hot soup or sauce 🙂

IMG_2800

Mixing it all up

IMG_2802


Freezing some for winter 🙂

IMG_2804 11800462_10153387039611438_2787259125193853462_n

Cooking some down too

1263798_10151879504951438_2015140527_o

This is the cherry tomatoes, sauteed with garlic, onions and spinach
tossed with the pasta, then fold in some fresh mozzarella pearls
then a drizzle of some balsamic glaze…Delish!!!!

481565_10151629364236438_111827949_n

My all time favorite thing in the world is
Polenta with fresh tomatoes and a poached egg!!!
This is heaven for me!!!

1003899_10151774555011438_1600804182_n


another day again…YUMMY!!!

IMG_2759

This is my FBT…Fake bacon and tomato 😛

IMG_3103

Ran out of the cornmeal to make polenta
So I made couscous instead…Delish too!!!

IMG_3105

This was last night’s dinner
tomatoes, roasted garlic tossed with pasta and some fresh mozzarella cubes
I was talking about making this a work…so ladies this is what I made…simple and quick 🙂

IMG_3122 IMG_3120

Oh and here is the kale and I made some kale chips…very good with a
sprinkle of kosher salt and garlic powder 🙂

IMG_2795 IMG_2796

IMG_2798 IMG_2797


Here are couple of links of 2 more of my blogs that I used tomatoes in the past
First up is my Tomato Cobbler – this turned out really really good so if you
want something a little different try this recipe.

 Second is Orzo Salad with Basil, Tomato & Feta – I made this at one
of my outdoor cooking classes last year.

Enjoy the rest of the summer everyone!!!

What’s next here hopefully sooner than later
my trip to Bourbon Country 🙂
IMG_2927

It Was An All-Star Week!!!!

17 Comments

Well if you are not a sports fan and don’t live in Cincinnati, then you may not even know what I am talking about 🙂 but for a year the city has been planning for Major League Baseball’s All-Star Game.

IMG_2742

Let me say the city was crazy, I did go downtown a couple of days but if you didn’t get down there early to find a parking space, lot or garage it was nuts.  So to say the least I just drove around and then went back across the river 😛

But the Home Run Derby was exciting since Todd Frazier of the Cincinnati Reds won it this year!!!

CINCINNATI, OH - JULY 13:  National League All-Star Todd Frazier #21 of the Cincinnati Reds celebrates with teammate National League All-Star Aroldis Chapman #54 of the Cincinnati Reds after winning the Gillette Home Run Derby presented by Head & Shoulders at the Great American Ball Park on July 13, 2015 in Cincinnati, Ohio.  (Photo by Rob Carr/Getty Images) ORG XMIT: 554358169 ORIG FILE ID: 480626732

CINCINNATI, OH - JULY 13:  National League All-Star Todd Frazier #21 of the Cincinnati Reds celebrates with the trophy after winning the Gillette Home Run Derby presented by Head & Shoulders at the Great American Ball Park on July 13, 2015 in Cincinnati, Ohio.  (Photo by Rob Carr/Getty Images)

635724332307380677-071315-hrderby-ke-2156

All and all I think Cincinnati and Northern Ky. did an outstanding job hosting this years All-Star Game.

I did take some pictures, I have some here that friends took as well, but as I say it was an “All-Star Week”

There were are couple birthdays in our family and of course I made a few things, so check out my pictures and enjoy!!!

First of the birthdays was my little niece I made cupcakes 🙂

IMG_2673

IMG_2674

IMG_2675

She likes presents and bubbles 🙂

IMG_2680

IMG_2691

IMG_2693

Around town they made these mustaches statues here are few of them

IMG_2738

IMG_2636

download

here is the picture of all of them that they made, pretty cool 🙂
All-StarStacheStatues

Here are few of my souvenirs

IMG_2739

Buskin Bakery made the cookies got to love that!!

IMG_2740

Here are some pictures of the Red Carpet Parade,
the players start at their hotel and end at the ball park, all on red carpet 🙂
Grand Marshall – Barry Larkin

IMG_2726


Mr. Red and Gapper

IMG_2723IMG_2724


Rosie Red

IMG_2730


Some other mascots

IMG_2729

IMG_2728

IMG_2731

Todd Frazier and his family

IMG_2721

IMG_2725


You can see on Todd’s hand the blisters from the Home Run Derby 🙂

IMG_2727


Few other Players 🙂

IMG_2737

IMG_2733

IMG_2734

IMG_2735

IMG_2736

Some of the city skyline and downtown

WCPO_Scripps_Mustache_All-Star_1434036512226_19645178_ver1.0_900_675

IMG_2644

IMG_2699

yes they had a zipline too

IMG_2700


My All-Star Pizza, half spinach & garlic
other half was spinach, Gorgonzola cheese,
sliced almonds, sliced strawberries and
balsamic glaze…so so GOOD!!!

IMG_2701


IMG_2705

IMG_2707

The other birthday was my Mommy!! 🙂

I made her cookies peanut butter with no flour 🙂

IMG_2744 IMG_2743

Dinner – Braised Short Ribs, butter noodles and carrots 🙂

IMG_2745

IMG_2750

IMG_2752

Peach Ice Cream (I just scooped some out to take the picture)
she took the Ice Cream, cookies all home 🙂

IMG_2747

IMG_2749

And for actual dessert I made Red Velvet Cake with Cream Cheese Frosting 😛

IMG_2720

IMG_2754

IMG_2753

I must say I agree is was an All-Star Week 🙂

IMG_2709

Summer Cooking Class Series!!

16 Comments

Yes I know I have been a little “MIA” lately!!!

But this summer has been busy and I can’t believe its JULY!!!! 
I have my hand in so many different little things that I am just so busy and it’s been hard to find the time to blog.  Plus I have not been cooking anything really good for myself, so hence no blogs.

But I did finish a couple weeks ago a cooking class series that I did in 3 of our stores 🙂

They all turned out great, a lot of grilling and a few out of the box recipes, beer sampling with one too!!

Here are a few pictures of the dishes and the crowds, it was a great time and I had a LOT of help from some of GREAT co-workers.

I hope you enjoy!!!

Grilled Fruit Pizza – naan bread, Camembert cheese, blackberries, strawberries, basil and balsamic glaze

FullSizeRender (0000000D) FullSizeRender (00000008) FullSizeRender (00000004)

Grilled Asian Corn with peanuts

FullSizeRender (0000000E)

Grilled Watermelon with arugula, feta and balsamic glaze

FullSizeRender (00000012)

Crowd pic

FullSizeRender (00000003)

FullSizeRender (00000002)

FullSizeRender (00000005)

Veggie Pizza – Garlic naan bread, red pepper hummus, grilled veggies topped with goat cheese

FullSizeRender (0000000B) FullSizeRender (00000007)

Grilled pound cake and pineapple

FullSizeRender (0000000A)

Grilled German Potato Salad

IMG_2585

Grilled veggies with garlic couscous topped with basil

IMG_2586

crowd pics

FullSizeRender (00000009) FullSizeRender (00000016)

Zucchini & tomato salad with ricotta, Parmesan and pesto

IMG_2581

Hawaiian Rice – cooked in coconut milk, golden raisin, macadamia nuts and green onions

FullSizeRender (0000000C) FullSizeRender (00000019)

Mango & pineapple salsa

FullSizeRender (00000013)

Crowd Pics

IMG_2588

IMG_2576

Grilled romaine with mango vinaigrette, shredded jicama, pineapple, red pepper and black sesame seeds

FullSizeRender (00000010)

Me – having fun with the microphone….I love being on the Microphone 😛 

Chef Amy

One Lovely Blog Award!!

10 Comments

Recently I was nominated for the “One Lovely Blog Award” by Ka@My Uni Kitchen

One-Lovely-Blog-Award-1
Ka has a terffic blog, he has amazing Recipes, How to Guides and Cooking Tips, so please go over to his
blog and check out all those good things he has to offer 🙂

There are few rules to accepting the award you must tell everyone 7 things about yourself and nominate 15 blogs
for the award.

So here we go 🙂

1. I worked on a cruise ship for 6 1/2 years

2. My first career was in Theater Costuming before going into Culinary

4. I love Hockey

5. I worked for our home town Hockey Team by sewing names and numbers on their jerseys

6.  During the baseball season, I am on call for the Cincinnati Reds and the away teams
      that come into town and play the Reds, to sew their uniforms (sewing names & numbers),
      for any last minute call ups.

7.  The most I was ever paid for sewing 1 single uniform for an away team was $100.00
and 
that was for 1 hour of work, that included the call, me driving to the ball park
(i live very close) 
getting in there sewing the name and number and then 
      back in my car.  🙂  

Bonus – here’s the picture 🙂

beliveau

I hope you enjoyed the few things that most of you did not know about me 🙂


Here are the blogs that I think are fantastic and I give the “One Lovely Blog Award” too

Suzanne@apuginthekitchen

Gretchen@Feeding My 3 Sons

Ginger@Ginger&Bread

Loretta@Safari of the Mind

Angie@The Novice Gardner

Julie@Hostess At Heart

Michelle@Giraffes Can Bake

Suzi@Beach Blanket Bacon

Jhuls@The Not So Creative Cook

Coco@Crafty Little Coco

Lili@Lili’s Cakes

Max@Dante’s Kitchen

Linda@La Petite Paniere

Ms. Frau@Frugal Hausfrau

Petra@Food Eat Love

Vidya and Chitra I added you as well
I know Ka added you to his blog
but I wanted to let you know I love
your blogs too, so you can consider mine
with his 🙂

Vidya@Traditionally Modern Food

Chitra@Chitra’s Healthy Kitchen

Thank you everyone for checking out my blog!!!


Roasted Garlic Bean Dip Recipe!!

19 Comments

Okay so I am trying to think of new ways to get my face out there in the world…yikes 😉

So I started to make videos, some will be product tests and some will be recipes.

This is just in the beginning stages, I only have a iPhone and my computer, but I am trying to make them better and better, sometimes I just laugh at myself when I watch them back :p LOL

But you have to start somewhere right, I will get better and its okay if you laugh I will not mind 😛

So here is the first one I did so check out I hope you enjoy it!!

FYI – I have already changed few things from this first video like I said it is a work in progress 🙂

Roasted Garlic Bean Dip

  • Difficulty: easy
  • Print

1 can Cannellini beans, drained and rinsed
1/4 cup roasted garlic
1/2 tsp. kosher salt
1/4 – 1/2 tsp. sweet paprika
1/4- 1/2 tsp. hot paprika
2-4 Tbsp. extra virgin olive oil

In a food processor add garlic and pulse a few times, then add beans and seasonings, pulse again and add oil and pulse until mixture is smooth.

Then serve with chips or veggies, you can also add spread on tortilla for a wrap.


Homemade Pierogies!!

23 Comments

IMG_2038

PIEROGIES!!!!!!!

Who loves some Pierogies!!! ME!!!

So why not for Fiesta Friday, check out many fabulous blogs for Fiesta Friday over at Angie’s page.

And her co-host for this Friday are Ginger@Ginger&Bread and Loretta@Safari of the Mind, so I would like to thank all of them for today’s Fiesta Friday #64

A friend of mine and I made some homemade pierogies awhile back I think they turned out great.
I made the dough and the filling, then headed over to my friend Paul’s house and we put them together and cooked them up…Delicious!!!!

If you are not familiar with what they are, click here

I have always seen them in the freezer section Mrs. T’s, which I am not saying are not good, if you need a quick pierogi these will do the trick.

For me on the other hand I have them fresh from a place in Pittsburgh a couple of times, my friend Paul is from there so when I went with him to visit we went to “Pierogies Plus” check out all the different flavors that you can get when you go or you can have them shipped 🙂

Also when I went to Chicago I stopped into a Polish Pierogi Shop…amazing 🙂

I just went with Potato and Cheese for this first batch 🙂

Dough – Ingredients

IMG_1990


I used a food processor, you can do it by hand too

IMG_1993


Flour and salt

IMG_1996


pulsed it a little then added my egg

IMG_1998


with egg mixed in


IMG_2001


then add sour cream and butter and pulse

IMG_2002


Pulse a few times

IMG_2003


then turn it out onto your work space

IMG_2005


Knead to just bring together

IMG_2006


form into a ball and wrap in plastic wrap
I heard if you make the dough the night
before it becomes a more tended dough

IMG_2007


Filling – Ingredients

IMG_1991


Peel and cube your potatoes & boil until
done

IMG_2008


Drain potatoes and place back in the pan
set back on the stove, just on hot burner
to help some of the extra liquid cook off

IMG_2012


I used a ricer, you can certainly mash the
potatoes with a masher or however you
make your mashed potatoes

IMG_2010


using the ricer forces the potatoes through
the tiny holes which make the potatoes very
creamy

IMG_2013


potatoes, riced 🙂

IMG_2015


mix in butter and half and half

IMG_2016


8oz. shredded cheese

IMG_1994


fold in cheese

IMG_2017


finished mixture

IMG_2018


place in container and chill

IMG_2019


my dough

IMG_2022


I cut in half

IMG_2023


then again, take dough and press out
into a rectangle then use a rolling pin to make
dough about 1/8 inch thick

IMG_2024

IMG_2025

IMG_2027


I use a round cutter to cut my circles
about a 3 inch round maybe 3 1/2 inch 🙂

IMG_2028


I used my scoop, it worked out perfectly
mixture was about 2 tablespoons

IMG_2029

IMG_2030

place potato mixture in the center of the round

IMG_2031


bring edges up together and start to pinch
dough together from center to the outside
then from the center to the other side

IMG_2032


IMG_2033


Done, this was perfect, it was easier just to
form a round with your fingers, fill it and pinch

IMG_2034

as you can see not all of them look perfect
but they all tasted Fabulous!!!

IMG_2035


From following recipe this was how much
potato mixture left, it may have been a
cup or cup in half.  Great mashed potatoes
for sure.

IMG_2037

Homemade Pierogies

Dough:

2 cups all-purpose flour
1 tsp. salt
1 cup sour cream
2 eggs, large
1 stick butter, softened

You can use food processor or mix by hand
Mix together the flour and salt, add eggs and combine, the dough will be clumpy.
Work in the sour cream and softened butter until dough comes together roughly, then scrap out onto work surface.
Knead and fold the dough without adding any additional flour until the dough becomes less sticky but it will be quite moist.
Wrap the dough well in plastic wrap and refrigerate for at least 60 minutes, but I like it overnight.

Filling:

2 lbs. russet potatoes, peeled, cubed
2 Tbsp. butter, softened
2 Tbsp. half and half
8 oz. cheese, shredded (about 2 cups) Cheddar, Colby, farmers or any good melting cheese

Cook potatoes in boiling water until tender, drained potatoes and place back in pot, set pot back on hot burner so any leftover liquid can cook away.
At this point you can put potatoes through a ricer, food mill or you can just mash them with a potato masher.  Once that is done add half and half and softened butter and mix to combine, season with salt to taste and refrigerate to cool for 3 hours or over night.

Remove dough from fridge and plastic wrap, cut in half, then each piece in half, at this point you can roll each piece into a rectangle to an 1/8 inch thick.  You can use a 3-3 1/2 inch round cutter to make your rounds.  Or you can free form your rounds, you will get 24 rounds out of this dough.

Scoop about 2 tablespoons of filling onto rounds, gently fold in half and with your fingers pinch the edges from the center to each end, to seal the dough together.

At this point you can freeze these up to 1 month or refrigerate overnight up to 2 days.

Bring a large stock pot filled with water to a boil, in the meantime slice a large onion and begin to saute in a large skillet with butter or olive oil over medium heat, watching so they do not burn and just brown.

Once water starts to boil add 2 Tbsp. salt and stir, add pierogies to the salted water, make sure not to over crowd the pot and give a stir occasionally.  When pierogies float to the top they are done, transfer cooked pierogies to skillet with onions, cook pierogies until browned and crisp on both sides.

Serve hot with additional sour cream or applesauce if you like, but most of all enjoy those delicious bundles of love!!! 🙂

Think about something sweet inside them, they do make them with fruit, you could sweeten some cream cheese as the filling and saute in just butter and sprinkle with cinnamon and sugar or drizzle with chocolate…the possibilities are endless really!!

fiesta-friday-badge-button-i-party

Irish Beer Cheese Soup!!

12 Comments

Happy St. Patrick’s Day 2015!!!

So in honor of today I have my Beer Cheese Soup recipe for you today 🙂

beercheesesoup

I made this soup a couple of years ago when I did a St. Patrick’s Day Cooking Class, I also served Guinness Mac & Cheese, Guinness Black Lager Irish Stew and Guinness Stout Cake Pops 🙂

We all had a great time and everyone loved the food and of course the beer 😉

So before we get to the recipe for the soup, here is what a few of the people over here at the office look like today dressed in their St. Patty’s Day garb 🙂

First let’s start with the man that was named
after this day… Sir Patrick!!

IMG_2152

Here is Connie with her Irish scarf

IMG_2153

Janet and Jennifer have their green on 🙂

IMG_2159

And Kathie and Heather have their head bobs on 🙂

IMG_2151

Kathy in her green

IMG_2157

There are the “Meat” guys in green too 🙂

IMG_2154

Ann has a head bob too

IMG_2149


Margie being silly 🙂


IMG_2155

Here is the advertising girls pretty as ever

IMG_2160

And I think Tina wins the prize
as she is all decked out!!!
Her tie lights up too and her head
bob thing does too just can’t tell

IMG_2158


And this is one of ladies that Demo’s
for us in one of our stores, she Dressed
up for the day too 🙂

w


So what ever you do today enjoy it and have fun and make some soup!! 🙂

Irish Beer Cheese Soup

  • Servings: 6-8
  • Difficulty: easy
  • Print

1 cup onions, grated or finely minced
½ cup celery, grated or finely minced
½ cup flour
1 stick butter
1 bottle Harp Beer
3 cups chicken stock
1 tsp. dry mustard
1 tsp. Worcestershire sauce
16 oz. Sharp cheddar, shredded (Tillamook is what I used)
8 oz. extra sharp cheddar, shredded (Cabot Vintage Choice)
2 cups cream
Cooked bacon for garnish
Green onions (tops only), thinly sliced

In a stock pot over medium heat add butter, onions and celery sauté until softened.  Add flour, whisk and cook for about 3 minutes, whisking often.  Whisk in beer slowly and same with the chicken broth, bring to a boil then reduce heat to a simmer and cook for 15 – 20 minutes.  Then add dry mustard and Worcestershire then add cream while whisking and then cheese a good handful at time until all added keep whisking until smooth and cheese has melted.  Cook for about 10 minutes more. Taste, season with salt and pepper etc., if too thick add more broth, beer or cream, too thin add more cheese.  But nothing extra was needed; garnish each bowl with bacon and green onions.

Let me say the bacon really put this soup over the top, serve with my Harp Beer Bread recipe and you are good to go…Enjoy!!! Cheers!!

Happy St. Patrick’s Day!!!

Here are my Guinness Stout Cake Pops…yummmy!!!

Irish cake pops

Mini Strawberry Espresso Surprise!!! Fiesta Friday #55

35 Comments

Hello everyone it’s another Fiesta Friday!!! I want to thank our host Angie@The Novice Gardener and her co-host today Sue@birgerbird and Suzanne@apuginthekitchen.  Suzanne has become a great blog friend and I want to thank her 🙂  So enjoy Fiesta Friday everyone!!!

So earlier this week I went to my favorite place “Flying Olive” 🙂

The Flying Olive has 50 varieties of olive oils and vinegar’s, I love going there because you can taste anything before buying it 😛 check out their website for all the info and check out their 2 locations one each in Ohio and Kentucky.

I currently have Strawberry, Red Apple, Wild Blueberry, Cranberry Pear in the vinegar’s and in the olive oils I have Butter, Persian Lime, Cilantro and Roasted Onion and Tuscan Herb 🙂

During my recent trip I got Dark Espresso Balsamic Vinegar as I just love coffee so I knew I had to get it.

So I had some strawberries at home so I knew I was going to use those some how and I was thinking of using mascarpone cheese. After getting home and checking out what I had already in my pantry, I thought this would be a perfect mini dessert.  A couple of years ago for Christmas my friend Danny gave me a few sets of mini plates, bowls, spoons and forks, he know how I like to entertain 🙂 so this is my is my mini dessert.

IMG_1936

Ingredients (ended up not using the half n half)
If you wanted mascarpone to be more creamy
then I would add a little half n half.

IMG_1914

Added the vinegar to my strawberries

IMG_1919

Added the vinegar to the Mascarpone cheese

IMG_1920

Mixed up

IMG_1921

I crushed the Biscotti and added a little to bottom on the dishes

IMG_1924IMG_1922

Topped the biscotti with the strawberries that were soak in the Vinegar
IMG_1923

Then a dollop of the mascarpone mixture

IMG_1926

drizzle of more vinegar

IMG_1928IMG_1929

shave some chocolate, I thought this chocolate would go perfect

IMG_1930

IMG_1933

IMG_1936

Done…serve or chill until your party begins 🙂

IMG_1939

Mini Strawberry Espresso Surprise

  • Servings: 12
  • Difficulty: easy
  • Print

3/4 cup Flying Olive Dark Espresso Balsamic Vinegar, divided
2 containers tiramisu flavored mascarpone cheese
1 1/2 cup fresh strawberries, chopped
3 chocolate biscotti’s, crushed
1 piece dark chocolate

In a bowl add the chopped strawberries and 1/4 cup vinegar, stir and set aside.

In another bowl add mascarpone and 3 Tbsp. of vinegar and whisk together, set aside.

Set out your mini dishes that you are going to use, add about a teaspoon or a little more of the crushed biscotti to each dish, then add strawberries on top of biscotti, start with a teaspoon on each then add more to each to finish up the strawberries.  Dollop mascarpone cream on each dish, then with a teaspoon drizzle a little of the vinegar over top the mascarpone and finish with some of the shaved chocolate.  I like this recipe as a mini since it has a great richness to it 🙂

Serve or chill until needed.

This was so good, it was not overly sweet, and that tartness at the end from the balsamic vinegar was just perfect!!!  Enjoy the rest of your Fiesta Friday!!!

IMG_1943IMG_1946IMG_1947

fiesta-friday-badge-button-i-party


Fried Quinoa Balls stuffed with Mozzarella for Fiesta Friday #52

49 Comments

I am so excited to be able to take part in Fiesta Friday #52

I was invited by Suzanne@apuginthekitchen and I really want to THANK her for her help 🙂 Thank you Suzanne!!!

Suzanne got involved in this from Angie@The Novice Gardener

Angie’s co-hosts this week are Hilda@ Along the Grapevine and Julianna@ Foodie On Board

Thank you so much for letting me be a part of Fiesta Friday 🙂

Today I am doing a “Arancini di Riso” but I will not be using rice/risotto, I am going to use qunioa 🙂

FullSizeRender (22)fiesta-friday-badge-button-i-party

Yes you heard me correctly, almost two weeks ago I had a cooking class on Qunioa in one of our stores, as I posted my Qunioa Burger earlier this week.  For my class I was going to make these but if you have made them before they can be a little time consuming 😛 and I would have had to make at least 75 of them 🙂

Rolling, dredging and then frying so I passed on making them for my class, and well I thought they are the perfect appetizer and perfect for Fiesta Friday!!!

Well these turned out so dang delicious, if you ever had a rice ball, these hold up 100%  I think if you told someone these were a rice ball they really may never know 😉

So I hope you enjoy and will make them 🙂

Ingredients – quinoa, seasonings, mozzarella and parmesan

FullSizeRender (5)


Rinse the quinoa well in a fine mesh strainer

FullSizeRender (4)

FullSizeRender (3)

FullSizeRender (6)

add to pan with water/broth*see note below in recipe
bring to a boil

FullSizeRender (2)

once it comes to a boil add broth base, garlic

FullSizeRender (1)

then seasoning, except red pepper flakes

FullSizeRender

FullSizeRender (11)

cover and reduce heat to low and cook 30 minutes
or till all the liquid has been absorbed

FullSizeRender (10)
then stir until quinoa becomes thick like

FullSizeRender (8)


let cool in a bowl then add parmesan and
Red pepper flakes

FullSizeRender (7)

mix to combine, taste and add salt and pepper to your taste

FullSizeRender (16)

with a 2 oz. scoop, scoop out onto a lined baking sheet

FullSizeRender (15)

cut your cubes of cheese

FullSizeRender (9)

make intentions in the center of the balls

FullSizeRender (14)

add cube of cheese

FullSizeRender (13)

roll into balls, place baking sheet in fridge
over night or at least 2 hours

FullSizeRender (12)


for dredging, seasoned flour, beaten egg &
breadcrumbs, I used a combo of garlic &
hot & spicy 🙂

FullSizeRender (34)

make your dredging station

FullSizeRender (33)

roll balls in flour first

FullSizeRender (32)

second egg

FullSizeRender (26)

third breadcrumbs

FullSizeRender (25)

bring your oil to 350 degrees

FullSizeRender (23)

and fry your balls for 1-2 minutes
or until a nice golden brown

FullSizeRender (30)

now ready eat, serve with your favorite sauce
and top with some extra Parmesan

FullSizeRender (29)

so good, look at the gooey cheese 😛

FullSizeRender (18)

FullSizeRender (21)

FullSizeRender (17)


Quinoa Balls

1 cup white qunioa
3 cups chicken or veggie broth
2 tsp. onion powder
2 tsp. crushed garlic
2 tbsp. parsley
1 1/2 tsp. oregano
1/2 tsp. crushed red pepper flakes – optional
1 cup Parmesan cheese, grated plus for garnish
mozzarella cheese, cut into 3/4 inch cubes

Rinse quinoa is a fine mesh strainer under water until water runs clear.

In a med saucepan add quinoa and broth*, bring to a boil uncovered, once it comes to a boil add garlic, onion powder, parsley and oregano, stir, cover and reduce heat to low.  Cook on low for about 30 minutes or until all the liquid has been absorbed, let cool for 5 minutes, then stir in 1 cup Parmesan and red pepper flakes if using, taste and add salt and pepper to your liking.  Set aside for 15 minutes, then with a 2 oz. scoop, scoop mixture into balls, press your thumb in the middle of the ball to make a indention add cube of cheese and cover the cube with the quinoa by rolling into a ball.  Place balls on lined baking sheet and refrigerate for 2 hours or up to over night.

*I used chicken base, I added it once the water came to a boil.

For dredging
3/4 cup flour, seasoned with salt and pepper
2 egg, beaten
1 1/4 cup Italian bread crumbs or what you like

Place each in shallow bowls, dredge balls into flour, egg then breadcrumbs, place on baking sheet.  Let set on counter for about 30 minutes.  In a fryer or medium sauce pan add frying oil about 1 1/2 inches high, heat oil on medium high heat too about 350 degrees, fry until golden brown. about 1-2 minutes.  I always pull one out, let it set for a minute then cut it open to see if the cheese is gooey, if you let the balls set on the counter for 30-45 minutes before frying, they should be ready in about 1 or so, but just cut one open and fry longer if needed.

Serve with your favorite red pasta sauce and a sprinkle of Parmesan.  Makes about 24 balls.  Enjoy!!

FullSizeRender (20)

FullSizeRender (19)


fiesta-friday-badge-button-i-was-featured1