Homemade Pumpkin Spice Creamer!!

19 Comments

So are you one of those people that CANNOT wait till fall hits so you can get your
Pumpkin Spice Latte on!! 😛

IMG_3347

As you know most of the coffee shops only have this Pumpkin Spice Syrup during the fall and maybe into the winter???

I don’t know because I am not one of those people 😛

But it doesn’t mean I don’t want to get on the “Band Wagon” and make my own…LOL!!

So many recipes have been flying around the internet, so I decided I would give it a try…

And let me tell you it turned out DELICIOUS!!!!!!!

I kind of shock myself…LOL 😛

So of course I dug into my spices to find the hidden Pumpkin Pie Spice in the back from the fall before LOL and finally can open one of the two large can of pumpkin pure, again from the fall before 😦

Okay so what else…I found some sweetened condensed milk and now I just needed cream, but I didn’t want to use cream, so I settled for half n half.

Okay I think I am ready to go and this is how it all went.

Ingredients

IMG_3315

in a saucepan, pumpkin, milk and spice

IMG_3317

stir that up, then stir in the half n half

IMG_3319

cook on med-high
okay I will confess, I had in on med-high, but I was trying to do other things as well, and I may not have been stirring it the whole time…hence it started to burn on the bottom, when I went back to it, and started whisking like a mad women, black bits started to surface.  I may have cursed that this time, but I turned it down to low and kept on whisking until it thickened a little, then I let it cool for 5 minutes

Once I tried it was AWESOME!! It tasted like Toasted Pumpkin Marshmallow 🙂
I thought Holy Crap I just added another flavor dimension…WOOO HOOOO!!!!! LOL 🙂

IMG_3322

It does get a little darker as it thickens

IMG_3321

now you have strain this through a fine mesh strainer,
and take the back of a spatula and force the mixture through the
strainer by moving the spatula back and forth

IMG_3323

IMG_3324

IMG_3325

this is what you will have left in the strainer

IMG_3326

after I let the mixture cool in the fridge,
I poured it into 2 little mason jars

IMG_3335

IMG_3336

This will keep in your fridge up to 2 weeks
if it last that long 🙂 LOL

IMG_3337

My Pumpkin Spice Cappuccino

IMG_3338

I added to my mug, about 2 Tbsp. pumpkin mixture
2 Tbsp. creamer and stir it up

IMG_3339

Then I frothed that

IMG_3340

IMG_3342

Then I add my espresso

IMG_3344

IMG_3345

and to finish it off I sprinkle a little
Pumpkin Pie Spice on top…it was just Yumm!!!

IMG_3346

Now you can just mix it into your regular coffee,
as I did at the office this morning 🙂

IMG_3349

IMG_3351

IMG_3352

As I talk to some of the ladies this morning, I started coming up
all kinds ideas to do with this mixture besides to put in your
coffee…oh a can wait to get back in the kitchen…stay tune!!!

IMG_3347

Homemade Pumpkin Spice Creamer

  • Difficulty: easy
  • Print

1 cup pure pumpkin puree
1 can sweetened condensed milk
1 1/2 tsp. pumpkin pie spice
1/2 cup half n’ half, or cream or whole milk

Whisk everything together in a saucepan, cook over med-high, whisk until mixture thickens
and darkens a little.  Like I said above, let it burn a little and it will give it a toasted flavored, I felt
like that added such good flavor.

Pour mixture through a fine mesh strainer, take a spatula and force mixture through the strainer by going back and forth.  Pour mixture into a jar or container and keep refrigerated for up to two weeks if it last that long…LOL  Mind didn’t 😛

Add as much or as little to your coffee or tea and sit back and enjoy!!


Golden Beet Chips!!!

10 Comments

Yum…Yum…YUMMY!!!

IMG_20140528_165357

You either like beets or you don’t there is no in between!! 🙂

I don’t like beets…well okay maybe if they are “Amish Wedding” Pickled Baby Beets…then yes I like those 😛

But that’s it on the “Red” ones…I do on the other hand like the “Golden” beets 🙂

Golden beets are a little less sweet, more mellow and less earthy.

These chips were so easy to make and Delicious but you must keep an eye on them as they will burn very quickly!!
But I like those little burnt edges 🙂

Golden Beets

IMG_20140528_160635

Peeled and sliced

IMG_20140528_161123

oil, salt, pepper and paprika

IMG_20140528_161357

Toss to coat them

IMG_20140528_161518

place on a baking sheet, you do not have to place on a baking rack
Keep checking them, they do burn easy…

IMG_20140528_161759

Golden Beet Chips

  • Difficulty: easy
  • Print

Golden Beets
Olive oil
Salt
Pepper
Paprika

Peel and slice your beets, use a mandolin if you have one.
Place in a medium bowl, drizzle with olive oil, then sprinkle with salt, pepper and paprika.
Toss to coat all the beet slices.

Arrange on a baking sheet in single layer, bake at 375 degrees, after 15 minutes you need to flip them, check that small rounds are not burning.  Continue to bake until they are crispy, about 15 minutes more.

When I first made them I baked them at 400, I would go to 375 or even 350, flipping them at 15 minutes and continue to bake until crispy.

Let them cool and Enjoy.

Enjoy!! Them 🙂

IMG_20140528_165357

Dark Chocolate Cake with Orange Mascarpone Frosting!!

15 Comments

This is a little late, but Happy Belated Mother’s Day to all the Mothers out there 🙂

This past Mother’s Day I had my parents over to my house along with my bestie Danny 🙂

I made dinner and dessert and everyone went home full and my folks got all the leftovers 🙂

Lets start with the best the dessert, I made a Dark Chocolate Cake with Orange Mascarpone Frosting…YUM!! 😛

10313823_10152377300036438_2960032182049847146_n

Dark Chocolate Cake with Orange Mascarpone Frosting

For the Cake
1 3/4 cups all-purpose flour
1 cup granulated sugar
3/4 cup unsweetened cocoa powder
2 tsp. baking soda
1 tsp. baking powder
1 tsp. salt
2 eggs
1 cup Chocolate Milk (TruMoo)
1 cup buttermilk
1/2 cup vegetable oil
1 tsp. vanilla extract
For the Frosting
Peel of 1 orange and Zest of 1 Orange
1 cup heavy cream
12 oz. mascarpone cheese, at room temperature
1/2 cup confectioners’ sugar, sifted (more or less, to taste)

DIRECTIONS
For the Cake:
1. Preheat oven to 350°F. Spray two 8-inch round cake pans with non-stick spray
2. In Medium bowl whisk together eggs, hot milk, buttermilk, vegetable oil, and vanilla extract.
3. In a large bowl, whisk together flour, sugar, cocoa powder, baking soda, baking powder, and salt.
4. Make a well in the center of the dry ingredients. Pour in eggs, hot chocolate, buttermilk, vegetable oil, and vanilla extract. Whisk together until combined. Divide evenly between prepared cake pans.
5. Bake for 30-40 minutes until a toothpick inserted into the center of the cake comes out clean. Cool on a wire rack.

For the Frosting:
Infuse orange peel into cream first:
1. Place cream in a saucepan over medium-low heat. Add peels of one orange to the cream and simmer for 2-3 minutes, until the cream has taken on some orange flavor.
2. Take cream off the heat. Remove peels with tongs or by straining the cream. Discard peels. Allow cream to cool a bit before placing in the refrigerator until completely chilled, I did this over night.
3. With an electric mixer on medium speed, beat cream just until very soft peaks form.
4. In a second bowl, beat together mascarpone and confectioners’ sugar until smooth and creamy. Beat in ¼ of the whipped cream, then fold in the rest of the orange-scented cream and the zest of one orange, (keeping a little to garnish the top of the cake), into the mascarpone mixture until incorporated. Frost cake, keep chilled until ready to serve.

10250140_10152377298051438_7141175614663044838_n

The was great I love the chocolate and orange combo 🙂

10302509_10152377299451438_1031536902369811577_n

Now for Dinner I made Grill Salmon with fresh pasta, pistachio pesto along with sauteed mushrooms and asparagus…it was yummy too!! :

10306313_10152377297071438_2524828915591505176_n

My pasta making O_o

969423_10152362451446438_6630770350386528679_n

10300117_10152362452091438_6300023733849603843_n

10325276_10152362452716438_5050632269385463754_n

10171695_10152362453341438_6799249344541162676_n

10153847_10152362455396438_4458887898342064533_n

10308114_10152362455761438_3161610538024106653_n

I need to make fresh pasta more often, it really is easy 🙂

Enjoy Everyone!!!

Brown Bread!!

12 Comments

No I don’t mean like Whole Wheat bread…I mean Brown Bread, this is a sweet or quick bread and bake in a CAN!!  

IMG_20130726_142609

Yes I said a can…you know a can that veggies come in or soup 

I grew up having brown bread in our house my Mom would make this as well as my Grandma…I don’t think I ever thought it was odd baking it in a can…I was a kid it was a cool thing 🙂

Wikipedia says – 

New England or Boston brown bread is a type of dark, slightly sweet steamed bread (usually a quick bread) popular in New England. It is cooked by steam in a can, or cylindrical pan.
Brown bread’s color comes from a mixture of flours, usually a mix of several of the following: cornmeal, wheat, whole wheat, graham flour, or rye, and from the addition of sweeteners like molasses and maple syrup. Leavening most often comes from baking soda (sodium bicarbonate) though a few recipes use yeast. Raisins are often added. The batter is poured into a can, and steamed in a kettle. While most variations are quick breads, and can be made in less than an hour, several commercial brands are available. Brown bread is somewhat seasonal, being served mostly in fall and winter, and is frequently served with baked beans.

I really had forgotten about this Brown Bread until I read this blog “A Small Insight” http://asmallinsight.wordpress.com/2013/04/09/mammas-fruit-loaf/
Lucy call it “Mamma’s Fruit Loaf and when I read this post and saw what it was, I immediately thought of Brown Bread 🙂 

So go to her blog and check her out and her recipe for her Mamma’s Fruit Loaf 🙂

All  know is that I really was not a big fan growing up, but now this stuff if great and I like mine with butter, now my Mom likes her’s with cream cheese.  So its up to you on which way you eat it, its also good heated in the microwave 🙂

My recipe here is is made with a couple of can, I also used small paper loaf pan, easy to give as gifts and I made some today for our office and I used a Bundt pan and it just came out so nice…perfect with you were having people over for coffee or tea, it’s perfect.

Now I did compare my brown bread to the ‘Can” kind you find in the store and let me say, I thought the store bought one was very dense, dry, very little raisins compared to mine.  And the flavor well I am sorry to say it was just plan awful…sorry if you like it, I just didn’t care for it 🙂

Store bought

IMG_20130726_114939IMG_20130726_115243IMG_20130726_115347IMG_20130726_115442


Ingredients

IMG_20130726_120106


Raisins and water in a small sauce pan

IMG_20130726_120508

IMG_20130726_120540IMG_20130726_120624


add flour, salt, baking soda and bran/bran buds to bowl 

IMG_20130726_121509


Mix together
IMG_20130726_121614

cream butter and sugar

IMG_20130726_122932


IMG_20130726_123109


stir in egg and vanilla

IMG_20130726_123241


IMG_20130726_123311


add dry mixture and stir a little

IMG_20130726_123357

IMG_20130726_123436


add raisin mixture

IMG_20130726_123543


Fold to combine

IMG_20130726_123613


pour batter into your containers

IMG_20130726_124005


bake

IMG_20130726_132140


this is the can

IMG_20130726_134203


this looks so good

IMG_20130726_142506


this is store on left and mine on right

IMG_20130726_142732


You can see that mine has so many more raisins

IMG_20130726_142852


Both buttered and ready to eat

IMG_20130726_143006


Out come, like I said did not care for the store bought, took one bite 😦

Mine oh it looks so good!!!!

IMG_20130726_143229

Brown Bread Recipe

1 1/2 -2 cups raisins
2 cups water
1 cup Bran or Bran Buds Cereal
1 3/4 cup all-purpose flour
2 tsp. baking soda
1/2 tsp. salt
1 cup granulated sugar
2 tbsp. butter, softened
1 egg
1 tsp. vanilla

4 – 16oz. cans (fill 2/3 full)- bake for 35-55 minutes, small loaf pans (fill half full) – bake 30 minutes, large loaf pan (fill half full to 2/3’s) – bake 40 – 50 minutes, bundt pan (whole recipe) – bake 45 minutes.  With any of these just keep an eye on it, when you stick a toothpick or skewer in bread it should come out clean, it then is done.   Cool upside down on a cooling rack.

Pre-heat oven to 325 degrees

In a small to med sauce pan add water and raisins, bring to a boil over med-high heat, once it boils, remove from heat and set aside for 10 minutes.

In a small bowl add flour, bran/bran buds, salt and baking soda, stir to mix…set aside
In a large bowl cream together butter and sugar for 1 minute, then stir in egg and vanilla, then add dry mixture, stir it a little and raisin mixture, fold to fully combine.

Pour into your WELL greased or spray baking container, and bake.  Let cool enough to handle and then you can dig in 🙂

The Bundt pictures

IMG_20130821_172431


IMG_20130821_172537

Banana Bread!!!!

8 Comments

Okay who doesn’t like Banana Bread 🙂

IMG_20130726_143721

I love Banana anything…cakes, muffins, cookies, bread, ice cream, yogurt, candy!!!  

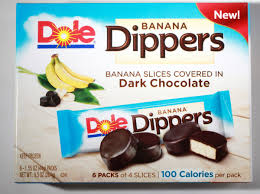
Oh and have you seen the **NEW** Dole Dippers, slices of bananas dipped in dark chocolate and FROZEN can you say

YUMMMMMMMMYYYY!!!!!!   download

I can, I have had them and they are addicting, they even have them with chopped almonds sprinkled on top too 🙂  They come 6 packages in the box, 100 calories a package, so well worth it 😛

So have a pack of those so when you have a slice of this Banana Bread you will not feel so guilty 🙂

So we’ve all had the few bananas sitting on the counter that are slightly or way past their prime…right 😛

I think what most people think of when that happens to the bananas is….BANANA BREAD TIME!!

So here’s my Banana Bread recipe 🙂  Hope you enjoy it!!

Ingredients

IMG_20130726_122341


whisk together, four, salt and baking soda

IMG_20130726_130728


add bananas to bowl and mash

IMG_20130726_125404

then add sour cream and vanilla to bananas

IMG_20130726_125734

mix together

IMG_20130726_125811

cream butter and sugar

IMG_20130726_125955

for about 3 minutes

IMG_20130726_130206


add egg yolks

IMG_20130726_130404

beat to combine

IMG_20130726_130624

fold in half flour mixture

IMG_20130726_130816


IMG_20130726_130848

then add banana mixture and rest of dry

IMG_20130726_130918


IMG_20130726_131007


IMG_20130726_131058

beat egg whites just until frothy

IMG_20130726_131212


IMG_20130726_131251

fold into batter, but don’t over work it

IMG_20130726_131318

IMG_20130726_131400


I used mini loaf pans, you can also find paper baking loaf size too, for easy gift giving

IMG_20130726_124253


IMG_20130726_131914


Then bake and done

IMG_20130726_140624


This recipe is so moist you will never use another 🙂

IMG_20130726_143858

Recipe

1 stick of butter, softened
1 1/2 cup granulated sugar
2 eggs, yolks and whites separated
1 1/2 cup all-purpose flour
1 tsp. baking soda
1/4 tsp. salt
4 tbsp. sour cream
3 overripe bananas, mashed
1 tsp. vanilla

Preheat oven to 325 degrees

pans – 8 1/2 x 4 1/2 x 2 1/2 loaf pan, or mini loaf pans or small bundt pan.

In a small bowl add mashed banana, sour cream and vanilla, mix to combine.

In another small bowl add flour, salt and baking soda, whisk to combine, set aside.

Cream butter and sugar together in a large bowl for about 3 minutes, then add egg yolks and beat until combined.
Fold in 1/2 of dry mixture, then add banana mixture and the rest of the dry.

In a clean dry bowl add egg whites and beat for about 30 – 45 seconds just until frothy, then fold egg whites into the batter.

Just until combined, try not to over work the batter.

Bake for regular size loaf pan 45 minutes to 1 hour, mini loaf pans about 30 minutes, check by inserting a toothpick in the center and comes out clean.

Enjoy!!!!

IMG_20130726_143758

Asian Flank Steak and Chicken Wings with homemade BBQ Sauce

1 Comment


This is a re-blog from last year but with grilling season still going strong is a great recipe for grilling out.

Hope everyone is enjoying the summer 🙂


This is the Flank Steak and Chicken Wing with homemade BBQ Sauce recipe I used when I grilled out with some friends and made the Mac and Cheese in the electric pressure cooker (previous blog)

I love this marinade I use is all the time!

Marinade

1/2 cup honey or brown sugar
1/2 cup soy sauce
1/2 cup rice vinegar
1 tbsp. garlic, minced
1 tbsp. whole peppercorns, or just ground black pepper will work too
Mix everything in a ziploc bag, place your steak inside and refrigerate up to 24 hours.  Grill about 7 minutes per side, for medium rare, slice thinly across the grain.

I made this steak sauce to be served with the steaks as well, but then I divided it and to half, I added a 1/4 cup more of brown sugar, stirred that in and used it as a BBQ sauce for our Chicken Wings…so good!!

BBQ Sauce/Steak Sauce

3/4 cup balsamic vinegar
2/3 cup ketchup
2 tbsp. Worcestershire sauce
1 1/2 tbsp. Dijon mustard
1/4 cup shallots, minced
1 tbsp. brown sugar
1/2 tsp. pepper
1/4 tsp. each of cinnamon, nutmeg and ground cloves

Add all ingredients to a medium saucepan, heat over medium-low heat, bring to a bubble, and then reduce to low, cook until shallots are tender, 15 – 20 minutes.  Let cool, store in an air tight container in the refrigerator.
Remember if you want to make half a BBQ Sauce, divide and add 1/4 cup brown sugar to half the mixture.

My go to veggies that I just love so so much are green beans, jicama and onions, I think I could eat that combo everyday.  All I do is clean and break the green beans, peel and slice the onions and the jicama you peel that like a potato, then I slice it and cut into matchstick like pieces (they kind of look like french fries). 

I toss all of together with a little olive oil and some salt and pepper, grill them in a sitr-fry basket until the desired doneness…I like me veggies with a little bit of crunch still.  You can also saute these up in a skillet if you don’t want to use the grill.

I really do love jicama, I first had it many years ago in mexico, I thought it was potato, but I quickly found out it was this big root vegetable like a potato.  I use jicama in my soups in place of potato, it really is go much better for you, I also will eat it raw just like carrot sticks.  It’s also great in salad or adding a crunch to salsa, if you have never tried jicama please go to your local produce dept. and ask them for it, you will not be sorry…Enjoy!!!

“Goodies Box” for July

1 Comment

A Goodie Box!!!  Who doesn’t like a Goodie Box 🙂

A box that comes to you each month with Goodies in it to surprise you…I love it!!

Well I have been so fortunate to be chosen to receive thus kind of box each month as long as I blog and review each item…Well I said “Of course, it would be my Pleasure” 😛

IMG_20130719_130214

First you too can get the same box ($7 per month) so you can too get to taste and enjoy the same products Check them out here https://www.goodies.co/

Okay here we go

The box and wrappings are all made with recyclable materials 

IMG_20130719_130422

What’s inside – Wow I like what I’m seeing

IMG_20130719_130506

a drink and snacks

IMG_20130719_130737

Okay so I am really liking whats in the box, I have seen some of these items around
but sometimes you don’t really want to buy somethings just in case they turn out
not so good 🙂

Okay so lets start
 
1.  Crunchmaster – http://www.crunchmaster.com/home.aspx

IMG_20130724_132848

These crackers were very very good, extremely crunchy, I thought they had a good flavor, along with everything you see on the package they are also Sugar Free, Vegan/Dairy Free, low saturated fat and Og Trans fat.

IMG_20130724_132957

These crackers are a great snack, I would totally buy them and if anyone has to eat Gluten Free I so recommend these crackers.   Check out their website (above) for other products they sell.

2.  Cosmos Creations – http://www.cosmoscreations.com/

So the front of the bag says “Heavenly Morsels of Baked Corn with all Natural Ingredients you can Pronounce”  I like this 🙂

IMG_20130724_133514

As you can see from the picture again Gluten Free, among other things, I did like these little cinnamon crunchy little puffs of goodness 🙂  I liked that the fact that I really did feel like I was eating popcorn without the Hulls or Kernels…YAY!!!

IMG_20130724_133541

These Crunchy good snacks come in 4 flavors – Cinnamon Crunch, Caramel, Sea Salt & Butter and Salted Caramel,  I’m wondering if the Sea Salt and Butter will taste like Buttered Popcorn 🙂
I hope these some in a snack pack size, because eating the whole bag could happen if you did not portion it out…so if you buy the big bag….which I do recommend this product 🙂  Scoop some out into a bowl first 😛

3.  Glaceau Fruitwater – http://www.fruitwater.com/

Okay so now I bet your thirsty by now, well I really did like this Fruitwater 😛

IMG_20130724_135859

This water was refreshing, bubbly and the flavor was not over powering, so many flavored waters the flavor is so strong and they are so sweet at least to me.  I like sparkling flavored water, but sometimes it hard to find, that’s why I really do like this one, they also have 5 flavors, Black Raspberry, Lemon-Lime, Watermelon Punch, Strawberry Kiwi and the one I had Orange Mango.  Also Zero Calories, 20% of the recommended daily value of vitamins b5 and b6, magnesium and zinc, and 50 milligrams of green tea extract.

This one is a buy for me can’t wait to pick up a few 🙂

4.  The Better Chip – Jalapeno with Sea Salt – http://www.thebetterchip.com/

IMG_20130724_133222


I absolutely LOVED these chips, they were very crisp and firm like, they would hold up to a thick guacamole or a cream cheese dip with out breaking.  The flavor was fantastic, spicy with just the right amount of sea salt, what I also liked about these chips was the fact you could see pieces of jalapeno.

IMG_20130724_133250


They come in other flavors too, Fresh Corn with Sea Salt, Spinach & Kale with Sea Salt, Sweet Onion with White Cheddar and Red Pepper with Salsa Fresca.

I totally would buy these, I think they are great just on there own or with salsa or any other dip they would be just fantastic!!!

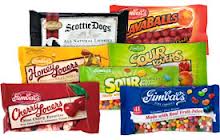
5.  Gimbal’s – Cherry Lovers – http://www.gimbalscandy.com/

download


I must say when I first saw the package I was so excited because I really love Cherry flavor in anything chewy 🙂

IMG_20130724_133909


I opened up that package and quickly sorted them out into flavors, there are 9 flavors in this package, once sorting them all, I was not pleased….flavors and how many – Chocolate Cherry – 1, Kiwi Cherry – 2, Cherry Cheesecake – 2 or 3, Cherry Vanilla 0 or 1 (it was was to tell with color but when I tasted it, I still was not sure if it was Vanilla or Cheesecake), Cherry Daiquiri – 2, Cherry Cola – 2, Bing Cherry – 2 I think, Wild Cherry -2 I think, Black Cherry – 9.

Let me say some of these were hard to tell which was which

IMG_20130724_134435


All and all I thought I did get one of each flavor, but after tasting each color, I am really not sure, Bing Cherry and Wild Cherry looked very much like the same 😦

I’ll say this Gimbal’s has other candy to choose from 🙂

images


I just don’t think I would choose the Cherry Lovers, matter of fact I brought the rest of them with me to the office and they are still in a baggie in my desk drawer 😛  Cherry was the flavor, I just was not impressed 😦

So this months Goodie Box was 4 to 1, I think that is pretty good 🙂
Can’t wait to get August’s box!!

Sunshine Award

15 Comments

Some people that follow me may not know that there are Blogger Awards, well I was nominated for the Sunshine Award

sunshine-blogger-award11

There are various Awards that you can nominated for, about a year ago I as nominated for the Inspiring Blog Award and I never did anything with it and I feel bad, so this time I am acting on it 🙂

I was nominated for this award by Clarissa from http://dishingitoutwithclarissa.com/

I can’t remember how I stumbled upon Clarissa’s blog but I really loved it when I first saw it, I love that she posts great recipes and her wonderful helpful posts on Amazing Food Facts, she has a fantastic blog and I think everyone should click, check her out and Follow her 🙂

So when you are nominated for an Award, there are questions you must answer (see below) and then you too have to nominate other bloggers for the Award as well (see below)

I have a list of questions that were given to me:

1. Favorite fairy tale… Sleeping Beauty

2. Favorite exercise… NONE 🙂

3. Favorite smell… Fresh cut grass/A burning fire on cold winter day

4. Favorite dessert… Crème Brule

5. Favorite vacation spot… New York City

6. Favorite sound… Showtunes

7. Most unexpected visitor… still waiting for Hugh Grant to show up for Dinner 🙂

8. Dream for the world… NO more Fighting

9. Closest dance with death… Knock on wood; don’t think I’ve had one

10. Favorite lake… Lake Tahoe

Now, the Blogs I have found to have the characteristics of the Sunshine Award,

Positive, Inspire Others Creatively or Make You Smile!

http://alotonyourplate.wordpress.com/

http://l2ee2l.wordpress.com/

http://thepeckishkiwi.com/

http://chgojohn.wordpress.com/

http://homemadedelish.com/

http://teawitherika.wordpress.com/

http://davidionelromulus.wordpress.com/

http://highheelgourmet.com/

http://memnerz.wordpress.com/

http://cosybites.wordpress.com/

Please take the time to check each of them out and Follow them 🙂

S’Meaches!!!!

7 Comments

S’Meaches…………………WHAT THE HECK ARE S’Meaches??????????????????????????

That is what everyone has been asking me since I’ve told them I’m going to make S’Meaches!!!

It’s like S’Mores but with peaches and a little kick 😉

IMG_20130623_161826

Funny I first heard about S’Meaches in a meeting at work, the video (below) is going to be featured in a few of our stores on huge TV Screens to promote the great tasting peaches we have for sale.

Click this link below for the video

https://vimeo.com/28647609

They are some good peaches too…I’ve been adding them to salads, oatmeal, making my spicy peach chicken, I could go on and on 🙂

But I want to talk about S’Meaches….this is not my recipe, this recipe is all over the internet but of course I have to change it 🙂

Only thing I did was use 2 peach slices and 2 marshmallows…next time I would add some cinnamon to the brown sugar, but using cinnamon graham crackers would do the trick too 🙂
I just thought 2 peaches would make it better and of course adding a second marshmallow made it even gooier 😛 

So if you don’t have a huge fire to cook these at then just use your grill just like I did…let’s take a look 🙂

Ingredients

IMG_20130623_153207

Slice peaches, mix cayenne and brown sugar together
(next time I will add the cinnamon)

IMG_20130623_154113

dredge slices in brown sugar mixture

IMG_20130623_154524

add peach slices to a skewer

IMG_20130623_155127


 I grill peaches first, until tender and caramelized

IMG_20130623_155912

add marshmallows, hold over grill until lightly brown

IMG_20130623_160044


IMG_20130623_160412

ready for graham crackers

IMG_20130623_160855

marshmallow down with peach on top then top with another marshmallow

IMG_20130623_160954


Eat and enjoy!!!

IMG_20130623_161151

Recipe

1 peach, sliced into 8 slices and halved horizontally

8 marshmallows

1/4 cup brown sugar

1/4 tsp. cayenne pepper

1/4 tsp. cinnamon (i will add this next time)

Graham Crackers

skewers

Mix the cayenne, cinnamon and brown sugar, and dredge the peaches in it.
Put 2 slices on skewer, grill over a medium-low flame until caramelized and brown, add 2 marshmallows and toast over flame until light brown.

Break graham crackers into 2 pieces, add marshmallows to top and to bottom piece, then add peaches, put them both together and Enjoy!!!

IMG_20130623_161724


So quick and easy!!!!!  Try it at your next grill out!!!


IMG_20130623_162014

Father’s Day & BBQ Ribs!

3 Comments

IMG_20130616_133605

Well I hope any Dad’s out there that are reading this had a Great Father’s Day yesterday, I believe that my Dad did 🙂

At least his belly was full 😛

We had Ribs, grilled cabbage and onions which came from his garden, mashed potatoes and I made him a Banana Cream Pie which is his favorite 🙂
Check out my blog on the Banana Cream Pie in the archives.

I also posted in the past my recipe for the BBQ ribs, but I changed it up a little this time.  
For Christmas someone gave me some “Bacon BBQ Salt” so instead of the kosher salt I use that instead and I add a little cumin this time as well.

I like doing a dry rub first then adding BBQ sauce  on them at the end, but everyone has there own method but if you try my recipe here I know you will not be disappointed 🙂

These ribs were so dang gone lip smack-in delicious, you will be making them all the time 🙂

And this recipe is really really so easy, there is NO excuse not to make these ribs!!!!!

Now I made 4 racks so everyone would have plenty of leftovers 😛

Spices used

IMG_20130615_071702

mix all in bowl, then I added the brown sugar

IMG_20130615_072057

IMG_20130615_072430

all my ribs

IMG_20130615_065828

Pull the skin off the back of the racks

IMG_20130615_070129

IMG_20130615_070306

I like cutting them in half
IMG_20130615_071334

spray my foil

IMG_20130615_072851

add the rub to the ribs all over

IMG_20130615_072954

put them in foil on baking sheets

IMG_20130615_074001

cover with another piece of foil

IMG_20130615_074154

make packets and I put the entire baking sheets in my fridge 
for 24 hours 🙂

IMG_20130615_074725

Take them out of fridge 1 hour before cooking,
bake for 3 hours in a 300 degree oven

after 3 hours, I cut the top piece of foil off

IMG_20130616_130804

look at how tender the meat is 🙂

IMG_20130616_130903

add your favorite BBQ Sauce and put back in the oven

IMG_20130616_131032

Done

IMG_20130616_132709

1 full rack of Baby Back Ribs

Rub – Makes about 1 cup

1/3 cup brown sugar, packed
1 tbsp. black pepper
1 tbsp. kosher salt or 1 tbsp. Bacon BBQ Salt
1 1/2 tbsp. paprika
1 1/2 tbsp. garlic powder
1 1/2 tbsp. onion powder
3 tbsp. chili powder
1/2 tbsp. oregano
1 tbsp. cumin

1 bottle of your favorite BBQ Sauce

Preheat oven to 300 degrees.

Mix all spices together in a bowl, set aside.  Flip ribs over to the back, there is a thin piece of skin that needs to be removed, at one end of the ribs with a knife or with your finger nail start at an edge to peel up a little of the skin. With a paper towel grasp the skin and pull gently as the skin comes up, using the paper towel helps it from slipping out of your grasp.
Rub a the entire rack with all the rub on both sides, put into a jumbo zip-loc bag, or you can cut ribs in half and use a gallon size bag.
Place in refrigerator over night.


Take ribs out of the refrigerator about 1 hour before cooking.

Using heavy-duty aluminum foil, lay one sheet out 8 inches longer then the rack of ribs. spray sheet with non stick cooking spray and place ribs face up, take another sheet same length and spray one side as well, putting that side down on top of ribs.  Fold both edges of the foil together rolling the edges towards the ribs, stopping about 1 inch before the ribs.

(I went ahead and put them in my foil packets instead of zip loc bags, and put them on the baking sheets and set them in fridge, then I just pulled them out and they were ready for the oven)

Place the package on a baking sheet and bake for 3 hours, after 3 hours  take out of the oven, increase heat to 425 degrees.
Remove the top piece of foil and add your favorite BBQ sauce to the top of the ribs all over, then place back in over without foil for 15 minutes.

IMG_20130616_132804

The meat just melts off the bones, so GOOD!

IMG_20130616_133637

Bones clean 🙂  enjoy!!

IMG_20130616_134716