Yes I know I have not blogged in FOREVER!! But this girl has been busy, but today I have a quick easy recipe for Halloween or really anytime. 🙂
I do like a Butterfinger Candy Bar every once in awhile, so when I saw this online, I thought really does it taste like a Butterfinger????
This was one of those million some videos you see of recipes, and I was like 3 ingredients and you have a Butterfinger…well lets give this a try 😛 LOL!!
Now I made a big batch, I wanted to bring them to the office today for everyone for Halloween.
So I will give you the original recipe and then tell you what I did for large batch.
So you need – Chocolate discs for melting, Creamy Peanut Butter and a bag of Candy Corn…
Now you know tomorrow you will find a ton of bags of Candy Corn marked down to like 25 cents…LOL So stock up and you can make this anytime 🙂
Melt Chocolate, spread on to a silpat or parchment paper
In a microwave safe bowl add peanut butter and candy corn
Heat in microwave until softened, then mix until smooth and candy corn has been melted and mixed in
Once Chocolate layer is firm, layer candy corn mixture over top
Spread mixture over chocolate to the edge
Melt more chocolate
Spread it over top all the way over the edge
Like this, now let it set up, I let mine set on the counter
Now Cut and there you have your bars, you also can free form bar shapes and then dip the whole bar into chocolate
The original recipe is not mine, just google it and you will find a lot of them.
1 cup candy corn 1/2 cup creamy peanut butter 2 cups chocolate discs
Melt half the chocolate and spread out onto a silpat or parchment paper, set aside to cool
In a microwave safe bowl add candy corn, heat for 30 seconds and keep repeating until smooth, then add peanut butter, mixture will become stiff. Let cool a little, then spread over top of chocolate, then melt remaining chocolate and spread over top of candy corn mixture, let set then cut into bars.
What I did was a little different, and this is that recipe, this was a large batch
I used a silpat for this and made it over the entire thing
To a microwave safe bowl add half the milk chocolate and half the semi-sweet, I also like to add a tablespoon of Crisco shortening to my chocolate to make smoother. Heat for 1 minute, stir, then heat again in 20 seconds intervals, stirring each time until smooth.
Pour out all over the silpat, let set to cool, once cool, then in a large microwave safe bowl add candy and peanut butter. I added some peanut butter first then some candy, then peanut butter again then candy then peanut butter again.
Heat for 1 minute, stir, then heat for 1 minute and 30 seconds, stir again, then heat in 20-30 second intervals until candy corn is completely combined into the mixture.
TIP – take the candy corn and add it to your food processor to chop up, I think doing this will help in melting easier and then it will not take that long in the microwave.
Let candy corn mixture cool just a bit, then spread it over the cooled chocolate, spreading it to the chocolates edge.
Now melt the same way as the first, the remaining chocolate and pour over top the candy mixture.
Let set up at room temp for at least 6 hours, if you can’t wait you can put it in the fridge to firm, but let it get to room temp before cutting or chocolate could crack.
My Dad’s garden is producing a plenty, his plants are 8 feet tall and going wild!!!
I have a few pictures here from the beginning stages, they are about 5 to almost 6 foot at this point, my Dad here is growing, leaf lettuce, kale, peppers, cucumbers, onions, green beans, eggplants and of course Tomatoes!!! There maybe be more he grows but I can remember, I do know he has another patch that asparagus is in and the green house that things grow too…
but I just decided to write this blog about tomatoes last night, so I don’t have recent pictures of it 🙂 these picture were about the 2nd week of June
So I have been eating a lot of tomatoes lately, but they have really only been from my Dad’s, I don’t buy them usually, but I do love when I get them from him and his garden.
As anyone knows they just taste better than you can get in the store and it’s really the only eat time I do eat them. My Mom and Dad will freeze them, stew them, roast them, sauce them, slice them for BLT (which I think they east daily during the summer) and chop them for salads. Plus whatever else they do with them 🙂
I on the other hand I tend to eat them a little differently 🙂
First I blanch them and remove the skins, I have issues with the skins, that’s all I will say 🙂
Here are a few pictures of ways that I have enjoyed using my Dad’s fresh tomatoes from his garden.
I hope you will enjoy too!!!
Making sauce, in my Vitamix are tomatoes, roasted garlic, some Italian herbs, red pepper flakes and salt.
The Vitamix will also cook it too you let it run about 5-7 minutes and you have hot soup or sauce 🙂
Mixing it all up
Freezing some for winter 🙂
Cooking some down too
This is the cherry tomatoes, sauteed with garlic, onions and spinach tossed with the pasta, then fold in some fresh mozzarella pearls then a drizzle of some balsamic glaze…Delish!!!!
My all time favorite thing in the world is Polenta with fresh tomatoes and a poached egg!!! This is heaven for me!!!
another day again…YUMMY!!!
This is my FBT…Fake bacon and tomato 😛
Ran out of the cornmeal to make polenta So I made couscous instead…Delish too!!!
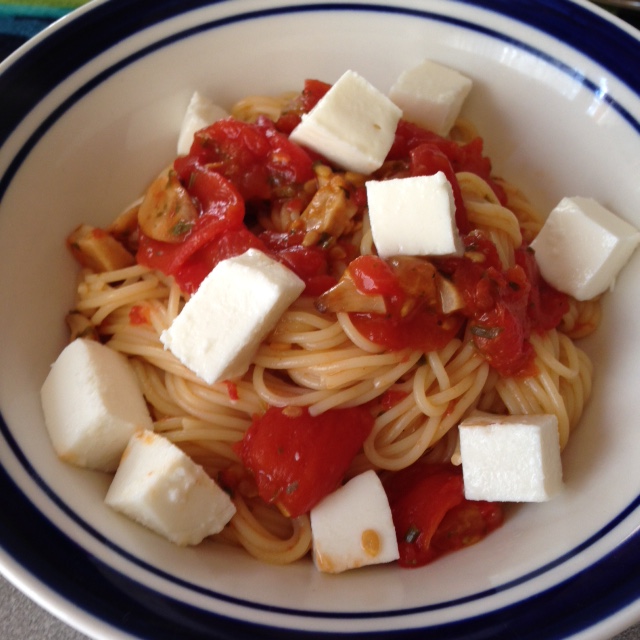
This was last night’s dinner tomatoes, roasted garlic tossed with pasta and some fresh mozzarella cubes I was talking about making this a work…so ladies this is what I made…simple and quick 🙂
Oh and here is the kale and I made some kale chips…very good with a sprinkle of kosher salt and garlic powder 🙂
Here are couple of links of 2 more of my blogs that I used tomatoes in the past First up is my Tomato Cobbler – this turned out really really good so if you want something a little different try this recipe.
Recently I was nominated for the “One Lovely Blog Award” by Ka@My Uni Kitchen
Ka has a terffic blog, he has amazing Recipes, How to Guides and Cooking Tips, so please go over to his blog and check out all those good things he has to offer 🙂
There are few rules to accepting the award you must tell everyone 7 things about yourself and nominate 15 blogs for the award.
So here we go 🙂
1. I worked on a cruise ship for 6 1/2 years
2. My first career was in Theater Costuming before going into Culinary
4. I love Hockey
5. I worked for our home town Hockey Team by sewing names and numbers on their jerseys
6. During the baseball season, I am on call for the Cincinnati Reds and the away teams that come into town and play the Reds, to sew their uniforms (sewing names & numbers), for any last minute call ups.
7. The most I was ever paid for sewing 1 single uniform for an away team was $100.00
and that was for 1 hour of work, that included the call, me driving to the ball park
(i live very close) getting in there sewing the name and number and then back in my car. 🙂
Bonus – here’s the picture 🙂
I hope you enjoyed the few things that most of you did not know about me 🙂
Here are the blogs that I think are fantastic and I give the “One Lovely Blog Award” too
Vidya and Chitra I added you as well
I know Ka added you to his blog
but I wanted to let you know I love
your blogs too, so you can consider mine
with his 🙂
Okay so I am trying to think of new ways to get my face out there in the world…yikes 😉
So I started to make videos, some will be product tests and some will be recipes.
This is just in the beginning stages, I only have a iPhone and my computer, but I am trying to make them better and better, sometimes I just laugh at myself when I watch them back :p LOL
But you have to start somewhere right, I will get better and its okay if you laugh I will not mind 😛
So here is the first one I did so check out I hope you enjoy it!!
FYI – I have already changed few things from this first video like I said it is a work in progress 🙂
We all had a great time and everyone loved the food and of course the beer 😉
So before we get to the recipe for the soup, here is what a few of the people over here at the office look like today dressed in their St. Patty’s Day garb 🙂
First let’s start with the man that was named
after this day… Sir Patrick!!
Here is Connie with her Irish scarf
Janet and Jennifer have their green on 🙂
And Kathie and Heather have their head bobs on 🙂
Kathy in her green
There are the “Meat” guys in green too 🙂
Ann has a head bob too
Margie being silly 🙂
Here is the advertising girls pretty as ever
And I think Tina wins the prize
as she is all decked out!!!
Her tie lights up too and her head
bob thing does too just can’t tell
And this is one of ladies that Demo’s
for us in one of our stores, she Dressed
up for the day too 🙂
So what ever you do today enjoy it and have fun and make some soup!! 🙂
1 cup onions, grated or finely minced
½ cup celery, grated or finely minced
½ cup flour
1 stick butter
1 bottle Harp Beer
3 cups chicken stock
1 tsp. dry mustard
1 tsp. Worcestershire sauce
16 oz. Sharp cheddar, shredded (Tillamook is what I used)
8 oz. extra sharp cheddar, shredded (Cabot Vintage Choice)
2 cups cream
Cooked bacon for garnish
Green onions (tops only), thinly sliced
In a stock pot over medium heat add butter, onions and celery sauté until softened. Add flour, whisk and cook for about 3 minutes, whisking often. Whisk in beer slowly and same with the chicken broth, bring to a boil then reduce heat to a simmer and cook for 15 – 20 minutes. Then add dry mustard and Worcestershire then add cream while whisking and then cheese a good handful at time until all added keep whisking until smooth and cheese has melted. Cook for about 10 minutes more. Taste, season with salt and pepper etc., if too thick add more broth, beer or cream, too thin add more cheese. But nothing extra was needed; garnish each bowl with bacon and green onions.
Let me say the bacon really put this soup over the top, serve with my Harp Beer Bread recipe and you are good to go…Enjoy!!! Cheers!!
Thank you so much for letting me be a part of Fiesta Friday 🙂
Today I am doing a “Arancini di Riso” but I will not be using rice/risotto, I am going to use qunioa 🙂
Yes you heard me correctly, almost two weeks ago I had a cooking class on Qunioa in one of our stores, as I posted my Qunioa Burger earlier this week. For my class I was going to make these but if you have made them before they can be a little time consuming 😛 and I would have had to make at least 75 of them 🙂
Rolling, dredging and then frying so I passed on making them for my class, and well I thought they are the perfect appetizer and perfect for Fiesta Friday!!!
Well these turned out so dang delicious, if you ever had a rice ball, these hold up 100% I think if you told someone these were a rice ball they really may never know 😉
So I hope you enjoy and will make them 🙂
Ingredients – quinoa, seasonings, mozzarella and parmesan
Rinse the quinoa well in a fine mesh strainer
add to pan with water/broth*see note below in recipe
bring to a boil
once it comes to a boil add broth base, garlic
then seasoning, except red pepper flakes
cover and reduce heat to low and cook 30 minutes
or till all the liquid has been absorbed
then stir until quinoa becomes thick like
let cool in a bowl then add parmesan and
Red pepper flakes
mix to combine, taste and add salt and pepper to your taste
with a 2 oz. scoop, scoop out onto a lined baking sheet
cut your cubes of cheese
make intentions in the center of the balls
add cube of cheese
roll into balls, place baking sheet in fridge
over night or at least 2 hours
for dredging, seasoned flour, beaten egg &
breadcrumbs, I used a combo of garlic &
hot & spicy 🙂
make your dredging station
roll balls in flour first
second egg
third breadcrumbs
bring your oil to 350 degrees
and fry your balls for 1-2 minutes
or until a nice golden brown
now ready eat, serve with your favorite sauce
and top with some extra Parmesan
so good, look at the gooey cheese 😛
Quinoa Balls
1 cup white qunioa 3 cups chicken or veggie broth 2 tsp. onion powder 2 tsp. crushed garlic 2 tbsp. parsley 1 1/2 tsp. oregano 1/2 tsp. crushed red pepper flakes – optional 1 cup Parmesan cheese, grated plus for garnish mozzarella cheese, cut into 3/4 inch cubes
Rinse quinoa is a fine mesh strainer under water until water runs clear.
In a med saucepan add quinoa and broth*, bring to a boil uncovered, once it comes to a boil add garlic, onion powder, parsley and oregano, stir, cover and reduce heat to low. Cook on low for about 30 minutes or until all the liquid has been absorbed, let cool for 5 minutes, then stir in 1 cup Parmesan and red pepper flakes if using, taste and add salt and pepper to your liking. Set aside for 15 minutes, then with a 2 oz. scoop, scoop mixture into balls, press your thumb in the middle of the ball to make a indention add cube of cheese and cover the cube with the quinoa by rolling into a ball. Place balls on lined baking sheet and refrigerate for 2 hours or up to over night.
*I used chicken base, I added it once the water came to a boil.
For dredging 3/4 cup flour, seasoned with salt and pepper 2 egg, beaten 1 1/4 cup Italian bread crumbs or what you like
Place each in shallow bowls, dredge balls into flour, egg then breadcrumbs, place on baking sheet. Let set on counter for about 30 minutes. In a fryer or medium sauce pan add frying oil about 1 1/2 inches high, heat oil on medium high heat too about 350 degrees, fry until golden brown. about 1-2 minutes. I always pull one out, let it set for a minute then cut it open to see if the cheese is gooey, if you let the balls set on the counter for 30-45 minutes before frying, they should be ready in about 1 or so, but just cut one open and fry longer if needed.
Serve with your favorite red pasta sauce and a sprinkle of Parmesan. Makes about 24 balls. Enjoy!!
Well Christmas is upon us once more a year is ending and a new one will begin!! The #1 thing that I am grateful for is my parents, I love them dearly and they always have been there for me through everything, I am truly blessed!!
An of course I am thankful that I have a job (s) 🙂 a house to live in a car to drive and I have many friends, friends that I have know forever it seems, co-worker friends and you, yes you blogger friends. Many of you I feel like we’ve known each other for years, I love reading your blogs about food, recipes, family, gatherings, trips, parties I love reading it all. And to ALL of you Merry Christmas and Happy New Year!!!
Okay so below are some recipes from my Holiday Open House, just a few, if there is something your looking for let me know I will get you the recipe. Of course while making some of the most recent treats, I have been rushing home from work and get started and then forget to take pictures so there are few 🙂
Oh and at the end there are couple a cute funny photos 🙂
Fudge, this recipe is so easy, its out there, and I use it for all of my flavors, just use 3 cups of chips, whatever combo or flavor, same with extract whatever flavor and you can fold in anything, I did the recipe below, also used white chips and peppermint with crushed candy canes, one I did dark chocolate and folded in chopped andes mints so you can be creative.
Rocky Road Christmas Fudge
1 pkg. semi-sweet chocolate chips
1 cup peanut butter chips**
1 tsp. vanilla extract
1 can sweetened condensed milk
2 cups mini marshmallows
1 cup walnuts (optional)
Christmas décor sprinkles
Line an 8×8 square pan with plastic wrap and lightly spray with cooking spray. Set aside.
In a non stick medium sauce pan add all chips, condensed milk, extract, cook over medium heat, stirring constantly, once chips are almost all melted remove from heat, continue to stir until all is melted. Stir in walnuts and marshmallows, then pour into spray pan, smooth out evenly. Sprinkle with Christmas candy décor sprinkles, press down lightly. Refrigerate for a minimum of 2 hours to set before cutting into squares. Store in an airtight container.
**Can’t have nuts, use Butterscotch chips instead of PB, and use not walnuts.
Chocolate with marshmallows, peanut butter with chocolate swirl and dark chocolate mint.
Bark is so easy, you put chocolate in a double boiler with crisco shortening, at least that is what I do, I also use the microwave too, you just have to watch it, and then once its melted and smooth pour on to parchment smooth out and top it with what ever you want 🙂
White Chocolate Cranberry Pistachio Bark
2 pkg. white chocolate chips
2 tsp. Crisco
1 cup each craisins and shelled pistachios
Add chips and Crisco to a double boiler, melt chocolate, pour onto a lined baking sheet and top with craisins and nuts. Let set then break into pieces. Store into an airtight container.
I have white chocolate with craisins and pistachio’s and did dark with mixed nuts and marshmallows and milk with the same.
Easy Holiday Muddy Buddy Mix, this way is too easy
Quick & Easy Muddy Buddy Mix
2 bags Chex Muddy Buddy Mix
4 cups Chocolate Chex Cereal
4 cups mini pretzels
1 bag Christmas M&M’s
Mix all together, store in an airtight container.
With out the M&M’s, when I put it into containers I pour some mix, then a few M&M’s then more mix, otherwise the M&M’s sink to the bottom.
The easiest bar treats, with coconut and nuts 🙂
Holiday Bars
1 ½ cup graham cracker crumbs
1 ½ cup sweetened coconut
1 stick butter, melted
1 can sweetened condensed milk
1 cup walnuts, chopped
1 pkg. holiday colored chocolate chips
Preheat oven to 350 degrees. Spray a 9×13 baking pan.
Add melted butter and graham cracker crumbs to a bowl and mix well, pour into baking pan and press mixture over the bottom of pan. Sprinkle coconut and nuts over top of crumbs evenly, then pour can of milk evenly over top of that, then sprinkle with holiday chips. Bake for 25-30 minutes for until light golden brown. Cool completely in pan before cutting.
Peppermint Chocolate Crunch Popcorn
1 large bag of pre-popped popcorn (I used Angie’s yellow bag)
2 cups white chocolate chips
½ tsp. peppermint extract
2 tsp. plus 1 tsp. Crisco
1 cup chocolate chips
In a double boiler melt white choc. Chips with 2 tsp. Crisco and extract, stirring until melted, pour chocolate over top popcorn and toss to coat. Pour out onto a lined baking sheet, then melt choc. Chips and 1 tsp. Crisco in double boiler, stirring until melted, once melted drizzle over top of coated popcorn. Let set until chocolate has hardened, then store in an airtight container.
On this batch in the pictures, I used the andes peppermint crunch chips with criso in the micowave, tossed with popcorn, then pour out to cool, then I meltes about 1/2 cup of the andes mints and drizzled that over top.
Last one Christmas Crack
The recipe is certainly out there, you use saltines in most recipes, I use those and I use graham crackers. I also this time use Special K cereal as the base…and people like it 🙂
Graham Cracker Christmas Crack
1 box cinnamon graham crackers
1 cup brown sugar
2 stick butter
2 cup semi-sweet chips
½ cup peanut butter
Christmas M&M’s or toffee bits
Preheat oven to 400 degrees, line a jelly roll pan with parchment paper or foil and spray with cooking spray. Place crackers to line the pan, cinnamon side up, there can be just a little space between crackers.
Bring sugar and butter to a boil in a saucepan over med-high heat, once it come to a full boil, boil for 3 minutes and do not stir during the 3 minutes. Pour mixture over crackers, place in oven for 5 minutes, put peanut butter in microwave for about 30 seconds to get soupy.
Remove pan from oven drizzle peanut butter over top and then sprinkle chocolate chips over top. Let set for 5 minutes to melt, spread melted chips and top with M&M’s or toffee bits, let cool over night. Once firm, break into pieces and store in an airtight container.
Chocolate Mint or Peppermint Christmas Crack
45 saltine crackers
2 sticks butter
1 cup brown sugar
1 pkg. Mint and Chocolate chips
Or
1 pkg. white chocolate chips
½ cup finely crush peppermints
Preheat oven to 400 degrees, line a jelly roll pan with parchment paper or foil and spray with cooking spray. Place crackers to line the pan, salt side up, there can be just a little space between crackers.
Bring sugar and butter to a boil in a saucepan, once it come to a full boil, boil for 3 minutes and do not stir during the 3 minutes. Pour mixture over crackers, place in oven for 5 minutes, remove from oven and sprinkle with either Mint/chocolate chips or white chips, . Let set for 5 minutes to melt, spread melted chips and then top with peppermints or nothing, let cool over night. Once firm, break into pieces and store in an airtight container.
Crackers and graham crackers
Special K Cereal
Butter and brown sugar in pan
bring to a boil
pour over top
bake for 5 minutes
I topped the Special K batch with a mix of Peanut butter, milk and dark chocolate chips
this batch with the crackers I used Dark Chocolate and Mint Chips
Oh here’s one once more
Holiday Nut Brittle
1 cup sugar
½ cup light corn syrup
¼ tsp. salt
2 cups nuts – peanuts, cashews or pecans
1 tbsp. butter
1 tsp. vanilla
½ tsp. cinnamon
1 tsp. baking soda
Line a baking sheet with parchment paper
use at wooden spoon for this
Spray with cooking spray a large glass mico safe bowl, add sugar, syrup and salt, stir to mix. Set microwave for 3 minutes, watch closely once the mixture starts to boil continue to cook for 4 more minutes (you will need to add more minutes)
Remove from microwave immediately add nuts, butter, vanilla and cinnamon, stir quickly to combine and cook for 2 more minutes. Immediately remove add baking soda and stir to combine, mixture will foam up, once mixed pour out onto lined baking sheet and spread out with spoon. Let cool at room temp, once cooled break into pieces and store in an airtight container.
I bought some pre cut cookies and they did not have crisp edges as it you would use cookie cutters, and I only had some bright colors so here are some of my fun Christmas cookies 🙂
Love my tie dye ginger 🙂
I also go the best gift ever, if you have not heard of this stuff, its funny and it works 🙂
Poo-pourri…yes it is what you think 😛
Check out the Holiday Commercial and please watch the whole thing…it will give you a chuckle!!
And lastly meet my new friend “Pixie Puddin'” my friends named her on facebook it was a fun time picking a name 🙂
So Merry Christmas and Happy New Year from Pixie and I 🙂
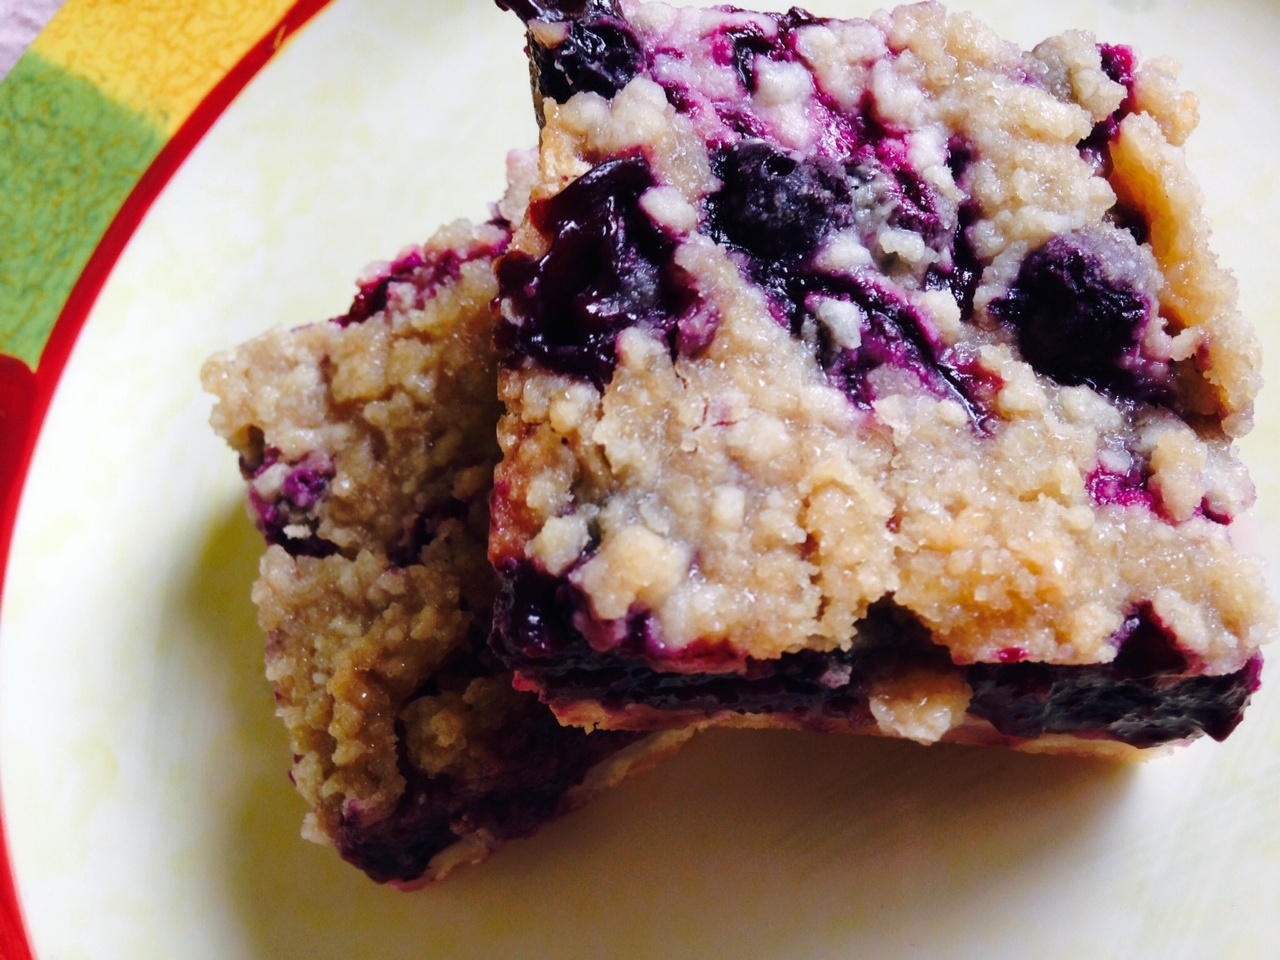
These Blueberry Crumb Bars turned out so delicious!!!
I was invited to a luncheon and I wanted to bring something for everyone to take home and enjoy!! And I really must say they are very tasty 😛
So I made Blueberry and I made Raspberry, I wrapped them up in this cute matching wax paper and bags along with cute stickers all from Michael’s…don’t you just love Michael’s!! 🙂
I had such a great time visiting with the ladies, one of the ladies “Val” just moved into a new high rise along the river that over looks downtown Cincinnati and her place was just exquisite!!!!
I tried to take a “selfie” I am not very good, but sun was shining and it was hard to see, I was trying to get the Reds Great American Ball Park in the background too 😛
I met these wonderful ladies through a friend of mine Robin, we both used to work for the same company and we remained in touch and good friends. She had me cater a few parties at her house so that is how I got to know this group of lovely ladies.
So “Thank you Val” for including me and I hope all the ladies enjoyed the bars. I know I had a great time!!! 🙂
I hope you all make these bars for your friends or family!!
Ingredients
Crust
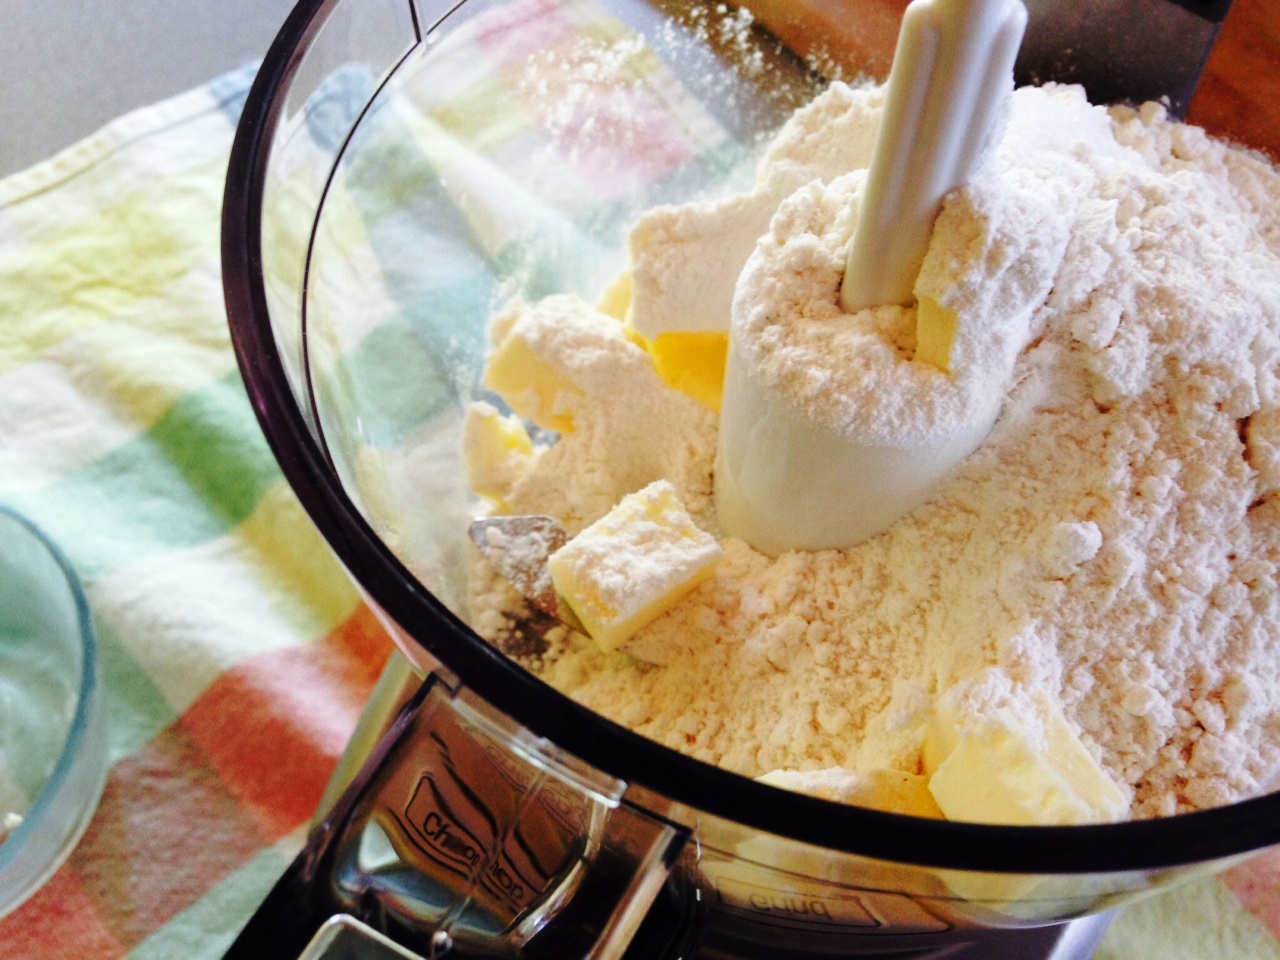
Blend in processor
Blended, pour into sprayed baking dish
press down all over and bake
baked
Filling ingredients
jam
since I made both I used this one for the raspberry
3/4 c. all-purpose flour
1/4 tsp. salt
1/4 c. powdered sugar
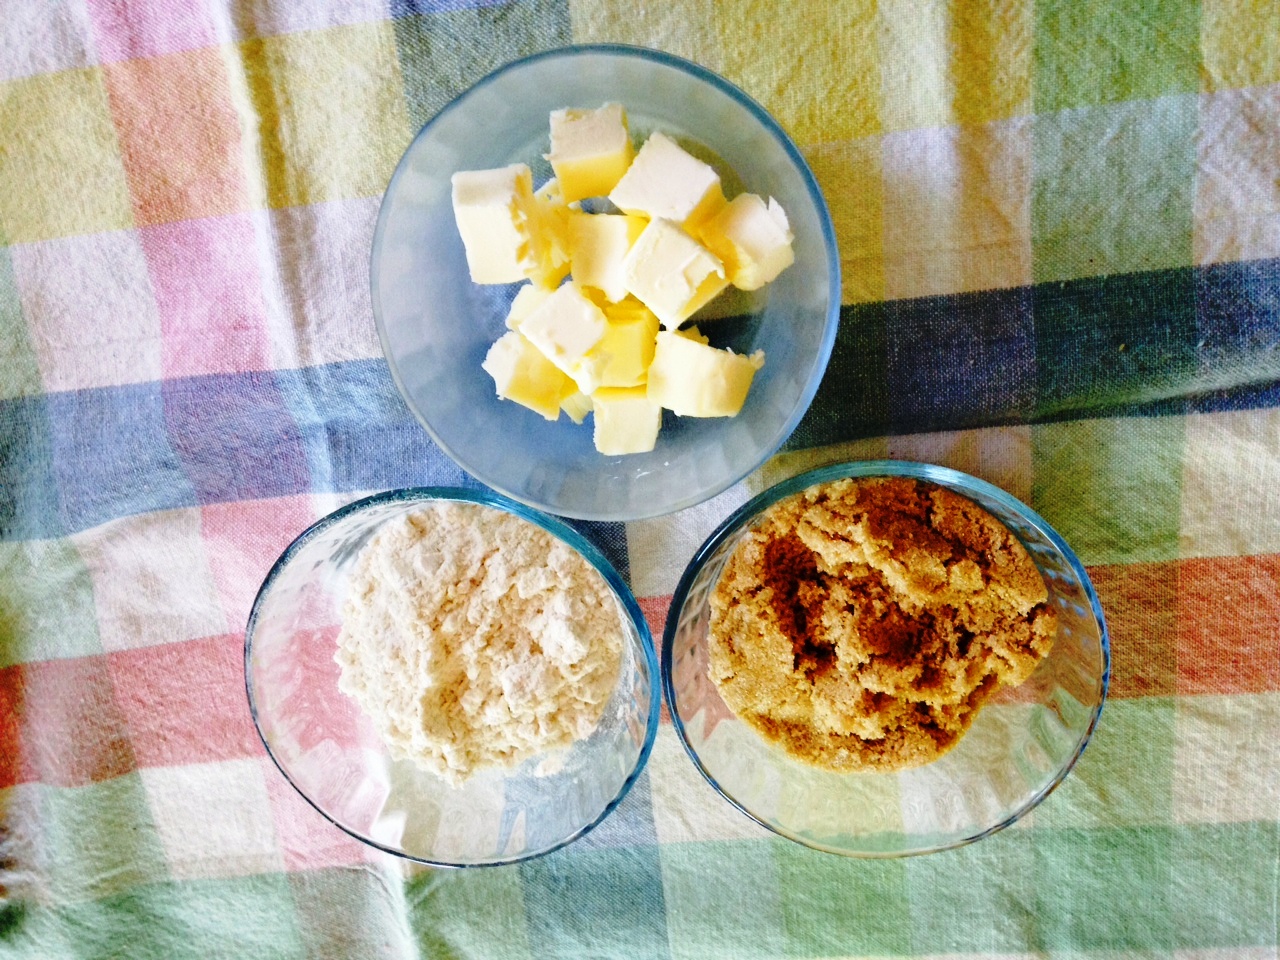
6 tbsp. unsalted butter, cold and cut into pieces
Filling
1 pint blueberries or “3” 6 oz. containers of raspberries, about 2 cups
2 tbsp. all-purpose flour
1/3 cup blueberry jam or raspberry if using raspberries
Crumb Topping
1/2 cup all-purpose flour
1/2 cup brown sugar
4 tbsp. unsalted butter, cold and cut into pieces
Preheat over to 375 degrees and spray or grease an 8×8 baking dish.
Crust – combine, flour, powdered sugar, salt and butter, place in a food processor or use a pastry blender until butter is the size of small peas. Sprinkle mixture into the bottom of the baking dish and press down evenly and bake 12 minutes.
Filling – if the jam you are using is thick and is not spreadable then place into a small sauce pan and heat jam to make spreadable, you can use the microwave as well. Pour the berries in a large bowl and sprinkle flour over top and gently toss to coat them.
Once the crust is done, spread jam evenly over the crust, crust will be warm so the jam does warm up and makes it easy to spread. Sprinkle berries over top the jam, any left over flour in the bottom of the bowl can be just sprinkle evenly over the berries.
Crumb Topping – in food processor add flour, brown sugar and butter, pulse mixture until crumbly, then sprinkle over top the blueberries and bake 35 – 40 minutes.
Cool completely before cutting. Enjoy!!
This picture when I made both, I used bigger pans and doubled the recipe 🙂
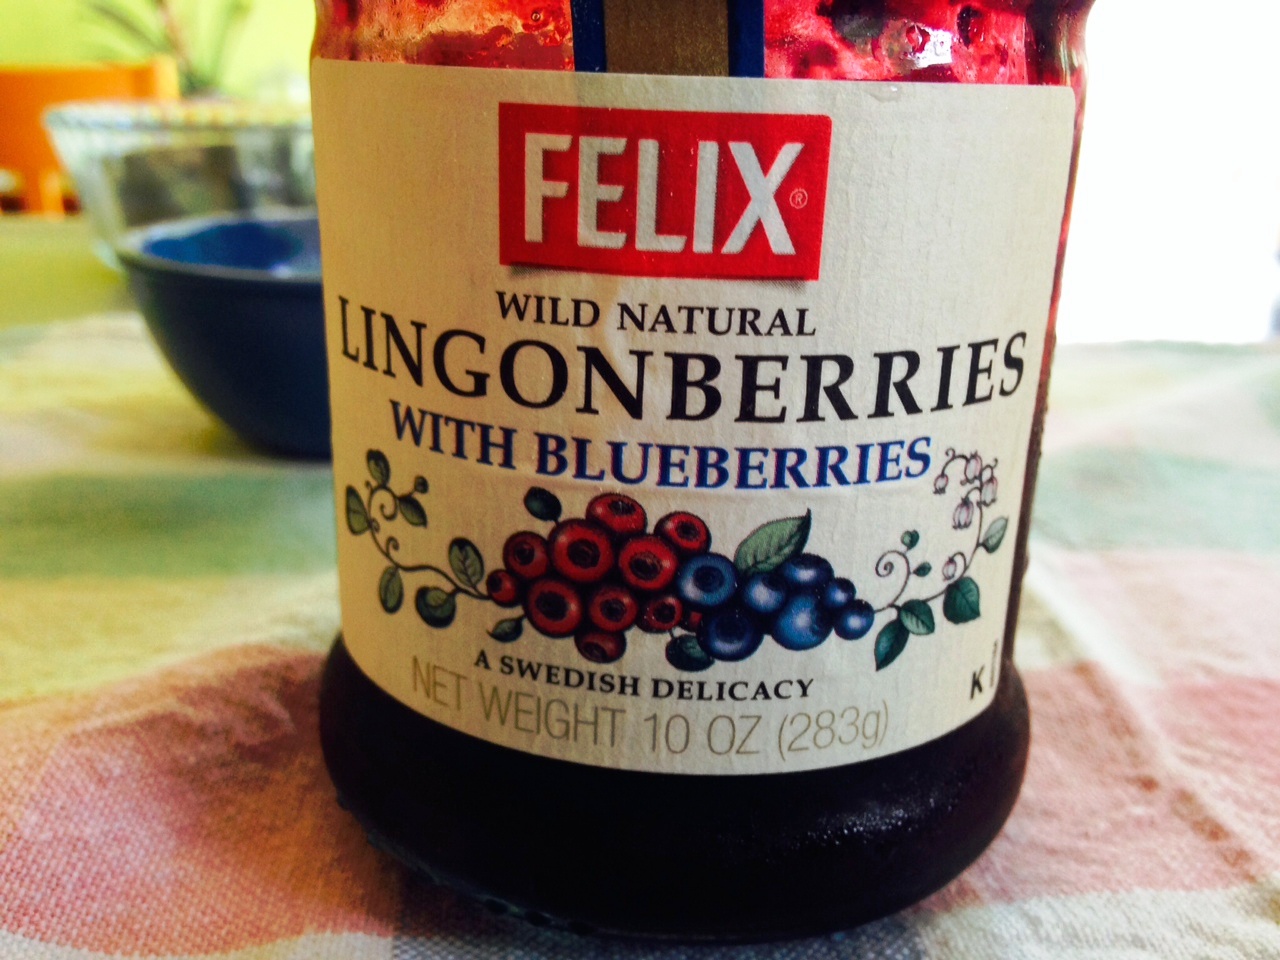
I got a couple of samples of this jelly from the office and well my mind starting thinking of something to do with it.
Of course what most people do with it is pour it over cream cheese, which is good…but
When I got home I was like I want crispy chicken tenders, I thought why not use the jelly 🙂
So I added the Jelly to my eggs mixture and it worked out awesome, this Red Pepper Jelly is great you can use it on some many things, here are just few that I thought of:
Brush on Grilled Corn
Mix into your Corn Bread or Muffin Mix
Brush on Grilled Chicken or Pork
Brush over grilled peach halves or pineapple rings, serve with slices of grill pound cake
I could go on and on 🙂
Diffidently worth a try for sure!!
whisk jelly and egg together
Seasoned flour
chicken tenders
dredge the tenders in flour
coat in egg mixture
dredge in panko
place on baking sheet and spray with olive oil
Bake at 400 degrees
microwave jelly to drizzle
Drizzle over top the tenders and enjoy!!
Chicken Tenders
seasoned flour
egg
Panko breadcrumbs
I keep seasoned flour in my freezer so I have it whenever I need to coat something.
Mix together egg and a couple tablespoons of the jelly and whisk together
Place panko in shallow dish or on a plate
Dredge chicken in flour to coat, then coat with egg mixture and then dredge in panko and place on baking sheet, spray chicken with an olive oil spray and bake at 400 degrees until chicken is done about 20 minutes.
Take a couple of tablespoons of the jelly and heat in microwave for 15 seconds and drizzle over the chicken.
I really enjoyed the sweet heat to the chicken tenders will make this again so sure, so hit up your local Remke Markets or your local grocery for Braswell’s Red Pepper Jelly!!
Give me anything Key Lime…cake, cookies, Ice cream, yogurt, pie, candy, I think you get the picture 🙂
So I thought I would make a little something for the “taste tasters” in out office 🙂
I was going to do something with chocolate or Key Lime and the word in the office was Key Lime since it was the summer.
So by using the pretzels in the crust I thought, oh salt…lime…okay Margarita!!! Of course minus the Tequila 😦
But if you wanted to add tequila you could, what I would do is cut the lime juice in half adding the tequila as the other half (1/4 cup lime juice & 1/4 cup tequila). But then add the zest of 3-4 limes instead of one, this will bring out the lime flavor, but I guess if you love tequila you could add all tequila and then just more lime zest.
I think if I was going to use Tequila, I would make the batter with out the juice, mix together, then add some Tequila and taste it, so you don’t over power it with Tequila 😛
Ingredients
Crush your pretzels, I did not crush them finely because I wanted to
make the texture like coarsely chopped nuts
Add pretzels and sugar to a bowl
add melted butter and mix together
mixed
Press mixture into a 9×13 sprayed pan and bake
Meanwhile whisk eggs, milk, lime zest and juice together
Mix all together in a bowl, then press into a 9×13 pan. Bake at 350 degrees for 9 minutes. Let cool 15 minutes.
Meanwhile make batter
2 can 14 oz. sweetened condensed milk
3 eggs, at room temp
1/2 cup Key Lime or lime juice (see note above if you want to add Tequila)
zest of 2 limes and extra for garnish
Whisk together in a medium bowl, then pour over top the baked crust, spread evenly and bake at 350 degrees for 25-30 minutes. Center will not jiggle and edges will be light brown.
Let cool completely on counter, then refrigerate till cold, over night if you can. You can garnish the top with lime zest or if you serve pieces individually you can add strips of lime zest on top of each piece.