My Holiday Open House!!

11 Comments

Well it is almost Christmas and for Holidays everyone loves homemade sweet treats!!

IMG_1513

And for the last two weeks I had Holiday Open Houses in a few of our stores 🙂

I made tons of sweet treats, shared my recipes and displayed those goodies in different ways as gifts, to give customers ideas on for Holiday gift giving.

I made fudge, bark, Christmas crack, Holiday muddy buddy mix, snowman soup among other things, I had over 20 recipes to share.  It was lots of fun, I had Christmas music playing (under my table), I gave everyone lots of ideas for their Christmas gifts.

Check out some of the pictures

Getting started 🙂

IMG_1470


Some baking dishes

IMG_1473

i have lots of things to fill 🙂

IMG_1471

Recipes

IMG_1485

Recipes

IMG_1486

Recipes

IMG_1487

Tips on packaging 🙂

IMG_1488

things are getting filled

IMG_1474

Chocolate covered popcorn

IMG_1489

christmas bark

IMG_1490

white chocolate bark

IMG_1491

Christmas fudge

IMG_1495

A hot cocoa kit, cocoa, marshmallows and peppermint stir sticks

IMG_1494

fun

IMG_1493

gathering it all together 🙂

IMG_1492

some cute mason jar ideas

IMG_1496

Setting up at one of the stores

IMG_1497

its coming together

IMG_1498

display

IMG_1501

more of the display

IMG_1502

here is a close up

IMG_1503


IMG_1504


IMG_1505


IMG_1509

Lot of stuff was found at the Dollar store and I made it look cute 🙂

IMG_1512

This was it set up another store, I added the Candy Canes
and did the green fabric a little different 🙂

IMG_1513

I love that I had the baking supply display behind me, people
were just asking what to get, I was filling up their carts 🙂

IMG_1528

I hope all you have a Merry Christmas!!!!


Honey Blueberry Upside-Down Cake

10 Comments

Test Kitchen was back open last week and I had some Blueberries so I thought why not a Blueberry Upside-Down Cake 🙂

Great for breakfast with your coffee or tea, maybe as an afternoon snack or after dinner, I hope you make it for your next baking adventure 🙂

As I thought about the topping I thought I would cut the brown sugar with some honey, hence the name 🙂 so this is my recipe 🙂

photo (2)

Ingredients

IMG_20140810_185656


Spray your pan, draw out the bottom of the pan on parchment and cut it out

IMG_20140810_191748


Place parchment in pan and spray paper

IMG_20140810_191921


I fail to take a picture of the topping melting, but just melt butter, brown sugar and honey together
and pour in pan

IMG_20140810_192015

sprinkle blueberries over the topping in the pan

IMG_20140810_192415


Cream together the butter & sugar until fuffy
then add eggs, one at a time

IMG_20140810_192607

then add lemon juice and vanilla, then add flour and milk (read below)

IMG_20140810_192817


Fold in lemon zest

IMG_20140810_193137


pour on top of blueberries and bake

IMG_20140810_193258

let cool for about 10 minutes

IMG_20140810_201252

place platter on top of cake and flip upside down

IMG_20140810_202828

and there you have your Honey Blueberry Upside-down Cake
let cool completely

IMG_20140810_203006 IMG_20140810_202941

slice and serve

photo (5)


Honey Blueberry Upside-Down Cake

  • Servings: 8-10
  • Difficulty: easy
  • Print

Topping

1 pint fresh blueberries (if using frozen use 2 1/4 cups)
1/4 cup honey
1/4 cup light brown sugar, packed
1/2 stick unsalted butter (1/4 cup)

Cake

1 1/4 cups cake flour
1 tsp. baking powder
1/4 tsp. salt
1 cup sugar
1 stick unsalted butter (1/2 cup), softened
2 eggs
1 tsp. vanilla
1/2 cup whole milk
2 tbsp. lemon juice
zest of 2 lemons

Heat oven to 350 degrees, spray a 9×2 round baking pan with baking spray and line the bottom with parchment paper.

Add 1/2 stick butter (1/4 cup), honey and brown sugar to a small sauce pan and heat over medium heat until mixture is melted and smooth, stirring frequently.  Pour into baking pan; top with blueberries, set aside.

Whisk cake flour, salt and baking powder in a small bowl, set aside.

Beat sugar and stick (1/2 cup) butter in a large bowl at medium speed for 2 minutes or until smooth and fluffy.  Add eggs one at a time, beating well after each addition.  Beat in lemon juice and vanilla, at low speed beat in flour mixture in 3 parts alternately with the milk, beginning and ending with the flour mixture.  Fold in lemon zest then pour over top of the blueberries; smooth out evenly.

Bake for 30 – 40 minutes or until toothpick inserted in center comes out clean, cool in pan on wire rack for 10 minutes.  Using a small knife, loosen  cake from the side of pan, invert onto platter; remove parchment paper, cool completely.

This was super moist and honey delicious 🙂 Enjoy!!!

photo (3)

Key Lime Margarita Bars!!!

10 Comments

I just love Key Lime!!!

IMG_20140724_163116

Give me anything Key Lime…cake, cookies, Ice cream, yogurt, pie, candy, I think you get the picture 🙂

So I thought I would make a little something for the “taste tasters” in  out office 🙂

I was going to do something with chocolate or Key Lime and the word in the office was Key Lime since it was the summer.

So by using the pretzels in the crust I thought, oh salt…lime…okay Margarita!!!  Of course minus the Tequila 😦

But if you wanted to add tequila you could, what I would do is cut the lime juice in half adding the tequila as the other half (1/4 cup lime juice & 1/4 cup tequila).  But then add the zest of 3-4 limes instead of one, this will bring out the lime flavor, but I guess if you love tequila you could add all tequila and then just more lime zest.

I think if I was going to use Tequila, I would make the batter with out the juice, mix together, then add some Tequila and taste it, so you don’t over power it with Tequila 😛

Ingredients

IMG_20140723_144120

Crush your pretzels, I did not crush them finely because I wanted to
make the texture like coarsely chopped nuts
IMG_20140723_145507

IMG_20140723_145919

Add pretzels and sugar to a bowl

IMG_20140723_150853


add melted butter and mix together

IMG_20140723_150921


mixed

IMG_20140723_151021

Press mixture into a 9×13 sprayed pan and bake

IMG_20140723_151415


Meanwhile whisk eggs, milk, lime zest and juice together

IMG_20140723_152928


IMG_20140723_153812

Baked crust, let cool about 15 minutes

IMG_20140723_154102

pour mixture over top of crust

IMG_20140723_154132


Bake at 350 degrees for 25-30 minutes

IMG_20140723_154251

baked

IMG_20140723_164148

Slice add lime zest for a garnish

IMG_20140724_162918

Eat and enjoy

IMG_20140724_163047 IMG_20140724_162723 IMG_20140724_163236 IMG_20140724_163534

Key Lime Margarita Bars

  • Difficulty: easy
  • Print

Crust

1 1/2 cups pretzels, crushed
1/2 cup sugar
1 1/2 sticks butter, melted

Mix all together in a bowl, then press into a 9×13 pan.  Bake at 350 degrees for 9 minutes.  Let cool 15 minutes.

Meanwhile make batter

2 can 14 oz. sweetened condensed milk
3 eggs, at room temp
1/2 cup Key Lime or lime juice (see note above if you want to add Tequila)
zest of 2 limes and extra for garnish

Whisk together in a medium bowl, then pour over top the baked crust, spread evenly and bake at 350 degrees for 25-30 minutes.  Center will not jiggle and edges will be light brown.

Let cool completely on counter, then refrigerate till cold, over night if you can.  You can garnish the top with lime zest or if you serve pieces individually you can add strips of lime zest on top of each piece.

IMG_20140724_162807

Golden Beet Chips!!!

10 Comments

Yum…Yum…YUMMY!!!

IMG_20140528_165357

You either like beets or you don’t there is no in between!! 🙂

I don’t like beets…well okay maybe if they are “Amish Wedding” Pickled Baby Beets…then yes I like those 😛

But that’s it on the “Red” ones…I do on the other hand like the “Golden” beets 🙂

Golden beets are a little less sweet, more mellow and less earthy.

These chips were so easy to make and Delicious but you must keep an eye on them as they will burn very quickly!!
But I like those little burnt edges 🙂

Golden Beets

IMG_20140528_160635

Peeled and sliced

IMG_20140528_161123

oil, salt, pepper and paprika

IMG_20140528_161357

Toss to coat them

IMG_20140528_161518

place on a baking sheet, you do not have to place on a baking rack
Keep checking them, they do burn easy…

IMG_20140528_161759

Golden Beet Chips

  • Difficulty: easy
  • Print

Golden Beets
Olive oil
Salt
Pepper
Paprika

Peel and slice your beets, use a mandolin if you have one.
Place in a medium bowl, drizzle with olive oil, then sprinkle with salt, pepper and paprika.
Toss to coat all the beet slices.

Arrange on a baking sheet in single layer, bake at 375 degrees, after 15 minutes you need to flip them, check that small rounds are not burning.  Continue to bake until they are crispy, about 15 minutes more.

When I first made them I baked them at 400, I would go to 375 or even 350, flipping them at 15 minutes and continue to bake until crispy.

Let them cool and Enjoy.

Enjoy!! Them 🙂

IMG_20140528_165357

Peanut Butter Cookies with What??

13 Comments

So I saw an add for one of those stores that carry the “odd” items and it had “Peanut Butter” but not just creamy or crunchy…but with “white chocolate”, “dark chocolate”, and “maple” and I was like what, I had never seen this or even hurt of this company.

IMG_20140212_110508

But I immediately thought I need to make something with these for sure 🙂

Peanut Butter & Co – is based out of New York City, they have a shop that makes all kinds of sandwiches

This is from the website  https://ilovepeanutbutter.com/

Lee Zalben is the founder and president of New York City’s world famous Peanut Butter & Co., and the man behind “gourmet peanut butter.” Lee grew up in Philadelphia eating a lot of peanut butter. And while an under-graduate student at Vassar College, he always won the fierce competitions he and his friends held for the wackiest but best-tasting peanut butter sandwich during late night study breaks. It was then where the idea of opening a peanut butter sandwich shop sprouted.

After college, Lee worked in advertising and publishing but he never forgot his dream of opening a peanut butter sandwich shop. While walking in Greenwich Village one day, he spotted a vacant storefront near NY University. Quitting his job the next day, the 26-year old entrepreneur-to-be started developing a business plan for his dream shop. On December 21, 1998, the vacant storefront became the Peanut Butter & Co. Sandwich Shop, offering not just various kinds of peanut butter sandwiches like The Elvis and Pregnant Lady but also peanut butter in newfangled flavors like Dark Chocolate Dreams and Cinnamon Raisin Swirl.

It was only a matter of time when people started clamoring to take the peanut butter home. Today, Peanut Butter & Co. is sold in ten delicious flavors in over 10,000 stores around the country and in Canada, the U.K., Japan, and Hong Kong. And the sandwich shop has turned into a pilgrimage site for many peanut butter lovers all over the world. Lee’s dream to open a peanut butter sandwich shop did not just become a reality, but he also created the market for specialty peanut butter.

I had never heard of this brand and they have 10 different kinds of peanut butter, not only the ones I mentioned above, but with honey, cinnamon and raisin, smooth, crunchy, old fashioned smooth, and crunchy and spicy called “the heat is on”.

The store that I found these in only had the smooth, crunchy, the 3 that I bought and the spicy one, which as I walked out the door and thought to myself, I should have bought that one…I think I’ll go back today and get “the heat is on” 🙂

Any way I love peanut butter so I was thrilled to find these 🙂

IMG_20140212_091838

The White Chocolate was sweet tasting, with tiny bits of white chocolate very interesting!!
Dark Chocolate was the same although dark in color like chocolate, it has tiny bits of dark chocolate!!

I have not tasted the maple yet but I can’t wait too and make something out it as well as the spicy one 🙂  I will use the Maple and the Spicy in future blogs 🙂

I wanted to do something quick so I just made cookies out of both of them, then I made a batch of swirl 🙂

I gave some to my parents as part of their Anniversary gift, they are married 54 years today!!!  So Happy Anniversary Mom and Dad!!!  I love you both very very much!!!

My Mom and Dad 54 years ago!

20468_340641971437_2713788_n

Also with Valentine’s Day tomorrow, I put some in my Manager’s Valentine’s Day gift bag 🙂  I don’t think she is going to share with the rest of her family.  As she asked me, do I have to share and I replied with a big smile…NO!! 😛

Ingredients – I forgot to put the Baking Soda in the picture

IMG_20140212_092049


mix together

IMG_20140212_093707IMG_20140212_094406


stir until smooth – see the little bits of chocolate

IMG_20140212_093821IMG_20140212_094521


add flour mixture

IMG_20140212_093936


stir in flour mixture until combined

IMG_20140212_094257IMG_20140212_094719


Roll into balls then roll into the sugar


IMG_20140212_095138


place on baking sheet and bake

IMG_20140212_095813


done

IMG_20140212_102035


IMG_20140212_102119IMG_20140212_102058


on the swirled ones I used a 1 oz. scoop

IMG_20140212_100459


put one of each together, roll, then pinch and twist, then roll again

IMG_20140212_101517IMG_20140212_100610


IMG_20140212_110200

Peanut Butter Cookie Recipe

1 cup Peanut Butter (you can use any flavor you want)
1 cup plus 1/4 cup granulated sugar
2 eggs
1 tsp. vanilla
1/2 tsp. baking soda
1/2 tsp. salt
1 cup flour

Pre-heat oven to 375 degrees

In a small bowl whisk together flour, baking soda & salt, set aside
In a large bowl add eggs, peanut butter, sugar and vanilla, mix until smooth with a wooden spoon, then add flour mixture until fully combined.
Scoop and roll into a ball, take the remaining 1/4 cup sugar add to a bowl and roll dough balls in sugar, place on balls on baking sheet and bake. (you do not have to flatten) 

I use a  2 oz. scoop and baked them for about 12-13 minutes, if you make your balls small do not bake as long, check them around the 10 minute mark.

IMG_20140212_110619


These are chewy and moist in the middle 🙂

IMG_20140212_111419

I hope you enjoy the recipe and if you find these Peanut Butters you must try!!

Apple Cake

8 Comments

IMG_20131120_131359

This recipe I first made because I was teaching a cooking class and I was using different beers and Redd’s Apple Ale had just came out.

Which if you never tried it, it really is a great light beer, its very refreshing, when I first tasted it my first thought was this beer would be fantastic on an extremely HOT!! day 🙂 
It just gave me that refreshing feeling…I thought it was great, so I paired it with this Apple Cake.

(I was doubling the cake in these pictures, I used a 11×15 pan)

Ingredients (missing in photo, butter and brown sugar)

IMG_20131120_093333


IMG_20131120_100036


IMG_20131120_093526


Peel, core and slice apples


IMG_20131120_094954


add flour, cinnamon and baking powder, whisk together

IMG_20131120_095938


Add softened butter and brown sugar


IMG_20131120_100209


Cream together

IMG_20131120_100430


add eggs and vanilla

IMG_20131120_100525


when mixed

IMG_20131120_100901


add 3rd of flour, mix, then half applesauce, mix
another 3rd flour, mix, rest of the applesauce, mix
add rest of flour, mix

IMG_20131120_101003


IMG_20131120_101153


fold in the flour on the sides

IMG_20131120_101334


spread mixture in sprayed baking dish

IMG_20131120_101613


layer you apples over top and bake

IMG_20131120_101936


Meanwhile in a sauce pan add cider, beer & brown sugar

IMG_20131120_080114


reduce down and let cool slightly

IMG_20131120_102027


Baked

IMG_20131120_112353


pour over cake using a pastry brush to spread around

IMG_20131120_112616


IMG_20131120_112810


Then let cool down, then slice and serve

IMG_20131120_131325

Recipe – Apple Cake

1 1/2 sticks unsalted butter, softened
2 1/4 cup all-purpose flour
2 3/4 tsp. baking powder
1 1/2 tsp. cinnamon
1 tsp. salt
2 cups brown sugar, packed, divided
1 1/2 tsp. vanilla
3 large eggs
1 1/4 cup unsweetened applesauce
2 large apples, peeled, cored, sliced
1 1/2 cups apple cider
1 cup Redd’s Apple Ale

Pre-heat oven to 325 degrees, spray a 9 inch square pan.

In a medium bowl whisk together flour, baking powder, cinnamon and salt.  In a large bowl beat with a mixer butter and 1 1/2 cups brown sugar for 3 minutes.  Add vanilla and eggs, beat until combined, reduce speed to low; add flour mixture in 3 additions, alternating with 2 additions of applesauce and beat until just combined, scrap the sides and fold in by hand.

Pour batter into pan and smooth out, arrange apple slices in rows on top, if you like more apples you certainly use more, and overlap them more closely.

Bake until toothpick inserted in the center comes out with a few moist crumbs, 45 minutes to 1 hour.  Set on wire rack to cool about 20 minutes.

Meanwhile in a medium sauce pan add cider, beer and remaining brown sugar cook over medium-high heat until reduced to about 1 cup and let cool slightly.  With a pastry brush brush mixture all over the top of the cake, letting drip down the sides.  Let cool, then serve.

IMG_20131120_131432

If you did not want to use beer you can just add more cider.

This cake is super most and the cider/beer reduction is so good, soaks right in 🙂

IMG_20131120_131613

Enjoy!!!

Christmas 2013!!!

9 Comments

Merry Christmas everyone!!! 🙂

1459827_10151995003636438_1290448086_n


I hope today fines all of you full of Love and Joy!!! Its has been a busy season for me thus far, hoping to slow down in January 🙂

Well I did some baking, I think most of my friends, family and co-workers got a little of something that I made.

Last night Christmas Eve we went to my cousins and there were I think 54 of us that is a lot of people and a lot of Presents!!!

Today I will be with my family, my Mommy and Daddy…yes I did just call them my “Mommy and Daddy” 🙂
My two nephews and my nephews little girl!!

Enjoy your day and make it count to someone you love!!

Here are some pictures of some of the things I did make along with pictures of my Christmas Decorations!!

My indoor Decor

Christmas 2013 013 Christmas 2013 023 Christmas 2013 022 Christmas 2013 014 Christmas 2013 025 Christmas 2013 026

Next year the garland will go away and I will be adding
blue/teal and purple ribbon 🙂

Christmas 2013 027

My Sous Chef 🙂

Christmas 2013 028

That picture of Santa is my bestie Danny 🙂

Christmas 2013 029

I love my new pink lights

Christmas 2013 030

I made most of the ornaments on my tree 🙂

Christmas 2013 033 Christmas 2013 032 Christmas 2013 031

My New tree topper

Christmas 2013 034


Outside Decor

Christmas 2013 005 Christmas 2013 004 Christmas 2013 007 Christmas 2013 006

I did these pots new this year 🙂

Christmas 2013 003

that’s funny you can see my hammer off to the side 😛

Christmas 2013 002

Made this myself

Christmas 2013 008 Christmas 2013 010 Christmas 2013 011 Christmas 2013 009 Christmas 2013 012


Okay now for the Sweets 🙂

Christmas 2013 054 Christmas 2013 052

I never had luck making these Spritz Cookies
with the cookie press 😦
But then my Mom pulled out this bag that I had got
from my Grandma’s house after she passed, I had totally
forgot about this

Christmas 2013 051

This awesome Super Shooter cookie gun
Its Electric!!! 
I made all of this cookies from start to finish
in less than 2 hours… Yay!!!

Christmas 2013 050

This was made in the 70’s

Christmas 2013 049 Christmas 2013 048 Christmas 2013 047 Christmas 2013 046 Christmas 2013 045 Christmas 2013 044 Christmas 2013 043 Christmas 2013 042 Christmas 2013 053

This is Chocolate Marshmallow Fudge

Christmas 2013 040

White Chocolate Peppermint Fudge

Christmas 2013 037

Peppermint Toffee Crunch

Christmas 2013 038 Christmas 2013 039

Brown Bread 🙂

Christmas 2013 036

And Gingerbread Bars with raisins


Christmas 2013 035


Finally, I had seen these in a picture, never ate one, the person would never tell me what it was or what was in it 😦
Now I knew it was Chocolate and to me it looked like Corn Flakes.
Well I ask my New Friend Melanie from France and she came through and they are “Rose des Sables”  pretty much Chocolate and Corn Flakes 🙂

I used Special K cereal I wanted more of crunch 🙂

Thank you Melanie!!! Cheers my friend!!


Christmas 2013 056


Thank you for taking the time to enjoy my blog!!

Merry Christmas to all and to all a goodnight!!!

Brown Bread!!

12 Comments

No I don’t mean like Whole Wheat bread…I mean Brown Bread, this is a sweet or quick bread and bake in a CAN!!  

IMG_20130726_142609

Yes I said a can…you know a can that veggies come in or soup 

I grew up having brown bread in our house my Mom would make this as well as my Grandma…I don’t think I ever thought it was odd baking it in a can…I was a kid it was a cool thing 🙂

Wikipedia says – 

New England or Boston brown bread is a type of dark, slightly sweet steamed bread (usually a quick bread) popular in New England. It is cooked by steam in a can, or cylindrical pan.
Brown bread’s color comes from a mixture of flours, usually a mix of several of the following: cornmeal, wheat, whole wheat, graham flour, or rye, and from the addition of sweeteners like molasses and maple syrup. Leavening most often comes from baking soda (sodium bicarbonate) though a few recipes use yeast. Raisins are often added. The batter is poured into a can, and steamed in a kettle. While most variations are quick breads, and can be made in less than an hour, several commercial brands are available. Brown bread is somewhat seasonal, being served mostly in fall and winter, and is frequently served with baked beans.

I really had forgotten about this Brown Bread until I read this blog “A Small Insight” http://asmallinsight.wordpress.com/2013/04/09/mammas-fruit-loaf/
Lucy call it “Mamma’s Fruit Loaf and when I read this post and saw what it was, I immediately thought of Brown Bread 🙂 

So go to her blog and check her out and her recipe for her Mamma’s Fruit Loaf 🙂

All  know is that I really was not a big fan growing up, but now this stuff if great and I like mine with butter, now my Mom likes her’s with cream cheese.  So its up to you on which way you eat it, its also good heated in the microwave 🙂

My recipe here is is made with a couple of can, I also used small paper loaf pan, easy to give as gifts and I made some today for our office and I used a Bundt pan and it just came out so nice…perfect with you were having people over for coffee or tea, it’s perfect.

Now I did compare my brown bread to the ‘Can” kind you find in the store and let me say, I thought the store bought one was very dense, dry, very little raisins compared to mine.  And the flavor well I am sorry to say it was just plan awful…sorry if you like it, I just didn’t care for it 🙂

Store bought

IMG_20130726_114939IMG_20130726_115243IMG_20130726_115347IMG_20130726_115442


Ingredients

IMG_20130726_120106


Raisins and water in a small sauce pan

IMG_20130726_120508

IMG_20130726_120540IMG_20130726_120624


add flour, salt, baking soda and bran/bran buds to bowl 

IMG_20130726_121509


Mix together
IMG_20130726_121614

cream butter and sugar

IMG_20130726_122932


IMG_20130726_123109


stir in egg and vanilla

IMG_20130726_123241


IMG_20130726_123311


add dry mixture and stir a little

IMG_20130726_123357

IMG_20130726_123436


add raisin mixture

IMG_20130726_123543


Fold to combine

IMG_20130726_123613


pour batter into your containers

IMG_20130726_124005


bake

IMG_20130726_132140


this is the can

IMG_20130726_134203


this looks so good

IMG_20130726_142506


this is store on left and mine on right

IMG_20130726_142732


You can see that mine has so many more raisins

IMG_20130726_142852


Both buttered and ready to eat

IMG_20130726_143006


Out come, like I said did not care for the store bought, took one bite 😦

Mine oh it looks so good!!!!

IMG_20130726_143229

Brown Bread Recipe

1 1/2 -2 cups raisins
2 cups water
1 cup Bran or Bran Buds Cereal
1 3/4 cup all-purpose flour
2 tsp. baking soda
1/2 tsp. salt
1 cup granulated sugar
2 tbsp. butter, softened
1 egg
1 tsp. vanilla

4 – 16oz. cans (fill 2/3 full)- bake for 35-55 minutes, small loaf pans (fill half full) – bake 30 minutes, large loaf pan (fill half full to 2/3’s) – bake 40 – 50 minutes, bundt pan (whole recipe) – bake 45 minutes.  With any of these just keep an eye on it, when you stick a toothpick or skewer in bread it should come out clean, it then is done.   Cool upside down on a cooling rack.

Pre-heat oven to 325 degrees

In a small to med sauce pan add water and raisins, bring to a boil over med-high heat, once it boils, remove from heat and set aside for 10 minutes.

In a small bowl add flour, bran/bran buds, salt and baking soda, stir to mix…set aside
In a large bowl cream together butter and sugar for 1 minute, then stir in egg and vanilla, then add dry mixture, stir it a little and raisin mixture, fold to fully combine.

Pour into your WELL greased or spray baking container, and bake.  Let cool enough to handle and then you can dig in 🙂

The Bundt pictures

IMG_20130821_172431


IMG_20130821_172537

Banana Bread!!!!

8 Comments

Okay who doesn’t like Banana Bread 🙂

IMG_20130726_143721

I love Banana anything…cakes, muffins, cookies, bread, ice cream, yogurt, candy!!!  

Oh and have you seen the **NEW** Dole Dippers, slices of bananas dipped in dark chocolate and FROZEN can you say

YUMMMMMMMMYYYY!!!!!!   download

I can, I have had them and they are addicting, they even have them with chopped almonds sprinkled on top too 🙂  They come 6 packages in the box, 100 calories a package, so well worth it 😛

So have a pack of those so when you have a slice of this Banana Bread you will not feel so guilty 🙂

So we’ve all had the few bananas sitting on the counter that are slightly or way past their prime…right 😛

I think what most people think of when that happens to the bananas is….BANANA BREAD TIME!!

So here’s my Banana Bread recipe 🙂  Hope you enjoy it!!

Ingredients

IMG_20130726_122341


whisk together, four, salt and baking soda

IMG_20130726_130728


add bananas to bowl and mash

IMG_20130726_125404

then add sour cream and vanilla to bananas

IMG_20130726_125734

mix together

IMG_20130726_125811

cream butter and sugar

IMG_20130726_125955

for about 3 minutes

IMG_20130726_130206


add egg yolks

IMG_20130726_130404

beat to combine

IMG_20130726_130624

fold in half flour mixture

IMG_20130726_130816


IMG_20130726_130848

then add banana mixture and rest of dry

IMG_20130726_130918


IMG_20130726_131007


IMG_20130726_131058

beat egg whites just until frothy

IMG_20130726_131212


IMG_20130726_131251

fold into batter, but don’t over work it

IMG_20130726_131318

IMG_20130726_131400


I used mini loaf pans, you can also find paper baking loaf size too, for easy gift giving

IMG_20130726_124253


IMG_20130726_131914


Then bake and done

IMG_20130726_140624


This recipe is so moist you will never use another 🙂

IMG_20130726_143858

Recipe

1 stick of butter, softened
1 1/2 cup granulated sugar
2 eggs, yolks and whites separated
1 1/2 cup all-purpose flour
1 tsp. baking soda
1/4 tsp. salt
4 tbsp. sour cream
3 overripe bananas, mashed
1 tsp. vanilla

Preheat oven to 325 degrees

pans – 8 1/2 x 4 1/2 x 2 1/2 loaf pan, or mini loaf pans or small bundt pan.

In a small bowl add mashed banana, sour cream and vanilla, mix to combine.

In another small bowl add flour, salt and baking soda, whisk to combine, set aside.

Cream butter and sugar together in a large bowl for about 3 minutes, then add egg yolks and beat until combined.
Fold in 1/2 of dry mixture, then add banana mixture and the rest of the dry.

In a clean dry bowl add egg whites and beat for about 30 – 45 seconds just until frothy, then fold egg whites into the batter.

Just until combined, try not to over work the batter.

Bake for regular size loaf pan 45 minutes to 1 hour, mini loaf pans about 30 minutes, check by inserting a toothpick in the center and comes out clean.

Enjoy!!!!

IMG_20130726_143758

Zucchini Cake with Cream Cheese Frosting

5 Comments

Well summer is here and the gardens are producing some awesome vegetables!!  Every year we always make zucchini bread with the zucchini.  

This time I decided to make a Cake instead….now I’m sure someone out there has made a zucchini cake…but I have have, this really is no different then the bread just in cake form, so this is what I came up with 🙂

IMG_20130728_200200

along with the things I would change next time 🙂

Did I say change…yes I did 🙂  No one is perfect!!!!!!!!!!  

Ever watch Top Chef or I like Top Chef Masters myself, (in case you don’t, it is a cooking competition show with mostly well know chefs)  I like this show better since I do admire some of the chefs that have been on the show and am amazed at the talent they have  that have made them famous.

download

This new season just started last Wednesday night on Bravo, this season does not have many chefs that are TV known except Chef David Burke he has multiple Awards, Restaurants, and few products.  They have many talented Chefs this season and I am excited to watch.

 It is hosted by Chef Curtis Stone images and recently he posted a picture of dish he was trying make and it just flopped, and he said “see not even Chefs are perfect”  I love him for that 😉

Which brings me back to telling you as I made this cake and it did not turn exactly as I wanted it too, so next time I know the things I’ll change (which I will let you know in the recipe what that is) 🙂

So I’ll tell you a secret, not everything I make turns out just right, including “my new idea for a cookie” that I tried to make this week 🙂
I was trying to make it with no flour, butter, oil…okay health and using things I already had around the house…well I am going to admit, the garbage had its share of treats 🙂  

Oh my goodness I can’t describe the texture…closest word I can think of is “RUBBER”LOL  Hey at least I tried 😛  

UPDATE on this post – I brought this cake into the office today and everyone loved just as I made it, so I’ll leave it up to you on the changes, that are below 🙂

Alright, alright lets move on to the cake 🙂

Ingredients

IMG_20130728_151421

add dry indgredients to a bowl

IMG_20130728_151837

whisk together to combine

IMG_20130728_151935

add eggs, oil and vanilla to large bowl

IMG_20130728_152350

whisk to combine

IMG_20130728_152435

Grate zucchini over the wet mixture bowl
or just add the grated zucchini to the wet mixture

IMG_20130728_152600

IMG_20130728_152940

fold in to combine

IMG_20130728_153026

then add dry to wet

IMG_20130728_153056

just mix until everything is moist

IMG_20130728_153211

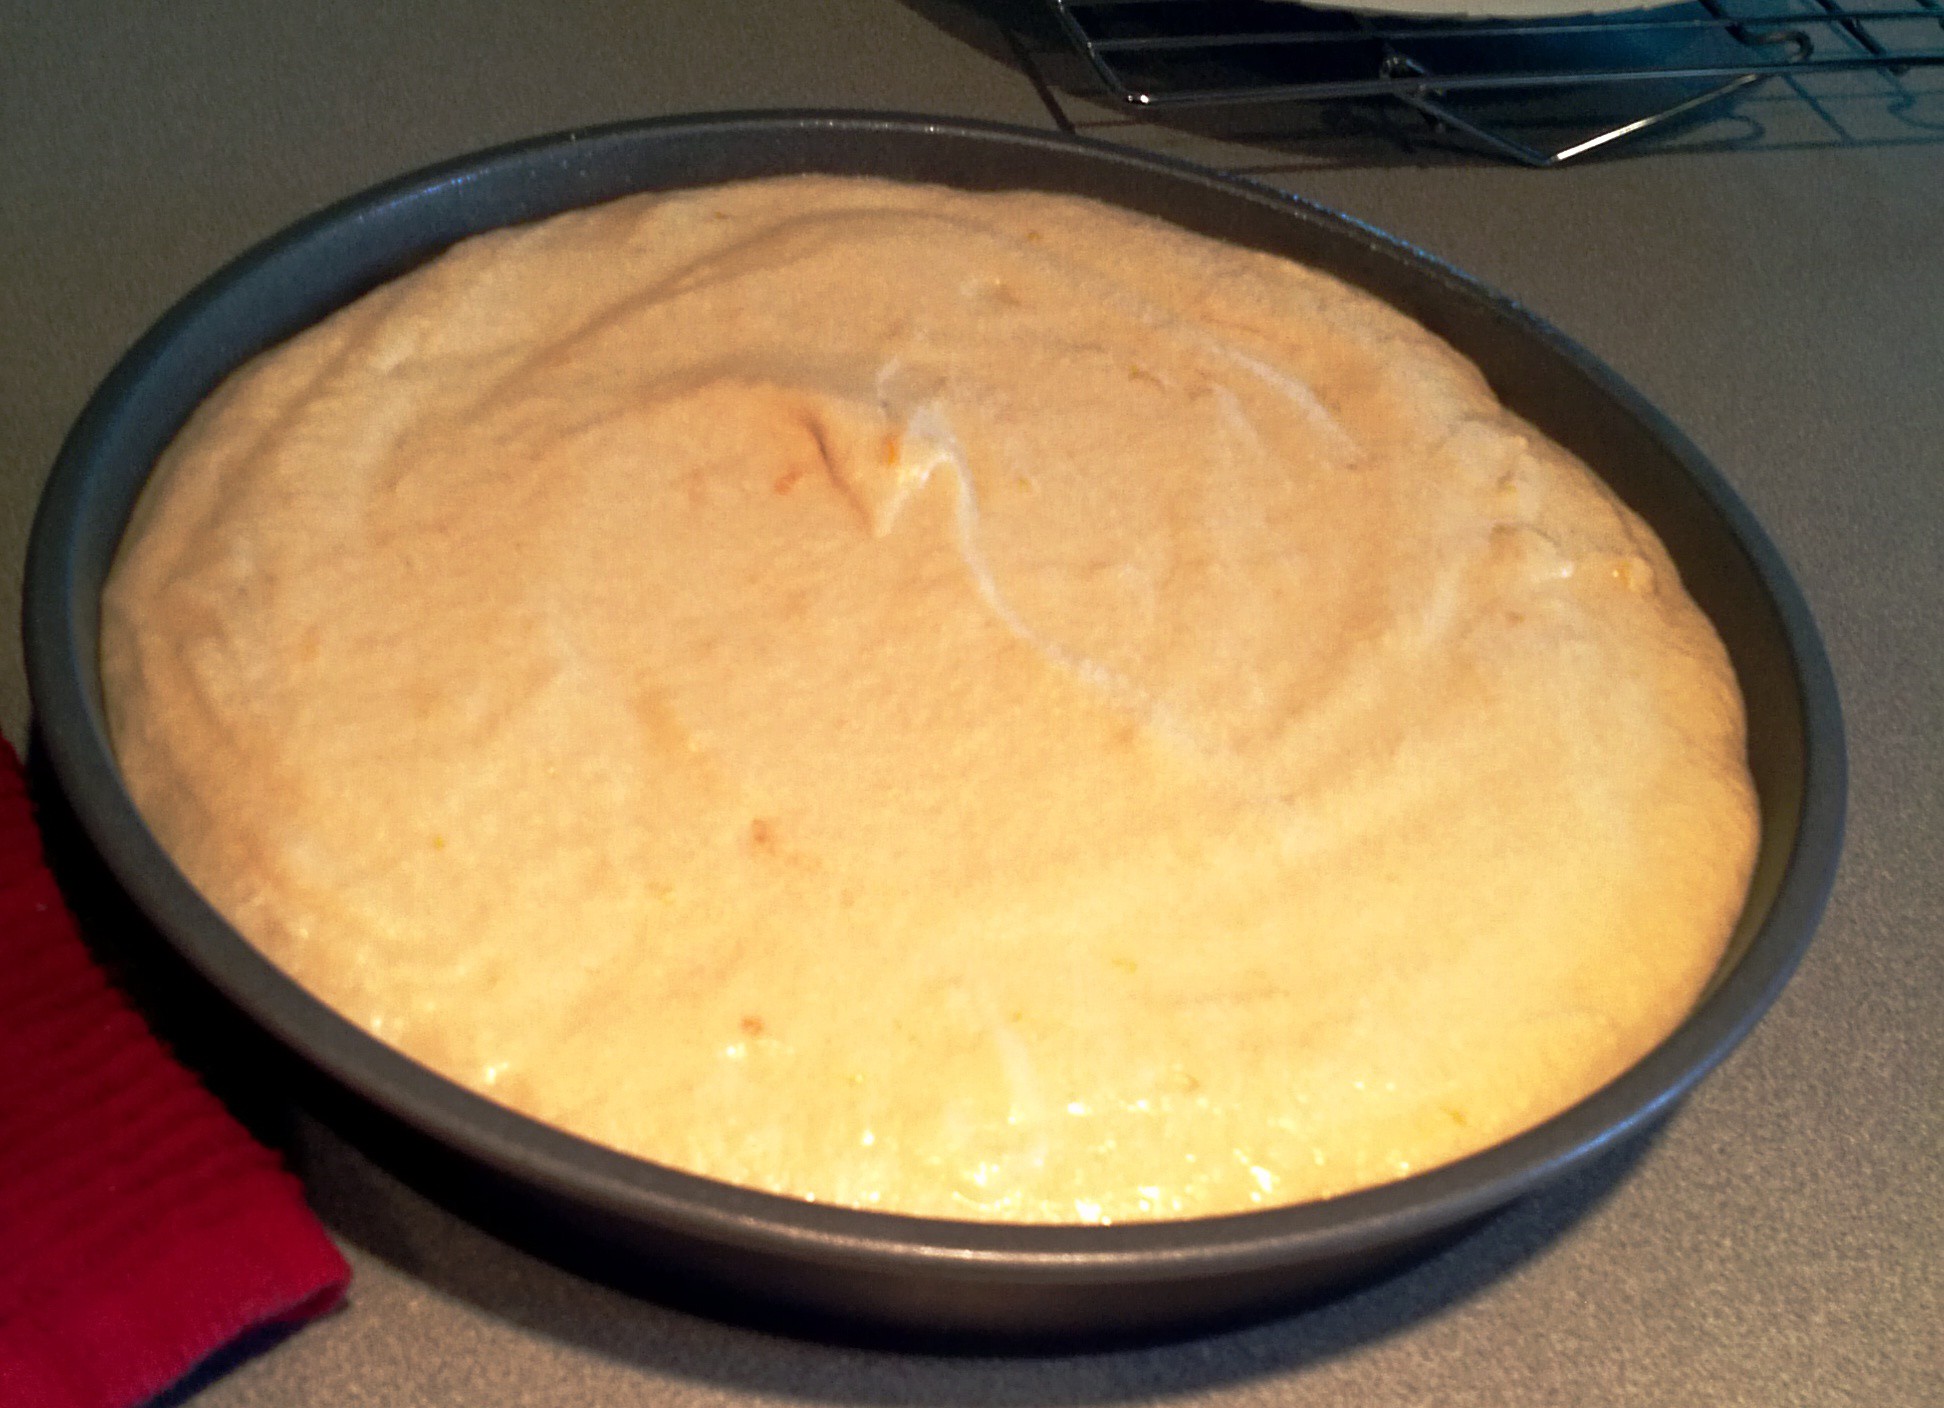
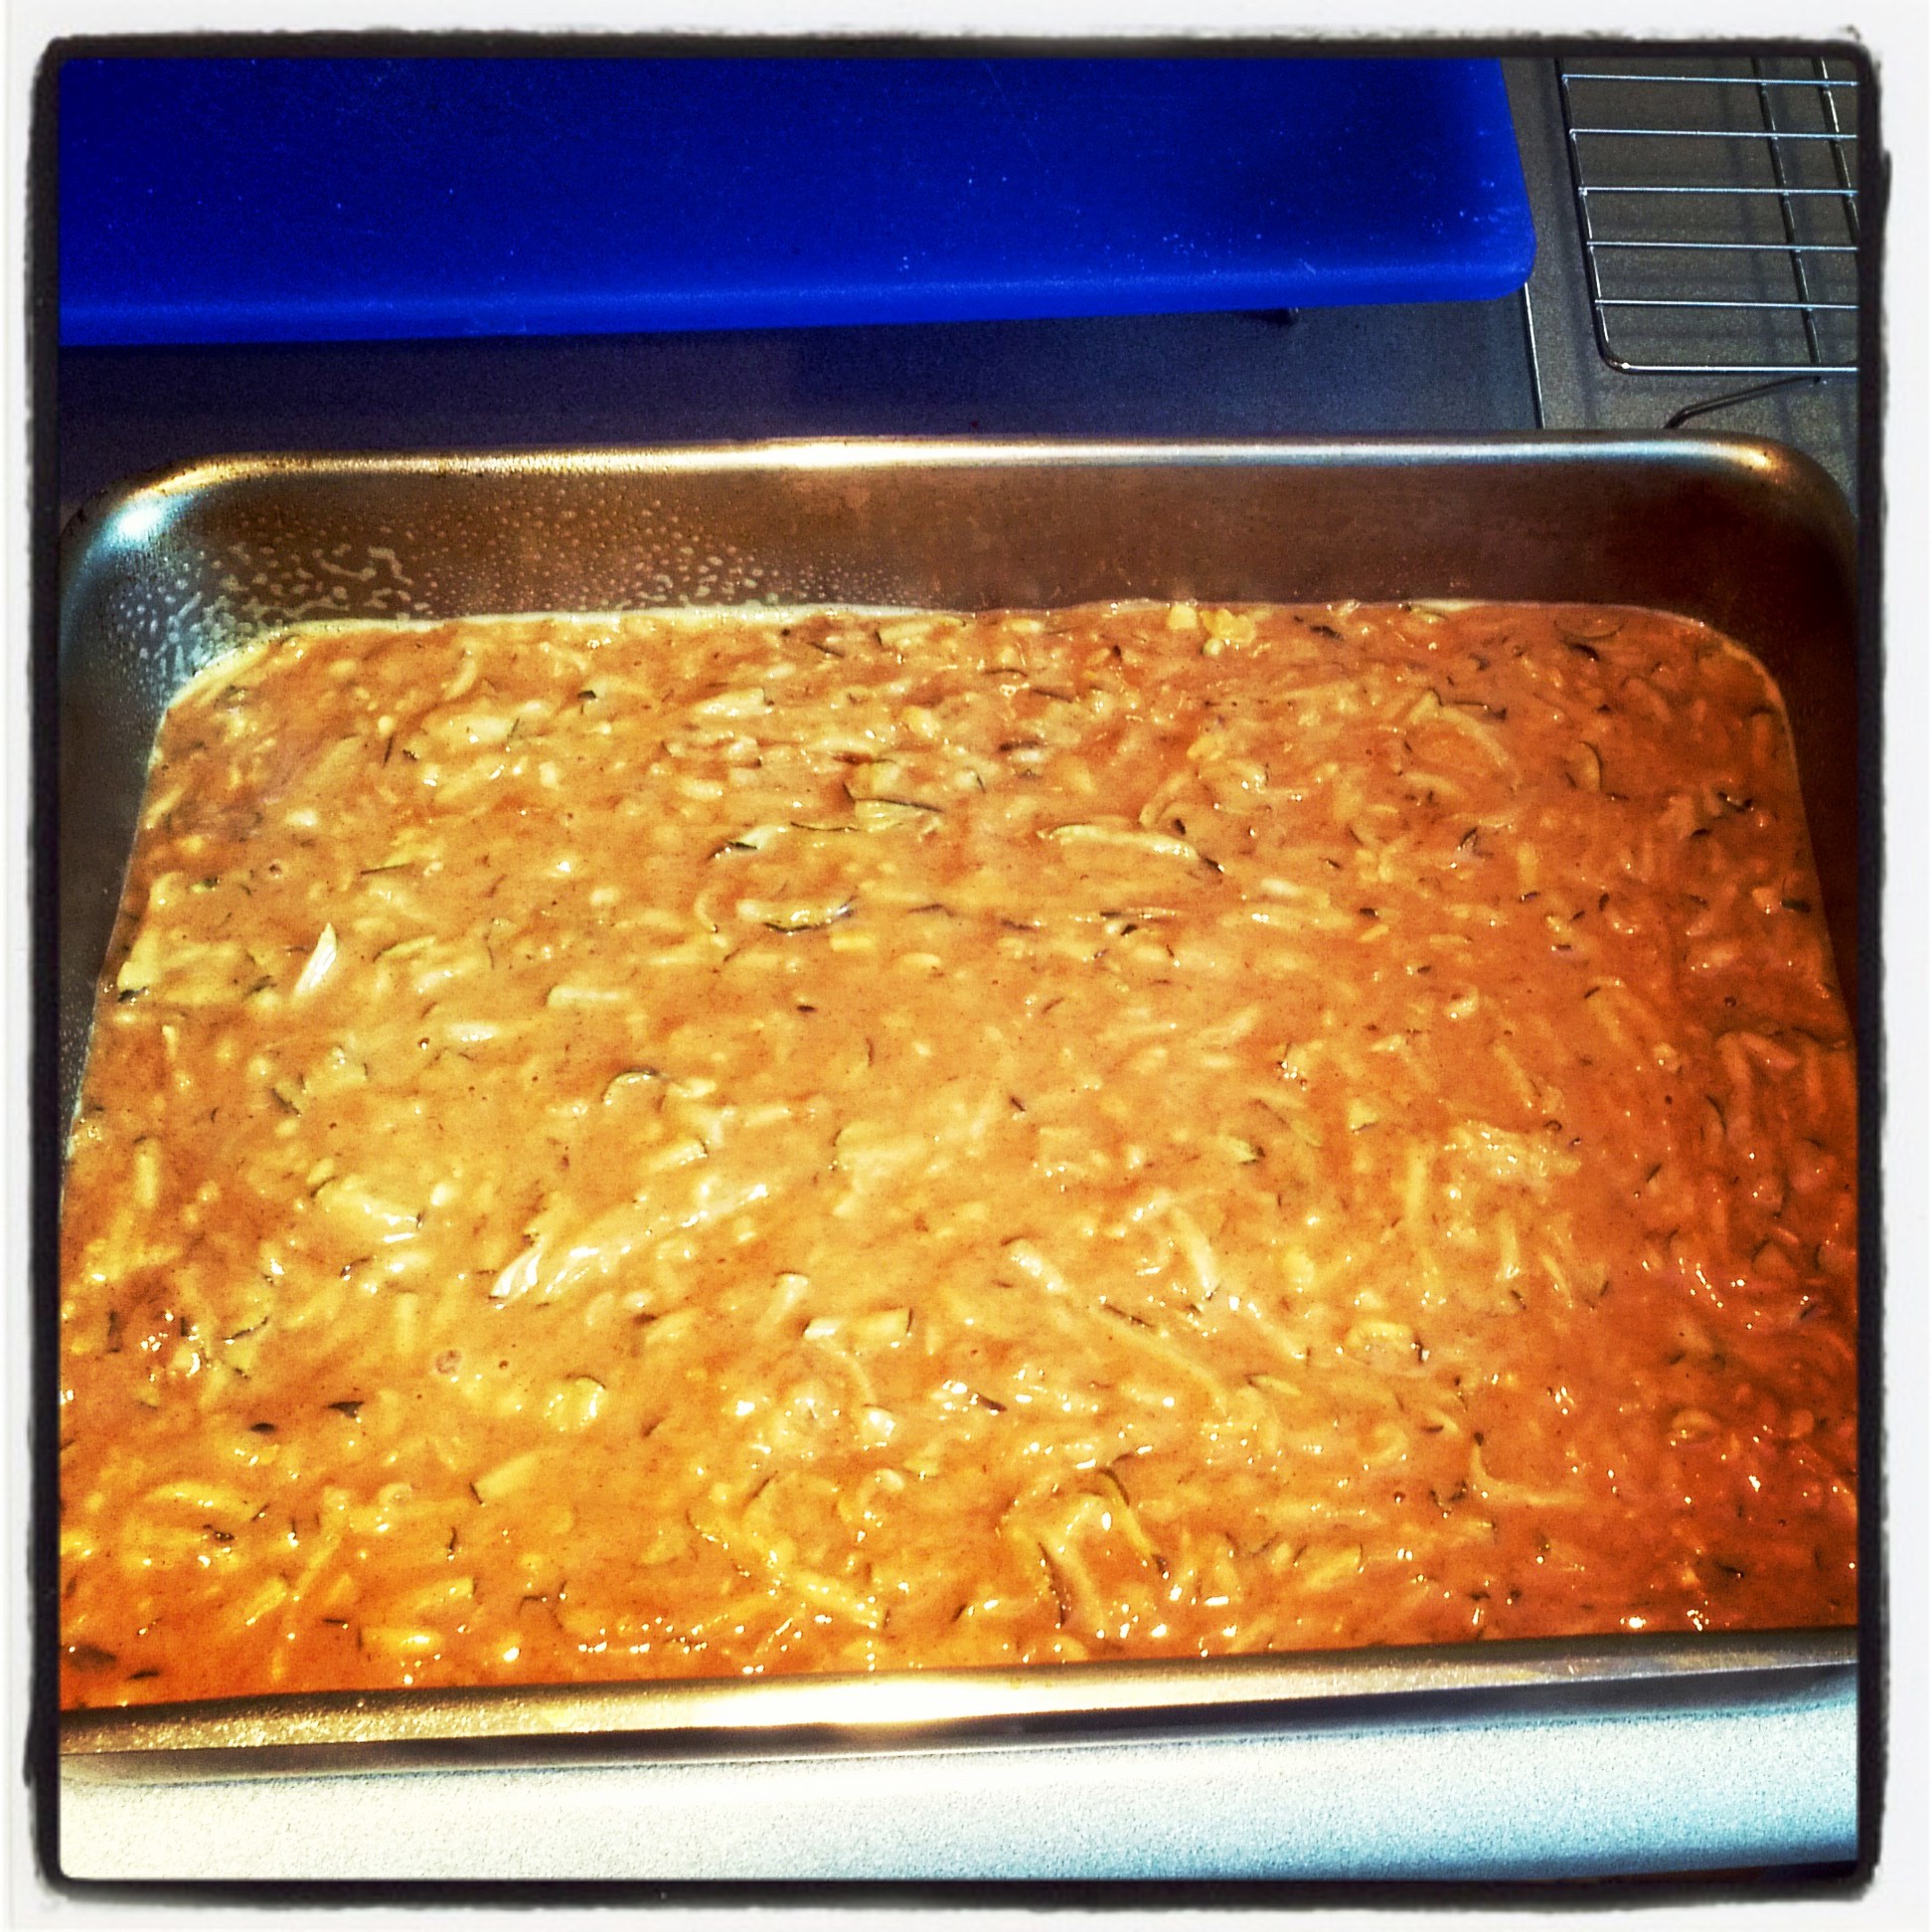
Pour into a 9×13 pan
(this is what I would change, if I use a 9×13 again I will double the recipe or I’d use a 9×9 baking dish)

IMG_20130728_153357

Bake and let cool completely

IMG_20130728_160642

Cream Cheese Frosting ingredients

IMG_20130728_153458

add softened cream cheese and butter to bowl

IMG_20130728_195007

with hand mixer or stand mixer, just mix to combine

IMG_20130728_195046

then add confectioners sugar a little at a time

IMG_20130728_195127

add as much sugar as you like for taste of sweetness and consistency

IMG_20130728_195343

I use only 3/4 of a 1 pound bag

IMG_20130728_195409

frost your cake

IMG_20130728_195541

done, you can dig in right now, but keep in the refrigerator

IMG_20130728_195724

IMG_20130728_200333

Zucchini Cake Recipe

 (exactly as I made, with what I would change)

1 large zucchini, grated (about 3 cups or so)
3 eggs
1 cup oil
3 tbsp. vanilla
2 1/3 cup all-purpose flour
1 cup granulated sugar
 1 tsp. salt
1/2 tsp. baking powder
1 tsp. baking soda
2 tbsp. cinnamon (I would have put in a least 1 more tablespoon, I also would have added 1/2 tsp. nutmeg)

Nuts are optional I did not use any

In a medium bowl add all the dry ingredients and whisk to fully combine.

In a large bowl add oil, eggs and vanilla, whisk to fully combine, add grated zucchini and stir to combine.
Then add dry to zucchini mixture, fold just until everything is moist.

Preheat oven to 350 degrees

Pour mixture into a greased or non-stick sprayed baking dish*** see Note below

(In the pictures I used a 9×13, for this recipe  would change that to a 9×9 baking dish.  I felt that the cake was too thin, I would have liked it to be thicker.  Therefore if using the recipe above and  you want a thicker cake use a 9×9 baking dish, if you like it thin (about 1 1/2 inch) then use a 9×13 baking dish.  Now you can also double this recipe and use a 9×13, resulting in a thicker cake)

Bake time using above recipe in a 9×13 done in 30-35 minutes,  using a 9×9 pan check at 35 to 40, until a toothpick inserted in the middle comes out clean.   Cool completely 

Cream Cheese Frosting

8oz. cream cheese, very softened
4 tbsp. butter, very softened
1 box confectioners sugar (1 pound box)

in a medium mixing bowl add cream cheese and butter, beat on med-high speed just until combined, then on low speed add sugar a little at time until you have the sweetness and desired consistency.

Frost cake, slice and serve, or this can kept in the refrigerator until you serve. 

This cake is Super Moist!!

IMG_20130728_200420

and Cream Cheese Frosting is so creamy 🙂

IMG_20130728_200521

I hope you try it!!! Enjoy!! 

IMG_20130728_200547