Happy 2016!! How about some Soup!!

19 Comments

Yes I am still Alive!!! 😛

I know, I know I have not blogged in forever, but I have been very busy with work and other things.

Plus I don’t cook up a ton of things for me on a daily basis, and when I do cook for my family I am so busy doing multiple things that I forget to take pictures, and if I do I don’t often have a lot of time to blog it all out.  So I am sorry for those who care, and I will try harder this upcoming year!!

So this would be something I would not blog about since its just something plan I would come up with, but I thought I just better share this to let everyone know I am still kickin 🙂 LOL

So yesterday on my day off I thought okay you have stuff in the fridge you need to use, so I made Soup.

I call it “Winter Soup” or “What else can I put in this” Soup 🙂 LOL

IMG_4027

I also had gotten a four pack of bone-in chicken breast out of the freezer to make some room 😛

Okay so I don’t have a recipe here because really it was a what can I throw into this pot kind of soup.

And I think that is what we all need to think more of when we have things in our fridges that need to be used. Or your pantry, heck if you have can veggies do it, or cans of tomatoes or sauce, what about pasta or rice, your options are endless!!!

So this is what I started with, cabbage, zucchini, carrots and beans.

IMG_4010

Chopped it all up and I added about 2 cups of chicken broth(had some left in the fridge), I cooked it in the oven on 325 degrees for 2 hours

IMG_4011

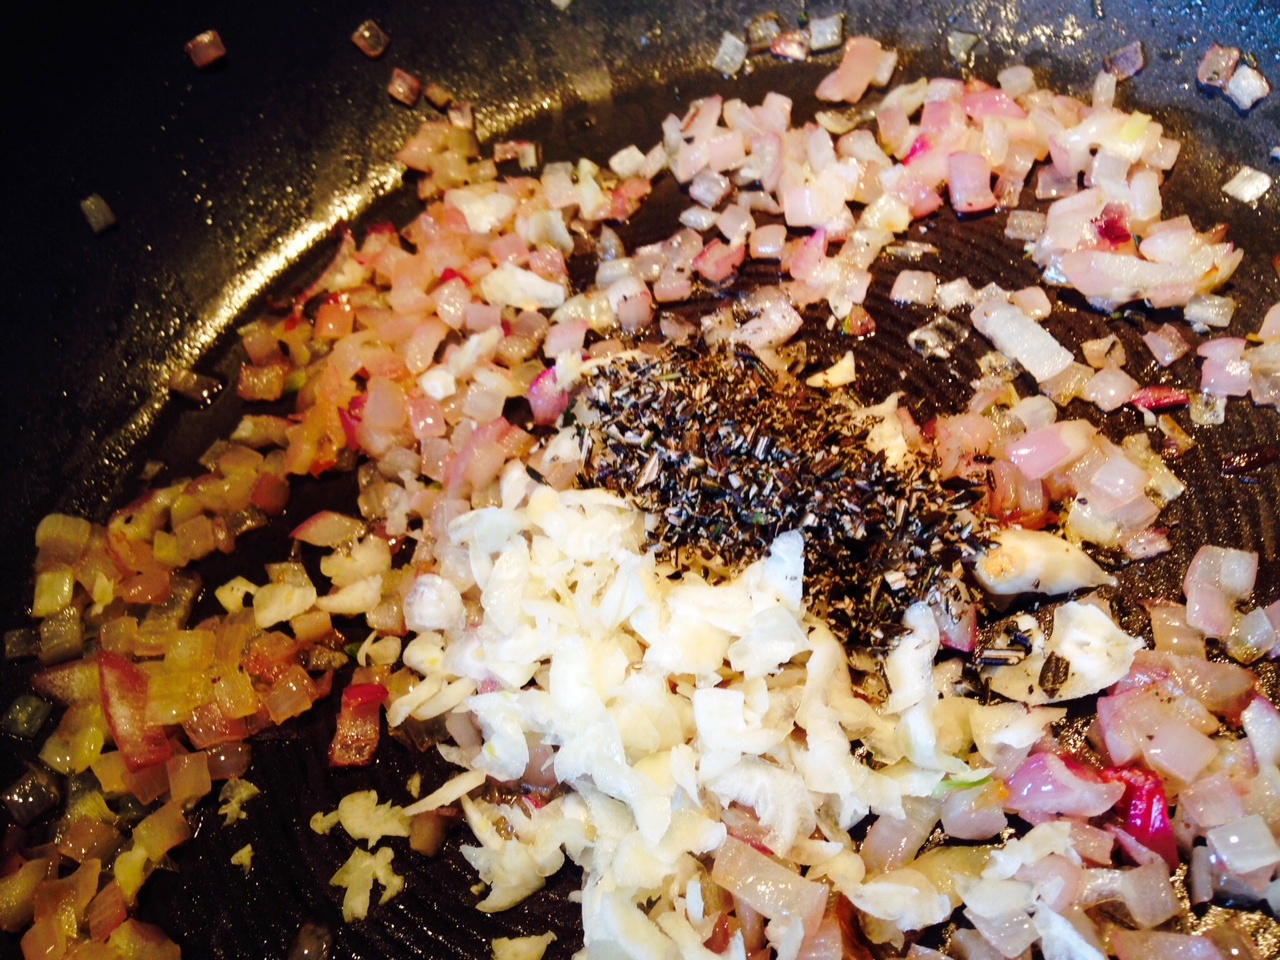
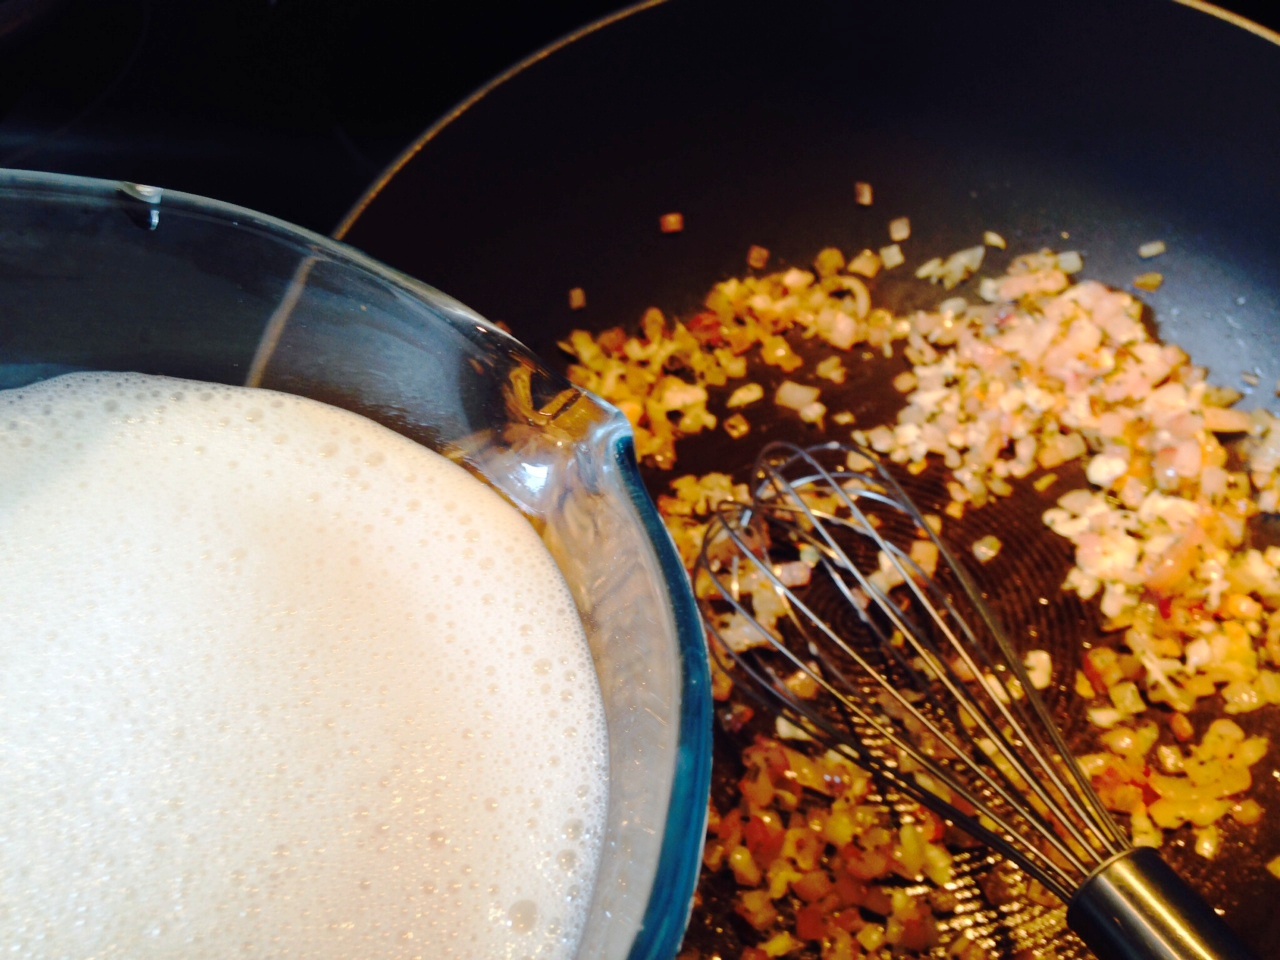
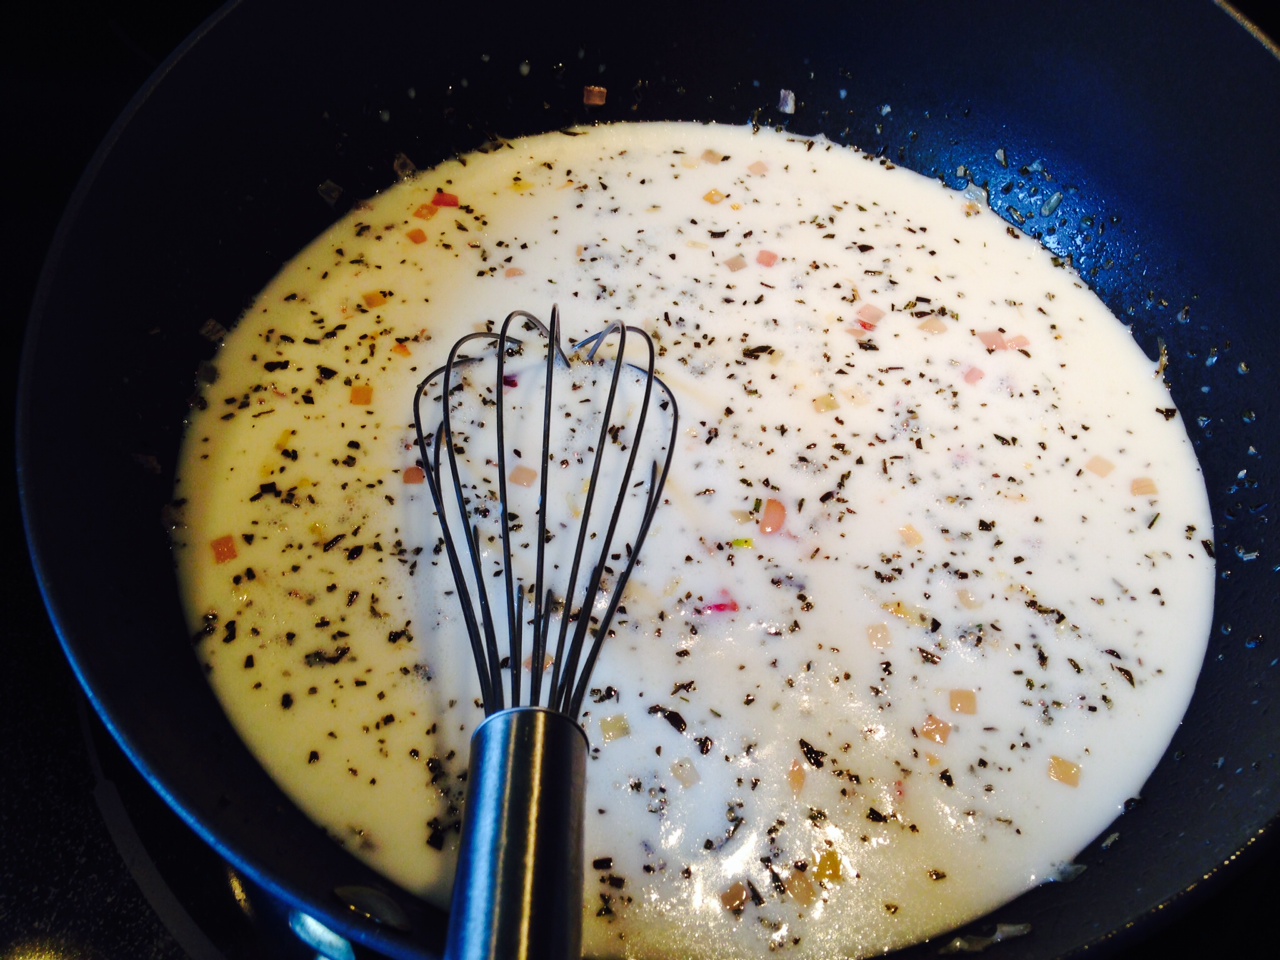
then I added about 4 more cups of broth, I love using “better than bullion” soup base, so I had a little beef flavor left scraped that in there and then some Turkey.  Just mix that up with 4 cups of hot water added a onion power and dill.  I love dill in soup, and I love using the tube herbs, I just don’t use fresh herbs quick enough so I do buy some of those tube herbs you can find in your produce dept.  So whisked all that up and poured it right on in.

Cooked at 350 degrees now for about 1 hour, then I added the beans about 4 cups, not that whole jar, mixed, then check for seasonings, I add some crushed celery seed, more tube dill, kosher salt and white pepper.  Back in the oven for 30 minutes.

IMG_4013

IMG_4019

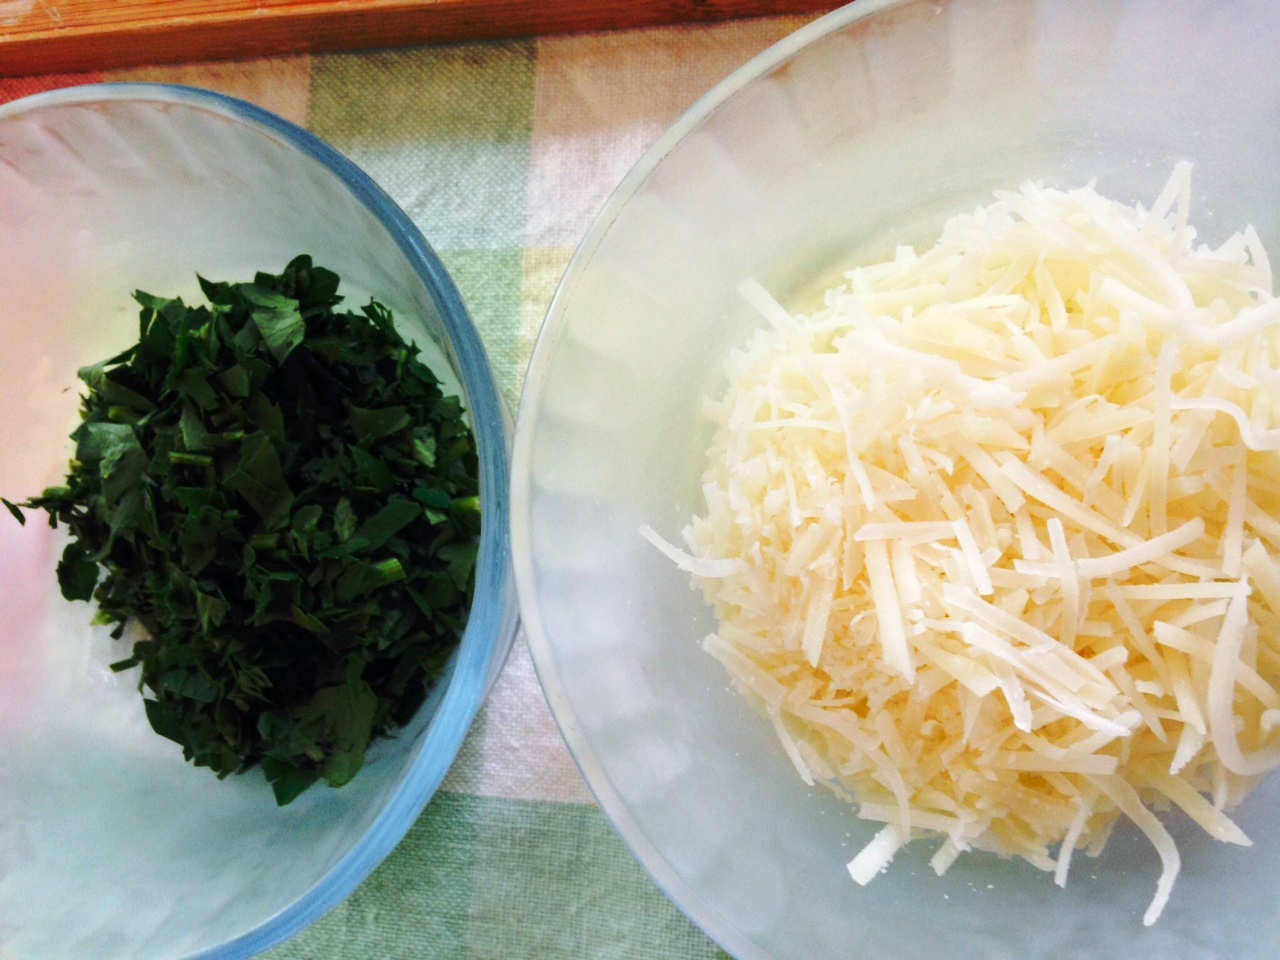
adding the celery seed and my tube dill 🙂

IMG_4016

Like I said I had chicken breast, so I just bought a new kitchen gadget, it was my Christmas present to myself…

Table Top Halogen Oven

IMG_3988


Now I love it, the first thing I cooked in it was a Steak, a Frozen Steak!!!   Steak (bone-in rib eye) was about 1 inch thick, I took it out of the freezer, salted and peppered each side, and in 25 minutes I had the most perfect medium rare steak…It was delish!!!

Now I know the haters are going to hate, I NOT telling you buy it, this just works for me and I like it 🙂

So I put two of the chicken breast in it and let it go, yes can I use the oven, of course, but I like this and wanted to use it, I can see it cooking and like the easiness 🙂

So here’s my chicken cooking, of course once it was done again I forgot to take pictures…sorry, but it they looked great.

IMG_4029

So I shredded some of the chicken

IMG_4017

and added it to the soup, and it was done and ready to eat.

IMG_4028

I have soup for the next week and I frozen half of it too, I like doing this so its easy to bring out and heat out when you need something quick.

So what do you have in your fridge right now that you can throw into a pot and make your own

“Winter Soup”

Enjoy everyone!!

IMG_4022

Eggplant Parmesan…my way!!

20 Comments

IMG_3144

As I have mentioned in a recent post my Dad has a garden and so another vegetable that has been a plenty is Eggplants.
Most of the summer, I would grill them or just roast them in the oven, and a couple of times I made Eggplant Parmesan.  I would post my pictures on facebook and of course my friends say tell me the recipe.

So this last time I tried to remember as making it to take pictures of the process and what I do 🙂

First I used my homemade tomato sauce that I made out of the tomatoes from my Dad’s garden and I love using Fresh Mozzarella 🙂

So enjoy!!

First I peeled, sliced then sprinkled slices with salt in a colander
for 30-40 minutes, then pat each slice dry with paper towel. 
(LOL of course the first picture of that I forgot to take)
Then place them on a baking sheet 

IMG_3177

I took panko bread crumbs and fresh grated Parmesan Cheese

IMG_3174

Mixed in some Sandwich Sprinkle from Penzeys
(coarse salt, garlic, black pepper, basil, oregano, rosemary, thyme and marjoram)
you can add Italian seasonings as well

IMG_3176

Put about 2 Tbsp. on mixture on top of each slice

IMG_3178

with your hand press down crumb mixture

IMG_3179

Then I sprayed each piece with PAM – Olive oil spray
of course you could drizzle with olive oil if you wish too.

IMG_3180

IMG_3182

Then bake in a 385 degree oven until tops are brown

IMG_3185

Sauce you can use any you like, so pick your favorite
I used my homemade sauce and I added
some of the Sandwich Sprinkle to the sauce

IMG_3183

I have some Fresh Sliced Mozzarella

IMG_3184

In a sprayed baking dish, place a eggplant down
and top with sauce

IMG_3186

Then top with a slice of mozzarella

IMG_3187

Place another piece of eggplant and repeat
with sauce and cheese

IMG_3188

I topped the final piece of cheese with the rest of the sauce

IMG_3189

I had crumb mixture leftover

IMG_3190

and I sprinkled some over top the entire dish
And bake at 385 degrees until brown 

IMG_3191

and cheese is melted and brown

IMG_3194

IMG_3195

IMG_3196

This was so good, most of the time I don’t measure anything so when
I cook unless I write it down it really just turns out to what I have 
in my pantry and such.  So when I am experimenting and it turns out good, I have to remember what I did so I can share in a blog, and then most the time I don’t take picture either 😛 LOL
The last time I made this (pictures below), I did the same except I didn’t have
any crumb mixture left, so I sprinkle the final layer with a little parmesan chesse

They both turned out delicious 😛 so as you make yours just make to what you like and
it will be just as Delicious!!

IMG_3148

IMG_3151

IMG_3150

Eggplant Parmesan

  • Servings: 4-6
  • Difficulty: easy
  • Print

4 medium size eggplant, peeled, sliced a 1/2- 3/4 inch thick (6 slices from each)
3 cups of tomato sauce
3 Tbsp. Penzeys Sandwich Sprinkle or Italian seasonings, divided
2 cups panko bread crumbs
1 cup fresh Parmesan cheese, grated
Fresh Mozzarella sliced, 2 slices for each stack
(used 1 1/2 logs for 8 stacks, so 2 logs would work for 12 stacks)
PAM Olive Oil spray

Sprinkle each slice of eggplant both sides lightly with salt, place slice in colander in the sink,
let set for 30-40 mins.  Then pat each piece with a paper towel, doing this helps draw out the bitterness that some eggplants tend to have.

In a bowl add panko, Parmesan and 2 Tbsp. seasonings; mix together.  Place slices on a baking sheet and put about 1- 1 1/2 Tbsp. of mixture on top, press mixture down with hand then spray with olive oil spray.
Crumb mixture does fly around a little that is why I press down the mixture, you can drizzle tops with olive oil if you wish.  Bake at 385 degrees until tops are brown about 25 minutes or so. 

Meanwhile get your tomato sauce ready, mix in 1 Tbsp. seasoning, have mozzarella slices ready.
Spray a baking dish that will hold the amount you are making.

Once eggplant tops have browned, place half the slice in the baking dish, top with 1 – 1 1/2 Tbsp. sauce,
then a slice of cheese, repeat again, eggplant, sauce and cheese.
At this point you can top each stack with leftover sauce and sprinkle with any left over crumb mixture, or just sprinkle some a little Parmesan cheese over top.  Bake at 385 degrees until light brown and cheese is bubbly.  

You can really make this your own, you like more sauce use more sauce, or cheese even, if you want to stack 3 high then stack 3 high.  These a great meal served with a simple salad on the side.

Enjoy!!!


You Say Tomato I Say Tomahto!!

25 Comments

Tomatoes, who has tomatoes…I DO!!!!!!!!
IMG_3098

My Dad’s garden is producing a plenty, his plants are 8 feet tall and going wild!!!

I have a few pictures here from the beginning stages, they are about 5 to almost 6 foot at this point,
my Dad here is growing, leaf lettuce, kale, peppers, cucumbers, onions, green beans, eggplants and of course Tomatoes!!!
There maybe be more he grows but I can remember, I do know he has another patch that asparagus is in and the green house that things grow too…

11666054_10153314920656438_2145071700432593791_n 11665606_10153314920601438_1139968286137009740_n 11391469_10153314920561438_153863238068122867_n 11180320_10153314920521438_125284806512604321_n 1978911_10153314920481438_8295813812636403610_n


but I just decided to write this blog about tomatoes last night, so I don’t have recent pictures of it 🙂 these picture were about the 2nd week of June

So I have been eating a lot of tomatoes lately, but they have really only been from my Dad’s, I don’t buy them usually, but I do love when I get them from him and his garden.

As anyone knows they just taste better than you can get in the store and it’s really the only eat time I do eat them.
My Mom and Dad will freeze them, stew them, roast them, sauce them, slice them for BLT (which I think they east daily during the summer) and chop them for salads.  Plus whatever else they do with them 🙂

I on the other hand I tend to eat them a little differently 🙂

First I blanch them and remove the skins, I have issues with the skins, that’s all I will say 🙂

Here are a few pictures of ways that I have enjoyed using my Dad’s fresh tomatoes from his garden.

I hope you will enjoy too!!!

Making sauce, in my Vitamix are tomatoes, roasted garlic, some Italian herbs, red pepper flakes and salt.
The Vitamix will also cook it too you let it run about 5-7 minutes and you have hot soup or sauce 🙂

IMG_2800

Mixing it all up

IMG_2802


Freezing some for winter 🙂

IMG_2804 11800462_10153387039611438_2787259125193853462_n

Cooking some down too

1263798_10151879504951438_2015140527_o

This is the cherry tomatoes, sauteed with garlic, onions and spinach
tossed with the pasta, then fold in some fresh mozzarella pearls
then a drizzle of some balsamic glaze…Delish!!!!

481565_10151629364236438_111827949_n

My all time favorite thing in the world is
Polenta with fresh tomatoes and a poached egg!!!
This is heaven for me!!!

1003899_10151774555011438_1600804182_n


another day again…YUMMY!!!

IMG_2759

This is my FBT…Fake bacon and tomato 😛

IMG_3103

Ran out of the cornmeal to make polenta
So I made couscous instead…Delish too!!!

IMG_3105

This was last night’s dinner
tomatoes, roasted garlic tossed with pasta and some fresh mozzarella cubes
I was talking about making this a work…so ladies this is what I made…simple and quick 🙂

IMG_3122 IMG_3120

Oh and here is the kale and I made some kale chips…very good with a
sprinkle of kosher salt and garlic powder 🙂

IMG_2795 IMG_2796

IMG_2798 IMG_2797


Here are couple of links of 2 more of my blogs that I used tomatoes in the past
First up is my Tomato Cobbler – this turned out really really good so if you
want something a little different try this recipe.

 Second is Orzo Salad with Basil, Tomato & Feta – I made this at one
of my outdoor cooking classes last year.

Enjoy the rest of the summer everyone!!!

What’s next here hopefully sooner than later
my trip to Bourbon Country 🙂
IMG_2927

Summer Cooking Class Series!!

16 Comments

Yes I know I have been a little “MIA” lately!!!

But this summer has been busy and I can’t believe its JULY!!!! 
I have my hand in so many different little things that I am just so busy and it’s been hard to find the time to blog.  Plus I have not been cooking anything really good for myself, so hence no blogs.

But I did finish a couple weeks ago a cooking class series that I did in 3 of our stores 🙂

They all turned out great, a lot of grilling and a few out of the box recipes, beer sampling with one too!!

Here are a few pictures of the dishes and the crowds, it was a great time and I had a LOT of help from some of GREAT co-workers.

I hope you enjoy!!!

Grilled Fruit Pizza – naan bread, Camembert cheese, blackberries, strawberries, basil and balsamic glaze

FullSizeRender (0000000D) FullSizeRender (00000008) FullSizeRender (00000004)

Grilled Asian Corn with peanuts

FullSizeRender (0000000E)

Grilled Watermelon with arugula, feta and balsamic glaze

FullSizeRender (00000012)

Crowd pic

FullSizeRender (00000003)

FullSizeRender (00000002)

FullSizeRender (00000005)

Veggie Pizza – Garlic naan bread, red pepper hummus, grilled veggies topped with goat cheese

FullSizeRender (0000000B) FullSizeRender (00000007)

Grilled pound cake and pineapple

FullSizeRender (0000000A)

Grilled German Potato Salad

IMG_2585

Grilled veggies with garlic couscous topped with basil

IMG_2586

crowd pics

FullSizeRender (00000009) FullSizeRender (00000016)

Zucchini & tomato salad with ricotta, Parmesan and pesto

IMG_2581

Hawaiian Rice – cooked in coconut milk, golden raisin, macadamia nuts and green onions

FullSizeRender (0000000C) FullSizeRender (00000019)

Mango & pineapple salsa

FullSizeRender (00000013)

Crowd Pics

IMG_2588

IMG_2576

Grilled romaine with mango vinaigrette, shredded jicama, pineapple, red pepper and black sesame seeds

FullSizeRender (00000010)

Me – having fun with the microphone….I love being on the Microphone 😛 

Chef Amy

One Lovely Blog Award!!

10 Comments

Recently I was nominated for the “One Lovely Blog Award” by Ka@My Uni Kitchen

One-Lovely-Blog-Award-1
Ka has a terffic blog, he has amazing Recipes, How to Guides and Cooking Tips, so please go over to his
blog and check out all those good things he has to offer 🙂

There are few rules to accepting the award you must tell everyone 7 things about yourself and nominate 15 blogs
for the award.

So here we go 🙂

1. I worked on a cruise ship for 6 1/2 years

2. My first career was in Theater Costuming before going into Culinary

4. I love Hockey

5. I worked for our home town Hockey Team by sewing names and numbers on their jerseys

6.  During the baseball season, I am on call for the Cincinnati Reds and the away teams
      that come into town and play the Reds, to sew their uniforms (sewing names & numbers),
      for any last minute call ups.

7.  The most I was ever paid for sewing 1 single uniform for an away team was $100.00
and 
that was for 1 hour of work, that included the call, me driving to the ball park
(i live very close) 
getting in there sewing the name and number and then 
      back in my car.  🙂  

Bonus – here’s the picture 🙂

beliveau

I hope you enjoyed the few things that most of you did not know about me 🙂


Here are the blogs that I think are fantastic and I give the “One Lovely Blog Award” too

Suzanne@apuginthekitchen

Gretchen@Feeding My 3 Sons

Ginger@Ginger&Bread

Loretta@Safari of the Mind

Angie@The Novice Gardner

Julie@Hostess At Heart

Michelle@Giraffes Can Bake

Suzi@Beach Blanket Bacon

Jhuls@The Not So Creative Cook

Coco@Crafty Little Coco

Lili@Lili’s Cakes

Max@Dante’s Kitchen

Linda@La Petite Paniere

Ms. Frau@Frugal Hausfrau

Petra@Food Eat Love

Vidya and Chitra I added you as well
I know Ka added you to his blog
but I wanted to let you know I love
your blogs too, so you can consider mine
with his 🙂

Vidya@Traditionally Modern Food

Chitra@Chitra’s Healthy Kitchen

Thank you everyone for checking out my blog!!!


Roasted Garlic Bean Dip Recipe!!

19 Comments

Okay so I am trying to think of new ways to get my face out there in the world…yikes 😉

So I started to make videos, some will be product tests and some will be recipes.

This is just in the beginning stages, I only have a iPhone and my computer, but I am trying to make them better and better, sometimes I just laugh at myself when I watch them back :p LOL

But you have to start somewhere right, I will get better and its okay if you laugh I will not mind 😛

So here is the first one I did so check out I hope you enjoy it!!

FYI – I have already changed few things from this first video like I said it is a work in progress 🙂

Roasted Garlic Bean Dip

  • Difficulty: easy
  • Print

1 can Cannellini beans, drained and rinsed
1/4 cup roasted garlic
1/2 tsp. kosher salt
1/4 – 1/2 tsp. sweet paprika
1/4- 1/2 tsp. hot paprika
2-4 Tbsp. extra virgin olive oil

In a food processor add garlic and pulse a few times, then add beans and seasonings, pulse again and add oil and pulse until mixture is smooth.

Then serve with chips or veggies, you can also add spread on tortilla for a wrap.


Quinoa Burger!!!

7 Comments

Oh its just SOOOO GOOD!!!!

IMG_1785

Yes is really is 🙂  Back in December when I needed to come up with a “Theme” or “product” for my cooking class, one thing came to mind…Quinoa!!

Quinoa I feel is something that people heard of??? But not sure what it is, or what to do with it let alone know how to pronounce it 🙂

Most the time you see a recipe for Quinoa it is in some sort of salad and I just wanted to do more with it.
I’ll say its funny because just a few days before my class and her now a week after I have seen more recipes with Qunioa in it I just had to laugh.

Any way for my class yes I made a burger, I also put it in Minestrone Soup, as a breakfast dish like oatmeal, of course a salad 🙂 and cookies, yes cookies 🙂 with only 4 ingredients 😉

When I make my quinoa, I do 3 to 1, 3 parts water (liquid) to 1 part dry quinoa.  I rinse it really well till the water runs clear, oh and make sure you have fine mesh strainer, you don’t want that tiny seed going down your drain 🙂

I then add it to my pan with the water, I turn it on med-high, uncovered and bring it to a boil.  Once it starts to boil, depending on what I am doing with it, I will then add some flavoring, broth base or seasonings.  I then stir that in reduce the heat to low, cover it and let it go for at least 20 – 30 minutes, again depends on the quantity of quinoa that I use.  The more I have the more time I let it cook, I like mind to kind of get sticky, a little like sticky rice, for my burger I may let it go for a little longer.
Then you just go from there with whatever you are making 🙂

So of course I did not get to take any pictures of my food at my class, I got some picture of the people that came but once I starting cooking it was a little hard 😛 LOL

About my burger, you can make this any flavor you want, once you have the mix add what ever seasonings you want, so the last night when I got home from work I made them 🙂

Of course at the same time I was trying to cook up some things for the week, I made Lentil Soup and a pork tenderloin.  Of course my mind was everywhere and I forgot the beans…yes beans 🙂

So here we go…

Ingredients  – Ouinoa, onion, seasonings,
beef base (optional) and cannellini beans(not pictured)

FullSizeRender (23)

I rinsed my quinoa

FullSizeRender (19)


Make sure it drained

FullSizeRender (10)

I add it to the pan with my water

FullSizeRender (16)

Once it boils

FullSizeRender (20)

I then add some beef base and cover

FullSizeRender (18)


This is almost done

FullSizeRender (14)


As you can see the quinoa expand’s and get’s thicker

FullSizeRender (6)

At this point I put it on a plate to cool
(if its cool, it’s easier to handle)

FullSizeRender (17)

Now the onion in a skillet with a little oil

FullSizeRender (15)


Saute up

FullSizeRender (12)

add the quinoa, onions, seasonings and beans

FullSizeRender (8)

mix together

FullSizeRender (4)

then add the cheese

FullSizeRender (11)

now make your burgers
Put them in the fridge for a least 2 hours to
help firm up.

FullSizeRender (9)


Then cook for about 5 minutes on Medium to Med. High

FullSizeRender (24)

Flip it

FullSizeRender (2)


add cheese and let melt

FullSizeRender (7)

Get you bun ready, of course I toasted my
whole wheat bun added some fresh spinach
and horseradish

FullSizeRender (5)

Done and Delicious!!!

FullSizeRender

Quinoa Burger

  • Servings: 8
  • Difficulty: easy
  • Print

8 regular size burgers

1 cup quinoa (red or white)
3 cups water
1 tsp. Better than bullion beef base (optional)
4 tsp. seasoning (I used Grillmates Worcestershire Pub Burger)
1 large onion, chopped and sauteed
1 cup Cannellini beans, drained, rinsed and blended in food processor (you could use the whole can)
1 cup cheese, fancy shredded (any flavor)

Rinse quinoa in fine mesh strainer until water runs clear, drain, add to med sauce pan with 3 cups water, cook on med-high uncovered.  Once it comes to a boil add beef base, stir and cover, reduce heat to low, cook for 30 minutes or until water is almost gone and quinoa has expanded and is thick, give a few stirs to make sure all water is gone.

Pour out on to a plate and let cool, once cooled, add sauteed onions, blended beans and seasonings, mix very well to blend.  Taste, add more seasonings if needed, then fold in cheese.  Form your burgers and place them on baking sheet lined with parchment paper, put in the fridge for at least 2 hours or longer.

Add oil to skillet add your burgers, cook over med to med-high for about 5 minutes, burger should have a nice brown color like a burger would have 🙂

Flip and then add some cheese on top if you want, cook another 5 minutes or so, add to your bun and dressing with your favorite toppings.  Enjoy!!

At my class I did a BBQ Bacon Cheddar with crispy onion straws 🙂

They all enjoyed it for sure 🙂

Here they are at the class and the crowd that came 🙂

I had to make the burgers in batches, so many came 🙂

FullSizeRender (21)

FullSizeRender (27)

FullSizeRender (25)

FullSizeRender (29)

FullSizeRender (31)


Tailgate Steak Taco!!!

14 Comments

It is that time again, football tailgating season and the die-hard fans are out there supporting their teams 🙂

069

This recipe is something that very easy to make, you prep almost all of it the night before and the day of you can just grill it up, slice and serve 🙂

I love cilantro so this has a lot of cilantro in it, but I use angel hair cabbage and made a slaw, then use creamy goat cheese which just made this taco delicious!!

You can some “Roasted Hatch Chilies” I got some sent to me from my cousin’s living in Colorado, they add a wonderful smokey spicy richness to the taco 🙂

058

Ingredients for streak marinade

004


blend it all in the food processor

007

009

pour all over steak, over night in fridge

011

grill it up 

032

033

034

036

slice

039

Slaw ingredients

016

cabbage, jalapenos, scallions and cilantro and mixed together

025

 whisk together, cumin, lime juice, lime zest, mayo, milk, agave & sour cream

017

022

pour over cabbage and mix, this can be made the night before

029

serve with floured tortilla and top with goat cheese crumbles

037

043

Tailgate Steak Taco

  • Servings: 4
  • Difficulty: easy
  • Print

Marinade

1/4 cup lime juice
1 bunch cilantro
1/4 cup oil
1 tsp. ground cumin
1 jalapeno, seeded if you don’t want it spicy

Place all in food processor and blend, pour all over steak and let marinate in fridge 6 hour to over night.

1 Flat Iron Steak

Grilled to medium rare. that is about 6-7 minutes each side over medium high heat.  Let rest for 10 minutes before slicing, slice against the grain.

Slaw

1/4 cup mayonnaise
1/4 cup sour cream
juice and zest of 2 limes
2 tbsp. milk
1 tsp. agave or honey
1-2 tsp. ground cumin (to your taste)
1/2 cup fresh cilantro, chopped
1 bunch scallions, tops with a little white only
1 jalapeno, minced (keep seeds if you like it spicy)
1 10-16 oz. package angel hair cabbage
salt and pepper to taste

In a large bowl toss cabbage, cilantro, scallions and jalapeno, set aside.

In a small bowl whisk together, mayo, sour cream, cumin, lime juice & zest, milk and agave, pour over cabbage and toss to mix, taste and add salt and pepper to taste.  Refrigerate up to overnight.

Small Flour tortillas
1 container crumbled goat cheese

Serve slaw on tortilla, top with streak slices and goat cheese.  You can have extra cilantro, sliced jalapeno or chiles for people to add.  Enjoy!!

076

with the Roasted Hatch Chilies
072

048

Italian Roasted Shrimp!!

8 Comments

131

This dish is so easy and quick and its great over polenta, pasta or would be great just served as an appetizer with crostini’s.

We have this great “Red Argentine Shrimp” and it is simply delicious, I have cooked with it several times and its always a big hit 🙂

Ingredients

079

in skillet add a little oil and shallots

084

then add garlic & oregano

087

then tomatoes (sorry the picture is blurry)

088

top with the shrimp

095

Mix panko, cheese and parsley together

082


add oil

089


mix again

091

sprinkle over top shrimp and bake

097

you can serve over polenta

116

114

or over pasta

137

130

Italian Roasted Shrimp

  • Difficulty: easy
  • Print

Red Argentine Shrimp (about 4-5 per person)

1 large can diced tomatoes with garlic & onion (about 4 cups)
1 large shallot, chopped
1 tsp. garlic, minced
1 tsp. oregano
1 tsp. agave or honey

3/4 cup panko breadcrumbs
1/2 cup grated fresh Parmesan cheese
2 tbsp. Italian parsley, chopped
3 tbsp. olive oil

In a large skillet add a little oil and shallots over medium heat, cook for 5 minutes, add garlic & oregano, stir to combine and add tomatoes, continue to cook for 2 minutes.  Add salt and pepper to taste.

Pre-heat oven to 450 degrees

Mix in a small bowl panko, cheese and parsley, add oil and thoroughly mix, add salt and pepper to taste.  Place shrimp on top of the tomato mixture and sprinkle breadcrumb mixture over top, and bake for about 10 minutes or until shrimp is done and breadcrumbs are golden brown.

Meanwhile make your pasta or polenta and serve shrimp right over top.

Which ever way you serve it Enjoy!!!

120


Chicken Fettuccine…On the Lighter side!!

8 Comments

Looking for a healthier lighter Chicken Fettuccine?

pasta1 (2)

I used Almond Breeze unsweetened Coconut Milk. Coconut Milk! I know what some of you’re thinking ~ “What! Really it is good?” and before you ask I’ll answer ~ No it does not taste like coconut! 🙂

When you order this dish in a restaurant or search online a Chicken Fettuccine recipe they usually call for heavy cream, butter and lots of cheese!!Let me just say that 1 cup of Cream is like 800 calories vs. the coconut milk which is only 45 calories and if you noticed I did not use any butter either.

Now don’t get me wrong the stuff made with all the cream, butter and cheese is great, but maybe not so healthy for us, go give this a try I promise you like it 🙂

For the entire month of September, three of our Remke Market locations will have all of these items on sale.  So stop by our Hyde Park, Skytop or Highland area stores in Ohio.  Most of all the other locations may only have some of these one sale. Everyone loves a Great Sale!!

Oh and if you visiting my blog for the first time, please look to right side of this page and see where it says follow me via email, enter your email address in the box and click the “Follow Chef Amy” link to follow me, then every time I post a new recipe or talk about great products or places I might have been, you get an email about the new post.  Once you have added your email address, make sure to go to your email and confirm the link to ensure you will get my posts!!

Ingredients

photo 1

put pasta on

photo 4

photo 1 (5)

in skillet add oil and shallots (or onions)

photo 1 (2)

cook until translucent

photo 5

finely chop your rosemary (my rosemary looks dark because I freeze it, when I buy herbs for recipes if I don’t use them all up, I will just put the container right in the freezer then whenever I need to something for a recipe I am cooking I have some.  I only use the herbs from the freezer when I use them in a cooking recipe not if I need it for fresh recipe like salads or on top of a dish)

photo 3

I grate my garlic cloves always it is just so easy, so add garlic and rosemary to skillet

photo 3 (3)

using cornstarch will help thicken the sauce (I forgot to add it to my picture above) 🙂

photo 4 (3)

add mixture to skillet and whisk often until it comes to a bubble and thickens

photo 5 (3)

once it bubble and thickens add cheese and whisk

photo 1 (3)

photo 4 (2)

drain pasta (you might want to do this and have ready before you add your cheese to the sauce)

photo 1 (4)

add the sauce to pasta and toss to coat the pasta, pour pasta out onto a big platter or bowl, top with your chicken

photo 2 (4)

you can garnish with fresh chopped Italian parsley and some shredded or grated Parmesan cheese

photo 2 (3)

and done

pasta5

Lighter Chicken Fettuccine

  • Difficulty: easy
  • Print

1 lb. pasta, cooked & drained
1 – 2 large shallots (1/2 cup)
3/4 cup fresh Grated Parmesan
2 1/2 cups Almond Breeze unsweetened Almond Milk or unsweetened Coconut Milk
4 tsp. cornstarch
1 tsp. fresh rosemary, minced
4 garlic cloves, minced
2 tsp. olive oil
2-3 cooked chicken breasts,  or grilled chicken thighs sliced
2 tbsp. Italian parsley, chopped
salt and pepper to taste

Cook pasta as directed, meanwhile in a large skillet over medium heat add oil and shallots, cook until onions are translucent; add garlic and rosemary and continue to cook for 1 minute more.

Whisk milk and cornstarch together then add to skillet, whisk mixture until it starts to bubble, once bubbling and begins to thicken whisk in 1/2 cup cheese.

Drain pasta, add pasta to the skillet and toss with the sauce until well coated, plate pasta, add chicken on top and garnish with parsley and extra cheese.

pasta3 (2)

pasta4

Enjoy!!!  Thank you for coming!!! Chef Amy